Thread Size Help With Starrett 196a Back Plunge Accessory

I am not quite sure what you are asking.

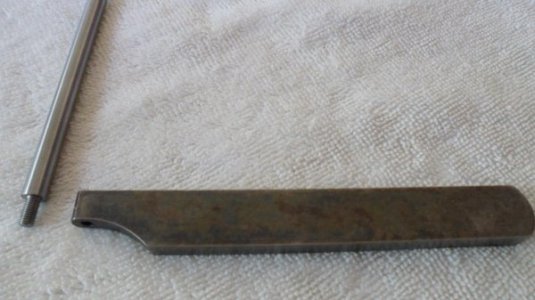
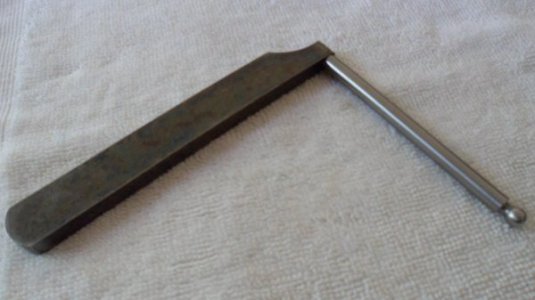
I measured the thread shown, and verified it screws into the bar shown.

32 tpi, 0.178" over the threads.

IMG_3742_zpsec7ujbgm.jpg

I always wondered what that bar is for. Is it supposed to fit into a lantern tool post? Come to think of it, that would be handy.
THANKS, omni, that is exactly the information I wanted! My best guess was .174 O.D. and 32 TPI, based solely on the idea that machine screw sizing is based on .013" increments per size, and that seemed to be about what a nonexistent 9-32 thread would measure. Your measurement is of the real deal, so I will use it. Nice photo, by the way. Tells the whole story without words. I will get busy and make one. Thanks again!

Yes, the bar is intended to go in a lantern tool post. Mine has quite a few marks on it from being tightened down by one. Mine also does not have the extra hole in the side of the bar, just the vertical one.
 
If it's of any help, I have one set that both 4" and 6" post is 10-32 thread and the other set is different. One post the 4" is 12-28 and the 6" post is 10-32. The 4" post can only be used with the 3/8" x 3/4" tool post bar. The 6" post can only be used with the c-clamp. I've made a couple of extra post to fill out one of other kits I have.

EDIT: I forgot to mention, the threads are slightly undersized. I believe that was done to compensate for the shrinkage of the internal threads from heat treat on the c-clamp frame and tool post bar.
Ken, the male thread needs to be about .178" O.D. and 32 TPI to be the right one, with a ball on the other end, and I think it is about 4-1/2" OAL. I have some 5/16" O-1 drill rod, and threading that small thread close up to the shoulder would be a good challenge. I have a form tool that with an little modification could rough out the ball.
 
Is there a purpose for the ball on the end of that rod or is it just decorative ? The rods in the newer sets don't have the ball.

Ted
 
As far as I know, the ball is just decorative, but then so is the color case hardening on the bar. Classy looks along with "best" quality tools is what has always separated Starrett from the rest of the pack. Sadly, it is going away, becoming just a another commodity. Starrett will not be able to hold on to their lead without producing tools that have class. In fact, they seem to have been losing ground for at least several decades already.

There could be some type of swivel clamp that fits that ball, but I have not seen one.
 
Ken, the male thread needs to be about .178" O.D. and 32 TPI to be the right one, with a ball on the other end, and I think it is about 4-1/2" OAL. I have some 5/16" O-1 drill rod, and threading that small thread close up to the shoulder would be a good challenge. I have a form tool that with an little modification could rough out the ball.

The ones I have measure .181 and .182" x 32 TPI. Yeah, it is about .010" under for 10-32 but I bet you they tap them 10-32 and you get that much shrinkage from the carburizing process they used to use. Of course, Starrett used lots of special threads, too. As for threading up to the shoulder, there is a slight counter bore at the start of the thread on the C-clamp and tool post bar. The one's I made, I was able to get up very close to the shoulder when threading.
 
Thanks, Ken. Yes, I saw the relief inside the bar. I would like to turn it using a tool on the far side of the work and thread out from the shoulder. I will probably harden it after making it, so I will make the corner from shoulder to thread with a slight radius.
 
The ones I have measure .181 and .182" x 32 TPI. Yeah, it is about .010" under for 10-32 but I bet you they tap them 10-32 and you get that much shrinkage from the carburizing process they used to use. Of course, Starrett used lots of special threads, too. As for threading up to the shoulder, there is a slight counter bore at the start of the thread on the C-clamp and tool post bar. The one's I made, I was able to get up very close to the shoulder when threading.
Thanks for your measurements, Ken. Your numbers are a little higher than omni_dilletante measured, so perhaps I should shoot for around .180" or so. I would like to get pretty close if I am going to harden it, but definitely not too big.
 
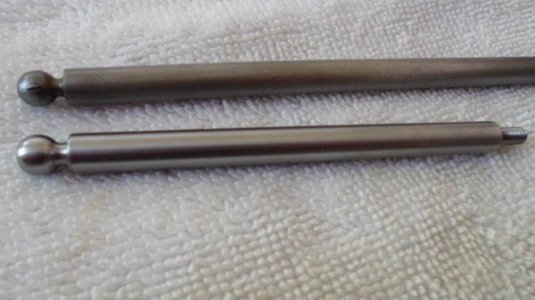
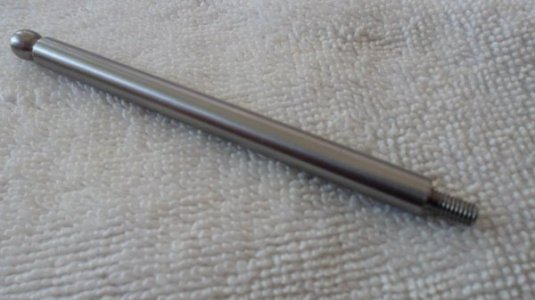
Here are some pics of the rod I made, the longer rod is off one of my surface gages, used as a pattern to make the ball:
SAM_1436.JPG SAM_1437.JPG SAM_1438.JPG SAM_1439.JPG
The project came out fine, and on the first try! The 32 TPI threads would not enter at .184" diameter, but it felt like they wanted to, so I lightly filed the thread crests to .182" and tried again without cutting the threads deeper. Nice fit. The threads were cut using a boring bar type HSS hand ground threading tool, with the cutter on the far side of the work, spindle running backwards, kept the half nuts engaged, jogged the carriage back close for the next cut and then turned the chuck by hand the last few revolutions up tight to the shoulder to start the next pass. 460 RPM. The ball was made almost entirely with hand files on the lathe. I think it turned out OK. Thanks to all for the helpful ideas and suggestions.

Edit: I thought about adding the tommy bar cross hole down by the threads for tightening the rod on to the bar, but this set did not have that feature when new, so I left it off. I can always add it later if I think I need it...
 
Back
Top