- Joined
- Jan 23, 2012
- Messages
- 1,216
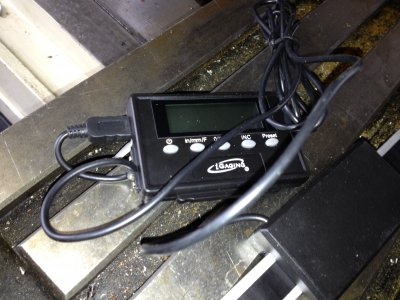
I bought a 30 inch long, DRO, mag strip with the remote readout on ebay. . .. you know, the one for $59 delivered. I figured that i'd put that much in beer in just a few weeks so if it would work, great, if not, a great learning experience. <o ></o
></o >
>
it showed up about 5 days after ordered, un-harmed and very well packaged.<o ></o
></o >
>
the mounting hardware is just about the same as came with the glass scales I installed on my bridgy. . . pretty dang universal, so i expected i’d be manufacturing whatever i needed for my application and i carried on. <o ></o
></o >
>
Kind of knowing what i was in for, i pulled out the small drills and taps and allen screw assortment and started in, drilling two holes in each end of the table,, about where figured the scale should mount. Of course my measurments were not quite right so it ended up not quite where i wanted it, but this was a custom mount so i felt i would be re-doing stuff as i went along.<o ></o
></o >
>
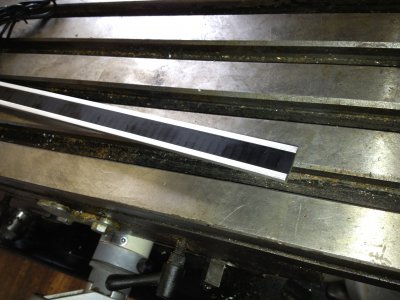
The scale or whatever its called is about ¼, maybe 3/8 inch below the top of the mill table and it was a little too long. I sawed it off with a cutoff wheel. Perfect.<o ></o
></o >
>
Put it on and start measuring for the slider mount that needs to fix solid to the lower part of the table.<o ></o
></o >
>
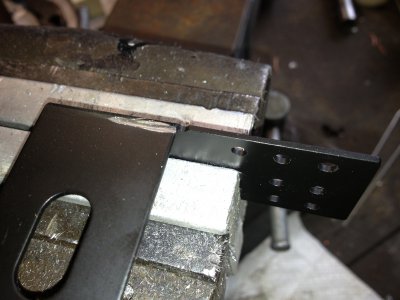
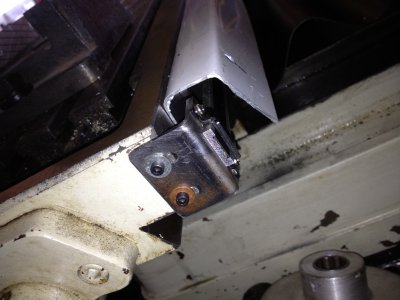
Ok, this should not be a problem. There are already two holes for the bolts that hold the skirt that covers the “y” axis ways. If i can make a bracket to use those holes, and still be at the right spacing at the back of the slider, that would be super. Well after some minor engineering and modification of the bracket that came with the unit, i had it. Great. Now take it all apart and next was to make the guard that covers the scale and slider and all to protect it from swarf and stuff. <o ></o
></o >
>
The guard needed to be the first part installed when im all done fitting everything else.<o ></o
></o >
>
Finding proper material is always the biggest part of a project. Im here in a place thats 30 miles from any kind of metal suppliers so i have salvaged and saved a bunch of “junk” as my wife calls it, over the years. I found two option. Sheet aluminum from and old sign that was about ½ as long as i needed but i could make two and just butt them together, or, the back galvanized sheetmetal from a kitchen range that i saved but was in the scrap heap. I’ll make both into guards and choose which one when they are done. <o ></o
></o >
>
So i cut those to size with the plazma, used the box and pan brake and bent them into a un-equal legged channel about 1” between the legs. <o ></o
></o >
>
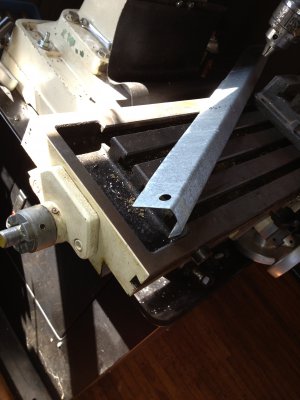
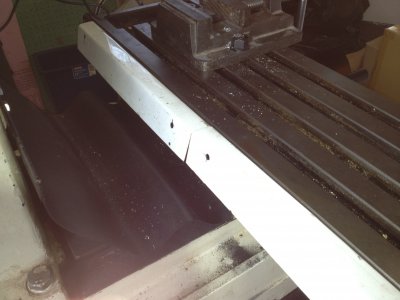
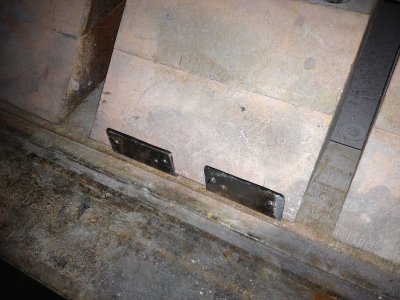
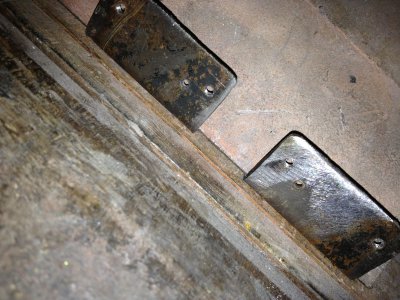
First, i did the aluminum one. I figured out that if i used two 6-32 allen screws in each of the short legs about 1” from each end, i could punch the holes for the screws first, then locate and punch a larger set of holes in the opposite or outer flange so i could get a allen wrench to the mounting holes. After the punching i marked the first hole in the back of the mill table, drilled and tappd and installed the first fastener. The first half of the guard mounted on one end and i could easily locate, drill and tap the second hole and continue with the other half of the guard and see how it came out. The top of the guard is still below the top of the table and the guard is the highest piece going on. <o ></o
></o >
>
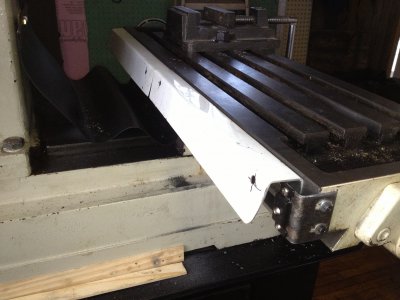
Ok, im done with the guard and its mounted, now lets install the magnetic strip under the guard and see how.................................. crap, now its too close and the screws and slider try to occupy the same space. I dicked around with the brackets a bit and put flat head machine screws in the guard in places where needed and now thats fine but, the end brackets are at the end of their slot and i need to space the magnetic strip out just a bit more. <o ></o
></o >
>
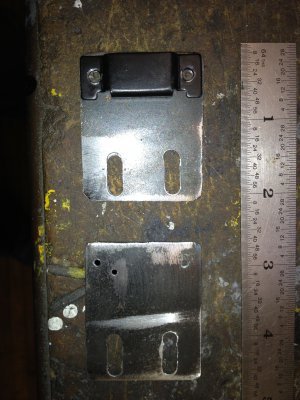
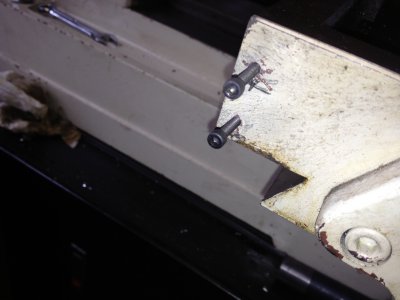
Well, make new end brackets, drill and tap the holes to take the chineeze screws and they won’t fit. Aarrggg. Maybe they are number 6 or no 5 screws. I don’;t know, heck with it, i drilled a hole thru the magnet strip and rammed in a little self tapping metal screw. Problem solved. <o ></o
></o >
>
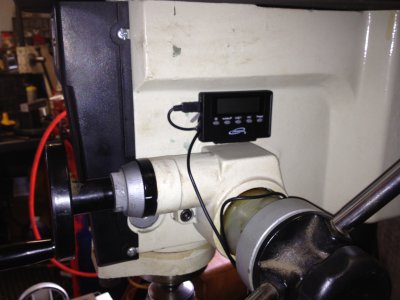
New longer slotted brackets fixed the interference. Whew. Mounted everything, even the orig. plastic skirt that covers the ways. I have lost maybe a bit over 1-1/4 inch of “y” travel. DONE. I should be able to live with that. These little DRO’s dont perform any fancy mathamatics, they just tell you where you are. I believe they are a great bang for your buck. . . .so to speak<o ></o
></o >
>
It seems to be fine, works smoothly, and i was so impressed i contacted the import company and signed up to be a distributor for their products. . . .which i will offer here. <o ></o
></o >
>
i have nearly 20 pictures of some of the progress if anyone is interested, plus i have a galvanized metal guard for anyone that wants it, to do the same conversion. Its 30 inches long and will fit in a mailing tube im certain. Just pay the postage. <o ></o
></o >
>
After i get my papers for the dealership i will be ordering the “y” and “z” sticks too. Its a very easy and reasonable priced DRO for the small Chinese mills.<o ></o
></o >
>
Whew, i need a beer. . . .<o ></o
></o >
>
it showed up about 5 days after ordered, un-harmed and very well packaged.<o
the mounting hardware is just about the same as came with the glass scales I installed on my bridgy. . . pretty dang universal, so i expected i’d be manufacturing whatever i needed for my application and i carried on. <o
Kind of knowing what i was in for, i pulled out the small drills and taps and allen screw assortment and started in, drilling two holes in each end of the table,, about where figured the scale should mount. Of course my measurments were not quite right so it ended up not quite where i wanted it, but this was a custom mount so i felt i would be re-doing stuff as i went along.<o
The scale or whatever its called is about ¼, maybe 3/8 inch below the top of the mill table and it was a little too long. I sawed it off with a cutoff wheel. Perfect.<o
Put it on and start measuring for the slider mount that needs to fix solid to the lower part of the table.<o
Ok, this should not be a problem. There are already two holes for the bolts that hold the skirt that covers the “y” axis ways. If i can make a bracket to use those holes, and still be at the right spacing at the back of the slider, that would be super. Well after some minor engineering and modification of the bracket that came with the unit, i had it. Great. Now take it all apart and next was to make the guard that covers the scale and slider and all to protect it from swarf and stuff. <o
The guard needed to be the first part installed when im all done fitting everything else.<o
Finding proper material is always the biggest part of a project. Im here in a place thats 30 miles from any kind of metal suppliers so i have salvaged and saved a bunch of “junk” as my wife calls it, over the years. I found two option. Sheet aluminum from and old sign that was about ½ as long as i needed but i could make two and just butt them together, or, the back galvanized sheetmetal from a kitchen range that i saved but was in the scrap heap. I’ll make both into guards and choose which one when they are done. <o
So i cut those to size with the plazma, used the box and pan brake and bent them into a un-equal legged channel about 1” between the legs. <o
First, i did the aluminum one. I figured out that if i used two 6-32 allen screws in each of the short legs about 1” from each end, i could punch the holes for the screws first, then locate and punch a larger set of holes in the opposite or outer flange so i could get a allen wrench to the mounting holes. After the punching i marked the first hole in the back of the mill table, drilled and tappd and installed the first fastener. The first half of the guard mounted on one end and i could easily locate, drill and tap the second hole and continue with the other half of the guard and see how it came out. The top of the guard is still below the top of the table and the guard is the highest piece going on. <o
Ok, im done with the guard and its mounted, now lets install the magnetic strip under the guard and see how.................................. crap, now its too close and the screws and slider try to occupy the same space. I dicked around with the brackets a bit and put flat head machine screws in the guard in places where needed and now thats fine but, the end brackets are at the end of their slot and i need to space the magnetic strip out just a bit more. <o
Well, make new end brackets, drill and tap the holes to take the chineeze screws and they won’t fit. Aarrggg. Maybe they are number 6 or no 5 screws. I don’;t know, heck with it, i drilled a hole thru the magnet strip and rammed in a little self tapping metal screw. Problem solved. <o
New longer slotted brackets fixed the interference. Whew. Mounted everything, even the orig. plastic skirt that covers the ways. I have lost maybe a bit over 1-1/4 inch of “y” travel. DONE. I should be able to live with that. These little DRO’s dont perform any fancy mathamatics, they just tell you where you are. I believe they are a great bang for your buck. . . .so to speak<o
It seems to be fine, works smoothly, and i was so impressed i contacted the import company and signed up to be a distributor for their products. . . .which i will offer here. <o
i have nearly 20 pictures of some of the progress if anyone is interested, plus i have a galvanized metal guard for anyone that wants it, to do the same conversion. Its 30 inches long and will fit in a mailing tube im certain. Just pay the postage. <o
After i get my papers for the dealership i will be ordering the “y” and “z” sticks too. Its a very easy and reasonable priced DRO for the small Chinese mills.<o
Whew, i need a beer. . . .<o


