Redlineman's Logan 200 Rescue

Next little project;

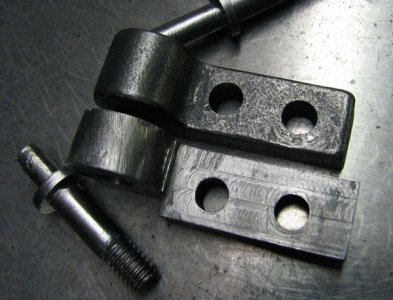
I should be looking ahead and getting all of my reassembly projects lined up so that everything that needs fixing is all done when it is time to put it on. Well... I haven't been doing that, so every step has its surprises and delays as a result. The next little project will be the drive box cover brackets. Those of you who remember the wreckage inside the headstock will not be surprised by this either. One of the brackets was obviously broken at some point, and someone made an attempt at making a new one.
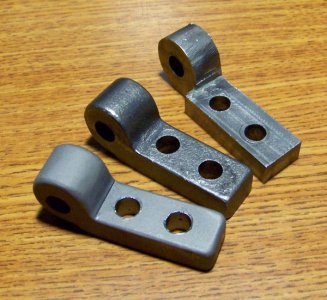
LoganDriveboxCoverHinges1.jpg

Some broken items on this poor thing have been quite well repaired over the years, and some not so much. These cover hinges LA-384 are yet another example of the not so much. You can see that the replacement version was a bit of a loose interpretation of the original. Among all the obvious faults, you can clearly see that with the pivot pin holes lined up, the mounting bolt holes clearly do not. I would imagine that it is kind of hard to get the cover lined up nicely if the brackets are not the same. I initially thought about welding up some of the holes and re-drilling them, but that doesn't do anything for the odd narrow pivot head on the homey made one. I guess in the end I might as well just make a new one of my own instead of settling for someone else's inadequacies. Another chance to make something is not a bad thing to me.
LoganGuardDoorLatch.jpg

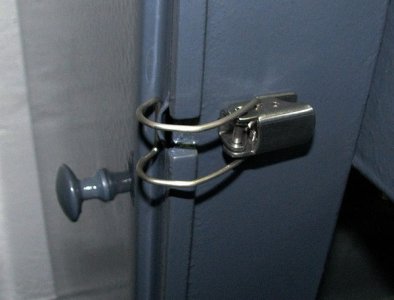
This worked out well, I think. I'm trying not to deviate too far from what was original, but the latches these came with were wholly inadequate, evidenced by the fact that so few of them exist. I think this constitutes a reasonable upgrade!
 
Good idea on that latch.
It should hold real snug, and looks good too.
 
Little Victories;

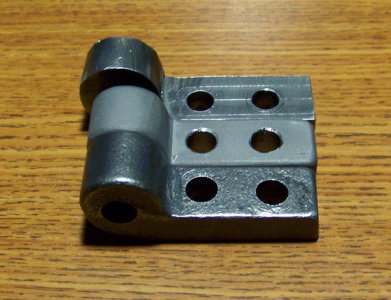
I don't really know what whoever made the last replacement hinge was thinking, or what their skill level was when they made their version of the original. I'm hoping that when I fit my version of it, I don't find it was an answer to some other silly problem that was created by the carnage visited upon this poor machine. Whatever, my version is done, ready for painting. I'm thinking it is just a bit more satisfying than the odd creation that preceded it. The oddity is on top, original in between, and mine at bottom. Hopefully... you could figure that on your own.

LoganDriveboxCoverHinges2.jpg

LoganDriveboxCoverHinges3.jpg

This second photo really shows how goofy the original replacement was. Now... if I hadn't twisted the shank off of the new rubber bumper I tried to install in the cover, I'd be able to mount the lid!!! :angry:
 
Last edited:
Hey;

Not so much a bump, really. Well, perhaps, sort of. I have not done much of anything through the warm months. Just too flingin busy. An interesting post script on the drive box cover hinges. I had a helluva time getting that lid lined up. it is possible that the funky home made hinge WAS indeed an answer to this specific problem. Hard to say. I had to take the bracket I made back off and open up the mount holes a bit for more adjustment range. Many hours of fiddling were spent trying to get the door to fit and close evenly. In the end, all you can do is try to reach the best compromise that you can. I know that full well from years of doing such things in all manner of different venues. It is most helpful to have that experience, and most amusing to watch neophytes struggle with the illusion of perfection.

I've done a few little things since, but the biggie looming on the horizon is the apron. That is going to require some time & concentration, and even perhaps some different parts, I fear. I don't really have the time, but mostly I'm just not feeling it right now. The mojo will return, however.
 
My, My, Hey, Hey - welcome back, and thanks for keeping the re-build alive !

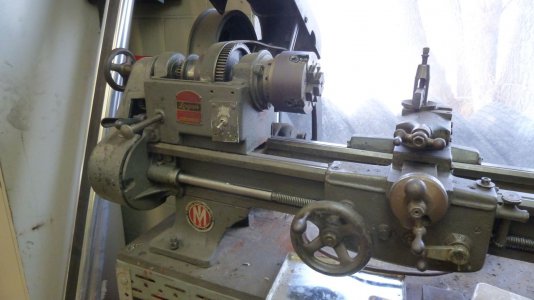
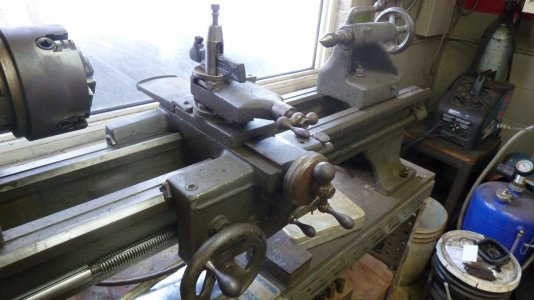
I just wanted to chime in and thank you for the good documented work performed thus far and to offer my words of encouragement to keep it going as your batteries recharge and that mojo wanders back. To help remind you just how far you've come I'll post a coupla pix of my Logan 200 that awaits my own mojo...I have other projects ahead of it but it will have it's day in the sun and I'm counting on your thread figuring to be a prominent part of that re-build.

You can see that I start with a little better base unit than you did initially, but I still face my own issues to overcome. You've got yours to a very nice state, however, despite the ugly duckling beginnings and that will serve as a good impetus for me to be positive when I decide the day has come. I look forward to your final push and you deservedly spiking that ball in the end zone.

Logan lathe head end.jpg Logan lathe tail.jpg
 
This would be a Start;


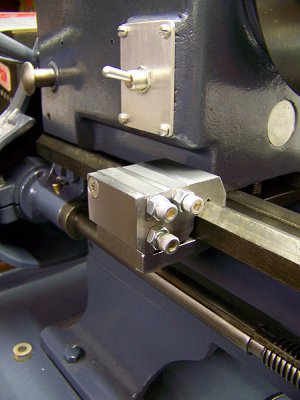
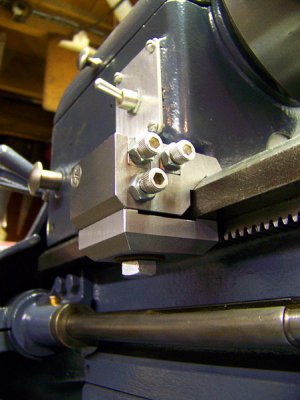
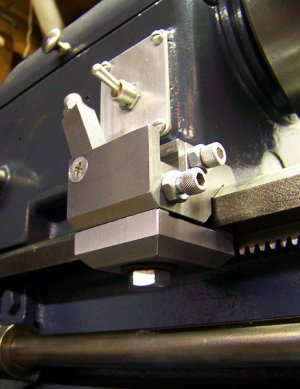
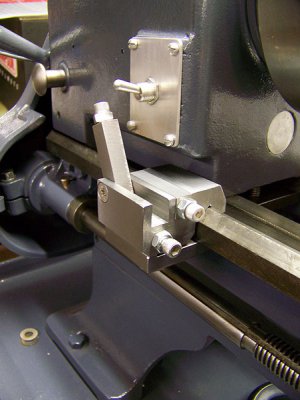
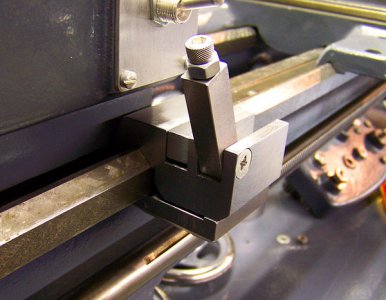
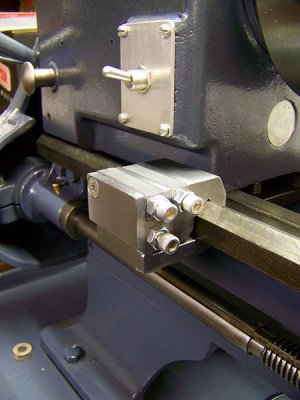
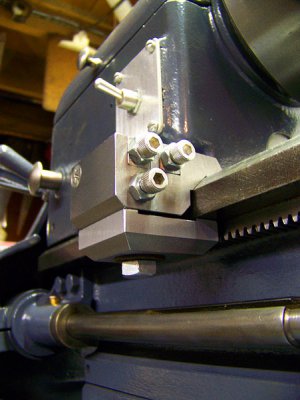
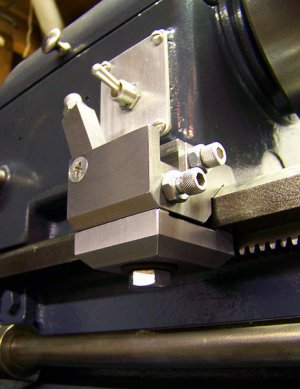
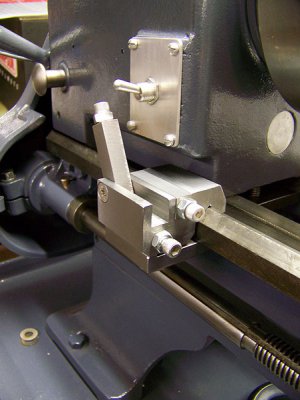
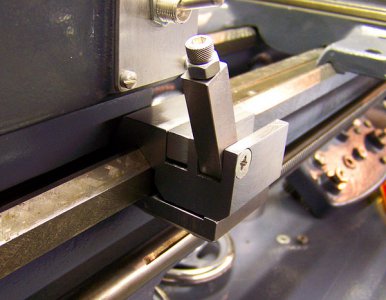
As in Fits &. I am working up to getting back to this project after a very busy summer. I have indeed gotten involved in something sort of off the topic, but for this lathe. There has been a lot of internet chatter elsewhere about larger dials for Logan crossfeeds lately. The ever polarizing Tubalcain has gotten a lot of attention for his efforts at same recently. Like him or not, the guy does have some chops, is pretty creative, and nothing if not utterly prolific! No, I have not been doing dials, but one of his Logans that he was using for the dial project had a nifty triple adjustable manual carriage stop that got no small amount of attention. I was inspired!


LoganCarriageStop3.jpg


LoganCarriageStop4.jpg


LoganCarriageStop5.jpg


LoganCarriageStop6.jpg


LoganCarriageStop7.jpg


This may not seem like a big deal to many looking on here, but this represents a fairly involved process for the doofus machinist. I was working from nothing but seeing the pictures on the internet, and having the lathe to take measurements from. Over the last few weeks I have toiled and come up with a very satisfactory piece, if I do say so. I'm quite pleased, and hope to actually make use of it some day in the not too distant future!

LoganCarriageStop3.jpg

LoganCarriageStop4.jpg

LoganCarriageStop5.jpg

LoganCarriageStop6.jpg

LoganCarriageStop7.jpg
 
I like it. A stop is on my list as well ... probably make it on my shaper, just because. I sure wish you would get the apron on that lathe! Then you can lead the charge on the bigger dial race.:))
 
Yeh....

I know. Enthusiasm is building. This stop project really got my juices flowing. It was a lot of fun, the most involved machining process I have ever done, and I am quite pleased with the results. I leaned a ton and didn't even break any tools! Well... there was this one 90* .50" end mill that lost its point. Damn. Learned that this is not the way to mill a V. I can only speculate that chip/swarf evacuation is not good down at the point, and it overheated and snapped off. I estimated that this would be a better way than to use the fairly non-rigid angle vice and a regular square end mill. Guess I was wrong. The end mill did a very nice job of cleaning up the mess. Live & Learn.

My apron? First, a personal rant. I ask questions on some of these forums, and no one ever seems to answer them. Yet, I see variously lost, misguided, clueless, inane banter for pages and pages about stuff that could be considered patently obvious. I ask about a skilled topic, and The Minds blather on over nothing instead. Well... this forum is indeed friendlier than SOME OF THOSE OTHERS. Less elitist attitude, perhaps, or smugness, or whatever. It's not necessarily overt "over there", but it exists, and Logans are looked on largely as a higher class Atlas, which are utterly SHUNNED. I've speculated that my obvious abilities to create in some areas make people think that I don't need any help. WRONG! I need help with things I don't know about, just like anyone else. I'm no more or less interested in blundering through and screwing up a million times than the next guy, so when I ask a question, it is sincere. I know a lot of things, and have talent, but I don't know everything. So... CAN I GET SOME ANSWERS????!!!!! RANT Off.

So, the main issue with my apron is the crossfeed idler gears. They have one spot where they hang up pretty consistently. The bevel gear is the original, and the idler is a very nice used replacement. Those who have followed my build will not be surprised that my lathe HAD no idler gear at all, likely having been pummeled into oblivion by numerous crashes. You might also not be surprised that the rack gear of the pair is a bit worn. I hoped it would not be too bad to work, and it does mostly, but there is that one spot...

Perhaps I should just go buy a new rack gear, but that is not usually my first thought. My question had been, and continues to be, what is the process for working out these confrontations between teeth, and massaging them into a synergistic existence?
 
Sometimes none of us have the answers.

Also, often one gets more responses by proposing something very specific and asking for criticism.
 
Back
Top