• Welcome back Guest! Did you know you can mentor other members here at H-M? If not, please check out our Relaunch of Hobby Machinist Mentoring Program!

  • In order for the Member Map to work properly, you must allow Google services AND Hobby Machinist to know your location. These settings are found in your browser of choice and in your Hobby Machinist profile.

Winner Pm Research Engine #7

Status
Not open for further replies.
A quick note: I realize I am putting in a lot of detail in the text. For those who want to skip this detail, I am now including captions on the photos. The captions are in a different font to help distinguish them from the main text.

Next up is the flywheel. This one was pretty simple, though my explanation below may not be.
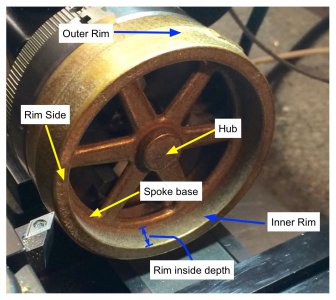
Flywheel casting.jpg

The raw casting. It is bronze.

Because I don't know flywheel terms, nor can I find them on the web, I am going to use the terms as indicated below. Hopefully that will help things remain somewhat clearer than mud.
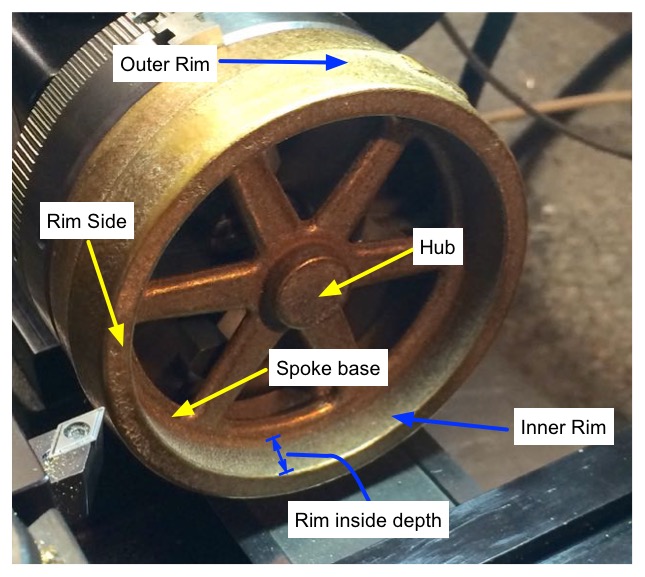
Flywheel terms small.jpg

What I call the parts of the flywheel

I started by chucking it in the three jaw chuck from one side. I spent quite a bit of time getting it set up so the hub rotated close to the center by trying different angular positions until I was satisfied.
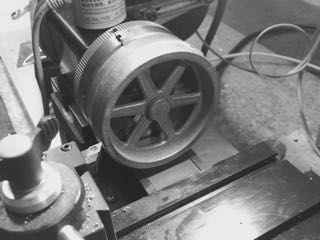
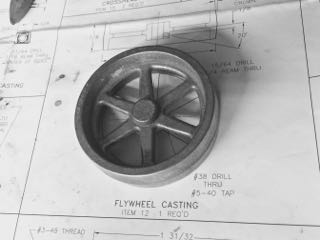
Flywheel in the 3 jaw chuck.jpg

The flywheel freshly chucked up in the lathe

Since there is a casting draft on all surfaces, I did not feel this was the most secure arrangement. Therefore, I took some very light cuts on the inner rim at a slow speed and feed until that surface was clean.
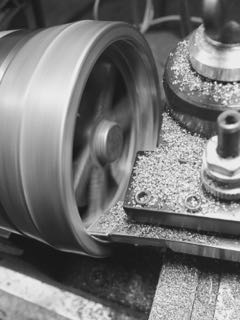
Cleaning up the inside rim.jpg

Making very careful cuts on the inner rim to create a better clamping surface for the chuck.

I then flipped the wheel over and re-chucked on the newly cleaned up side. I then cleaned up the inner rim, the rim side, and the sides and face of the hub. I cleaned up the the outside rim of the wheel using the Sherline compound set at whatever angle was called for (I think 5°). I made sure to cut deeply enough to go over the centerline, and and then I carefully noted the final depth of cut. This way by cutting to the same depth on the other side I could be reasonably sure to have apex of the wheel centered side to side.
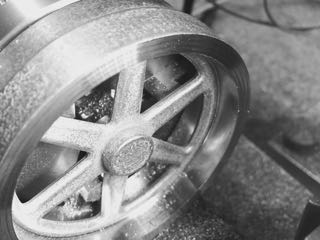
Both sides of inner wheel cleaned up.jpg

Cleaning up the surfaces of the flywheel rim
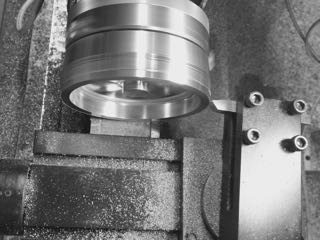

Tapering surface of wheel with compound.jpg

Cutting the outer rim taper using the Sherline compound. This compound mounts on the back of the cross slide and the tool is mounted upside down.

The hub center drilled, drilled and reamed to 1/4".
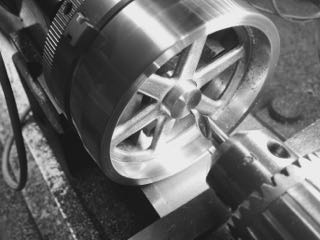
Center drilling hub.jpg

Center drilling the hub.

I then finished facing the rim side until that was nice and clean with a nice clean meeting line to the outer rim. I recorded the distance from the spoke base to the edge of the rim (the rim inside depth).

The wheel was then flipped again, the rim side faced to create a rim inside depth that matched the other side. The outer rim on this side was cleaned up using the compound as previously described.

Then it was over to the mill to drill the hole for the hub grub screw. I mounted the three jaw chuck, with the flywheel still in it, to my angle plate. I used the crankshaft to center the flywheel hub hole under the spindle. Using the long center drill, I spotted the hole, and then drilled it out and tapped it. Pretty slick, really.
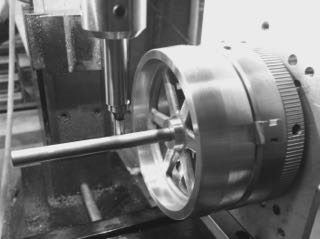
Finding centeral axis of flywheel.jpg

Indicating the spindle on the center of the crankshaft to find the center of hub.
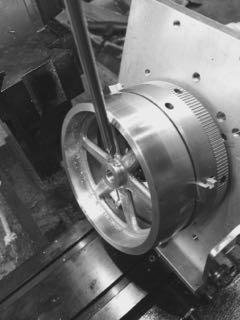
Center drilling flywheel hub.jpg

Center drilling the hub for the grub screw hole. This was followed by drilling and 5-40 tapping.

Progress so far:
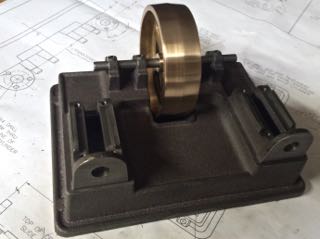
Build so far.jpg
Flywheel terms.jpg
 
Last edited:
Doggone it, Tom. Why'd you have to go and show us this? I've already taken a look at the PMR web site. That looks like a great project to take on.

Seriously, thanks for sharing. I'll be watching your progress. Might just have to join you. Your detailed tips will make it easier for any who give it a try.
 
I may have to take you up on coming to see you unless I can get the extended col for my 5400, Found I need it even to do the holes for the piston rod and end cap, I guess I could do it on a drill press or something, but that would not ensure they are correct. Also had to stop and working on my laptop as it cratered on me. (using wife's now) so my fun budget just got cleaned out.
I also see that you have the angle plate for your mill, Nice. I bet that helped to get the set screw done on the flywheel.
Also did you use HSS or a carbide on taper, as it looked like you were using the carbide on the rest of it, it looks clean and bright finish
 
Ken,

I sent you message with my phone number. Just send me text if you have a hankering to head to Austin.

I forgot about the holes for mounting the cylinder. Yes, you will need the extended column for those, or a very short bit. Someplace I saw someone use a three jaw lathe chuck to hold drill bits because it gave him more head room.

I used HSS in the compound, as it can only hold 1/4" bits. I used carbide for the rest of it.

Cheers,

Tom
 
I have a set of 1/4 inch carbides that I use that way I can switch back and forth as needed. I do not have a quick change toolpost setup yet. Still using the originals. Getting tools as I can. Thus mostly sticking with 1/4 inch all around.
 
Doggone it, Tom. Why'd you have to go and show us this? I've already taken a look at the PMR web site. That looks like a great project to take on.

Seriously, thanks for sharing. I'll be watching your progress. Might just have to join you. Your detailed tips will make it easier for any who give it a try.

Hawkeye,

Thanks for watching the progress. The PMR model castings really seems to be good. They are also interesting engine designs. And, for me, they have several models that can be done on small machines.

Cheers,

Tom
 
Do they happen to make a kit for it to make a reversing linkage? That could be a fun after-project.
 
Hawkeye, I have not seen one on their site but have seen general ones on other sites that is like the kit that one guy used for a governor it was from some place else, But that would prob be fun trying to make that kit work with this kit, say governor, reverse, and a boiler pump, all hooked up with drip oilers, and a nice boiler and water tank. Then you could put on show, Oh, though of another item that auto cylinder oiler, That way we do not have to worry about killing the cylinder. I may have to start looking for additions to mine, but first I have to finish the basic engine. but yo u gave me some good ideas for mine. thanks
 
Hawkeye, as far as I know, no. They do make kits for boilers, which might be my next project. I always like to build things that might go boom.

The next casting I thought I would tackle was the connecting rods. So, instead I did the heads.
The first step with the heads was to remove the remains of the sprue. I did this with my 1" belt sander followed by a bit of filing. As an aside, one of my favorite tools has become by Grizzly combo 4" disc, 1" belt sander. It is a Chinese thing, sold under a bunch of different brands. It is cheaply made and cheaply sold. But man, is it handy!

Filing to remove the sprue.jpg

Filing the head flattish after removing the sprue using the 1" belt sander.

I then decided to proceed with the inboard heads. First I chucked it up using the "stuffing box", or gland seal, or whatever you want to call it, protrusion as the hold point. I did my best to get the flat face to run true-ish. Holding the head this way was a little precarious, what with the casting draft on the stuffing box. Thus, it was again light cuts to make a clean flat surface.

1 Inoard head in chuck.jpg

An inboard head in the 3 jaw chuck.

2 inboard head flattened.jpg

Taking very light cuts to get a clean, flat surface on the inside of the inboard head.

The head was then taken out and re-chucked, with the newly flattened surface resting on parallels. This is really easy to do in a small lathe like the Sherline because it is so easy to remove the chuck and put it on a bench. I then put the chuck back on the lathe and proceeded to fling the parallels at high speed across the shop. Just kidding, but that is what will happen if you don't remove the parallels before you start the lathe!

3.2_ reverse mounting inboard head .jpg

Using the newly created flat side, the head was mounted in a 3 jaw chuck using parallels to indicate in the part.

4 head ready for lathe.jpg

The head in the chuck, without the parallels. Did I mention that it is important to remove the parallels before spinning up the chuck?


Once the head was securely in place, I proceeded with machining the outer face and stuffing box, including drilling through the stuffing box 1/8" (for the piston rod), then drilling and tapping for 1/4-28 threads 1/4" deep of the gland nut. I used both a plug and bottoming tap to get the threads as deep as possible.

Out side of inboard head machined to size.jpg

The stuffing box and outer face of the inboard head machined to size

Tapping the stuffing box.jpg

Tapping the stuffing box for the gland nut. Here I am using a 1/4" bottoming tap.


The head was again reversed in the chuck. To ensure that the head was running true, I used a bump indicating trick. I do not have a little ball bearing tool to do this, but I have found that the ass end of a brazed carbide tool, with a little lube on it, works great for this. I double checked the alignment with a DTI, declaring success if the face runout was less than or equal to a thou. This is an important step, as that face really needs to be perpendicular to the piston rod hole. Otherwise the rod could bind.

Bump aligning inboard head.jpg

"Bump" indicating the inner face of the outboard head to make sure it is running perpendicular to the lathe ways.

The face and edge of the head were then machined. The face was machined to the final thickness of the mating surface plus the height of the cylinder pilot. The cylinder pilot was then machined by additional facing cuts to the diameter of said pilot.

Inboard head step.jpg

Facing the inboard heads inner surface to create the cylinder pilot. The pilot is only 1/32" high, and the diameter is critical, so this is fiddly work.

The entire process was then repeated with the second inboard head.

The outboard heads don't have a nice little stuffing box boss to hold onto. To remedy this situation I CA glued (super glue) a bit of 3/8" diameter brass to the outside of the head. It turns out a 3/8" dia piece of round stock just fits into the depression on the outside of the outboard heads.

Super glue for the boss.jpg

Using CA glue to attach a bit of 3/8" brass rod to the outboard head. I removed the boss later by using a butane torch to heat it to about 400°F.

The head was then mounted in the 3 jaw chuck using parallels, with my glued on boss sticking out to be machined. The parallels were removed and the boss was then turned until it ran true. The head was then flipped and held by the boss in the 3 jaw chuck for final machining. like the inboard head, the pilot was machined in once the head was taken to a thickness of the flange plus the pilot.

Turning the boss.jpg

Turning the brass rod "boss" to run normal to the inner face of the casting.

Machining outboard head.jpg

Turning and facing the outboard head castings edge and inner surface.

Machining outboard head pilot.jpg

The cylinder pilot successfully machined on an outboard head.

Once the lathe work was done, I removed the chuck from the lathe, with the head still in it, and mounted it to my mill. I then used a coaxial indicator to align the center of the head and spindle. The four mounting hole locations are on a 3/4" bolt circle, and were easy to locate using the DRO. These holes were center drilled and then clearance drilled 9/64" for the 5-40 head screws.

Center drilling outboard head.jpg

Center drilling the head bolt clearance holes.

twist drilling outboard head.jpg

Drilling the clearance holes 9/64".


After doing the second outboard head, I now had 4 heads. I hear this is better.

The heads.jpg

Can anybody spot the step I just might have forgotten?

Until next time:
Progress with inboard heads.jpg

My blogging buddies:
IMG_1159.jpg
 
Last edited:
OK, so about those connecting rods. They are little bronze castings. They don't appear to have a straight surface on them, the thickness from the big end to the small changes, and there is much that is round about them. But, Dean of Idaho managed to machine them is a few simple steps. How hard can it be?

First off, I should admit that these connecting rods are the same as on the PMR #3 engine, which I previously "built." Second, I ended up making a custom, "light weight" rod out of aluminum bar stock when I completely screwed up the casting for that engine. By completely screwed up, I mean made a hash of, destroyed, made useless, or other synonym for doing what I should not have done.

But this time, it was going to be different. I had Dean's build!

Nope, I hosed both rods, at the same time, trying to be efficient. Just so the reader knows, super glue (cyanoacrylate glue or CA) is great, but it is not a wonder drug. Unless inhaled. Then it is wonderful at killing you.

I have ordered four new connecting rod castings from PMR. Maybe I will be able to update this log with how you actually might machine these little bastards. And, if any of you all (or y'all) have some tips, please let me and readers know what they might be.

So, I ended up making both rods from brass bar stock. Because this is not part of the kit, I am going to largely gloss over the details and show some nice pictures.

1_Casting for connecting tod.jpg

The raw casting

2_Connecting rod trickery.jpg

The raw casting adhered to a bit of aluminum. The shim is to get the things level with the mill table. This failed.

3_Starting over.jpg

A bit of brass bar stock being milled to square. It is slightly wider than two connecting rods worth of material.


4_cutting the blanks.jpg

The two "blanks" for the connecting rods being split from the single squared chunk of bar stock.

5_the blanks.jpg
g
The two roughed blanks for the connecting rods.

6_center drilling the big end.jpg

I stacked the connecting rod blanks in the vise edge on and milled them square to each other. I could then put them into the vise as you can see above and drill both blanks at the same time for the big and small end holes.

7_twist drilling the big end.jpg

The big end hole being drilled.

8_Reaming the big end.jpg

The big end hole being reamed. The small end hole was just drilled, not reamed, per the directions on the plan.

9 _blanks finished.jpg

The connecting rod blanks with some holes.

10 Jig for connecting rod.jpg

I created a jig to hold the connecting rod blanks on my rotary table. Both blanks were mounted to this jig at the same time (stacked).

11 Small end machining.jpg

Using the rotary table to make the small end.

12 Side plunge machining.jpg

Using the rotary table to make some plunge milling to rough in the angled side from the small to the big end. This was followed by by a continuous with the same end mill to final size.

13 Basic shape of connecting rods.jpg

The connecting rods so far. These are both 1/32" too large on the small end.

14 Machining final width.jpg

Milling the relief to get the small end (and most of the rod) to 1/8". Shims and parallels and cursing were used to make this possible.

15 Finished Connecting rods.jpg

The finished m******ing connecting rods are done. They are not as originally intended, and they are not pretty, but they should work. I hate these f***ing things.

Please pardon my French.

Cheers,

Tom

P.S. I will add to this log how I succeeded in machining these little freaking connecting rod ****s when and if I actually succeed in machining these little effing ************ers. Not that I'm bitter.
 
Status
Not open for further replies.
Back
Top