2015 POTD Thread Archive

my 5 in the morning project...tail light round plug to hook us a rear light for my bike..

just a simple round bored out for a bolt to the light..and a side screw to hold it on the rack.

it had a plastic plug to hook it too, but the light would have bounced its way out eventually

IMG_7312.JPG
 
Your wrong in thinking that a bicycle chain will work better than a timing belt, what do you think cnc machines use? The only thing better about the chain is price, on my cnc conversion the 2 pulleys and belt per axis is about $60, I know your just making a powerfeed but using chain may induce alot of backlash, which in turn could create drive train shock, wear out your screw or nut prematurely.
Www.sdp-sti.com I think that's the website for stock drive products
I do believe however, that as long as your mindful of chain tension, and don't make sudden rapid direction changes you should have years of trouble free service from Your chain drive setup, stock drive has alot of parts available for power transmission, including but not limited to chain drive, I think even polychain. Check em out, they have a cool centerline designer app

I will add that I use the Gates GT2 tooth profile, 5mm pitch 15mm wide belt, the other advantage of timing belt is they are low profile compared to a chain sprocket
 
Last edited:
Your wrong in thinking that a bicycle chain will work better than a timing belt, what do you think cnc machines use? The only thing better about the chain is price, on my cnc conversion the 2 pulleys and belt per axis is about $60, I know your just making a powerfeed but using chain may induce alot of backlash, which in turn could create drive train shock, wear out your screw or nut prematurely.
Www.sdp-sti.com I think that's the website for stock drive products
I do believe however, that as long as your mindful of chain tension, and don't make sudden rapid direction changes you should have years of trouble free service from Your chain drive setup, stock drive has alot of parts available for power transmission, including but not limited to chain drive, I think even polychain. Check em out, they have a cool centerline designer app

I will add that I use the Gates GT2 tooth profile, 5mm pitch 15mm wide belt, the other advantage of timing belt is they are low profile compared to a chain sprocket

I agree that timing belts are boss for smooth backlash-free power transmission. I have, however, used 25 pitch thru 40 pitch chain drives on specialized glass working machines using idlers to eliminate backlash with smooth rotation. I have also used SDP for decades. They're a great source.
 
Some good and some bad. The good was I pulled the trigger on a new Kurt D688 vise for my mill. I pulled it out of the box this morning and removed my old vise in prep to mount the new and tram it in. When I turned the new vise over to clean the bottom I see several deep scratches on the bottom I could feel with my finger nail. I was so bummed. I thought to just stone them off but came to my senses, why pay for a new vise that has issues out of the box. It will go back to the store on Monday for a replacement. I'll bet that it was a customer return, hard to believe that it came from Kurt like that. All of the scratches are in the same direction like they were caused by sliding the vise along the table where a burr was. My old D60 looks way better on the bottom than the new Kurt.
 
I"m now considering timing belts, I've seen them work in heavy duty situations, heard them strip when a cutter stalled, too. I've sent for data, awaiting (probably till Tuesday) information, but what the heck, I've got nothing but time.
 
The GT2 profile is said to handle like 20-30% more power than the previous HTD belt from gates, my friend has a Prototrak K4 5hp machine, it uses the old HTD, GT2 has less backlash too, in the book for prototrak it makes mention that the motors are 280oz torque, it said something like double what is actually needed, also uses a 2.75:1 ratio, I chose 3:1 ratio cause my servos are faster than the prototrak motors, end up with almost 12lb-ft max on the screw lol overkill. I could've gone with 1:1 and been fine but I didn't want the servo to run the screw at 5000rpm by accident, plus the resolution is waaaaaaay better, like .0000067 per step, 120,000 steps per inch not exact number on the decimal I don't remember what it is off hand but it's close to that
 
Last edited:
Today and a fair part of yesterday, with great effort and not inconsiderable expense, I accomplished nothing.

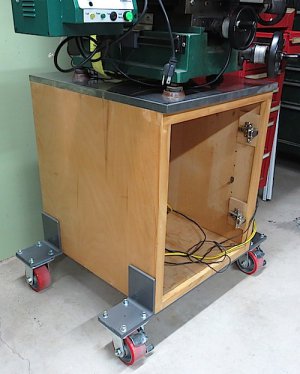
The idea was to replace the wheels under my mill, with hopes of reducing how much it wiggles.
I figured if I used better wheels with locking swivel wheels, and spaced them wider it might not wiggle and it might be a little easier to steer when moving it.
The old wheels were from harbor freight and were attached under the cabinet.

But, I didn't improve anything, and I didn't know that until I was finished,
which required purchasing and cutting a bunch of steel,
wearing out a bandsaw blade,
hunting all over town for a replacement,
cutting and deburring and cleaning a bunch of expensive steel,
and drilling 20 high precision holes,
then painting and assembling.

Did I mention hoisting the mill off the stand and replacing it?

I don't know how to fix it without throwing more money at it. There is no good place to mount adjusting feet. I suppose I just have to spring for two more of the leveling casters I used on my lathe stand. I'm disappointed in the locking swivel casters I got. They are almost impossible to maneuver.

This is the basic design of the wheel trollys. A bar of 4 x 1/4 steel with 5 x 5 x 5/16 angles to beef it up. The wheel bolts hold it together.
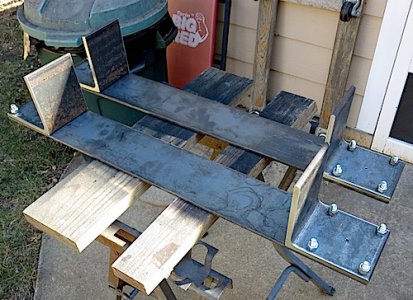
IMG_0728.JPG

Assembled, this is how it looks.

IMG_0729.JPG

The holes had to be precision drilled.
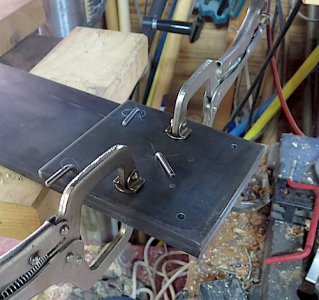
I Made a pattern and guide plate with 5/32 guide holes and a center locator hole on the mill,
and then cut and bent some locating pins.
I located the holes on the template by clamping a caster on it and using a transfer punch.
The rest of the drilling was on the drill press.
The guide was clamped to the angles and the flat stock. Center hole drilled first, locked in with a pin, then two back side holes, also locked in. Then the front holes.
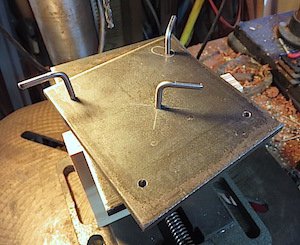
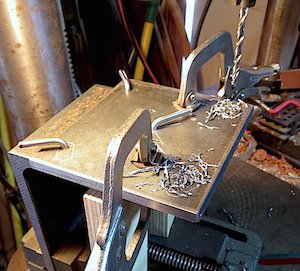
IMG_0723.JPG IMG_0725.JPG

Once the 5/32 holes were located, I discarded the template and finished them out with a pilot point 3/8 drill. The pilot point was a good tight fit in the locator holes, so the drilling to final size went pretty fast.

I'm pleased with the precision of the holes. Everything lined up and the bolts slipped in easily. No small feat on 16 mating bolt holes on a drill press.
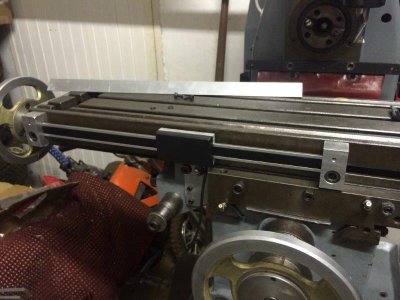
IMG_0727.JPG
 
Last edited:
Back
Top