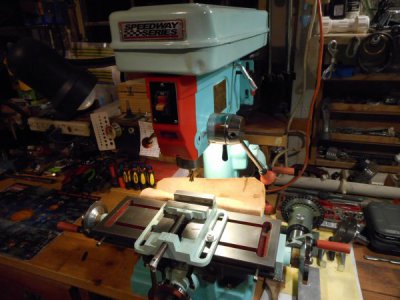
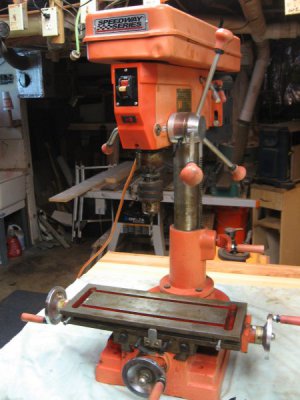
My First Mill Could Use Some Help Identifying Rf 31?

got the table back on, had to wait on new oil cups. the ones from grizzly were different size then the current ones.

20160110_173110.jpg
 
I feel bad to mention this now you have the table back together, on my slighhtly smaller round coloum mill theirs one position you can put the table in to make all the oil holes line up so you can oil both sets of ways at the same time, it's not marked on mine it's on the todo list next tome it gets striped down.

Looks very nice, good job by the way.

Stuart
 
Put some feet on the base today, used 3/8 bar stock and welded them to the legs, drilled and tapped them.

Next step to make mounts for the base,

20160113_181223.jpg
 
Welded in 3/8"x2" bar stock for a solid mounting instead of the previous wood base/top.

Drilled and tapped the holes 1/2x13

And rattle canned it.

IMG-1452988516292-V.jpg 20160116_192744.jpg 20160116_203148.jpg
 
Hows is it coming along?

I have a smaller version of that mill. Mine still had the packing grease on it but had sit in a garage for many years almost unused.

It is a good little mill for small stuff and has actually handled some heavy cuts. I'm still looking for a larger mill at the right fix it up price.

DSCN0104.JPG
Mill 7-3-15 022.JPG
 
0efa2aea64cce3b6979d22d7b4b27c1d.jpg

Heres the current status i picked up a 6inch vise for it. And a 1948 craftsman 6" lathe project. And a 2 post lift im refurbing (rebuilt the hydraulic cylinders today). So machine tool progress is slow right now.

Sent from my SAMSUNG-SM-G900A using Tapatalk

0efa2aea64cce3b6979d22d7b4b27c1d.jpg

0efa2aea64cce3b6979d22d7b4b27c1d.jpg

0efa2aea64cce3b6979d22d7b4b27c1d.jpg

0efa2aea64cce3b6979d22d7b4b27c1d.jpg

0efa2aea64cce3b6979d22d7b4b27c1d.jpg
 
Those three ball bearings probably go between the gibs and the lock screws.
As the gibs are at a 60deg angle the screw can tighten down on the ball bearing without serious galling against the gib.

Edit: Meant to ask if you've blue checked the ways and gibs.
Some machines can benefit a lot with a bit of scraping.
 
Last edited:
Those three ball bearings probably go between the gibs and the lock screws.
As the gibs are at a 60deg angle the screw can tighten down on the ball bearing without serious galling against the gib.

Edit: Meant to ask if you've blue checked the ways and gibs.
Some machines can benefit a lot with a bit of scraping.
Dont know about blue checking, i inspected the ways and knocked off any sharp edges, n cleaned them nicely thats it. Added oil n reassembled

Sent from my SAMSUNG-SM-G900A using Tapatalk
 
That looks exactly like my Enco 105-1117; must have got on a different conveyor at the factory. Two points from posts I have read on the website. Using grease on leadscrews or elsewhere collects fine chips and dust increasing the wear rate. Not sure where it is but another machinist posted about making U joints on the snubbing bolts under the table for the "Y" direction. He added extension shafts held up by a bracket on the main frame and knobs on the end of the extensions. The net result is that he doesn't get his hands and wrists covered with way oil when securing the table. This project is high on my things to do list.

On the Enco mill/drill the speed-pulley chart is on the folding pulley guard at a somewhat inconvenient spot, my solution was to make charts on a spread sheet, laminate them in plastic and put one in the tool box , the other under a magnet on the front of the machine. Using the screws that hold the plastic front cover (depth of cut chart) I fashioned a "rube Goldberg" bracket for a digital read out for the "Z" axis. It works fairly good but the battery doesn't like cold weather.

Have a good day and welcome to the site.
Ray
 
Back
Top