Expanding Mandrels Tips And Tricks?

Staurt, the big problem right now is machining the inside surfaces of the journal bosses to the dimension indicated here:
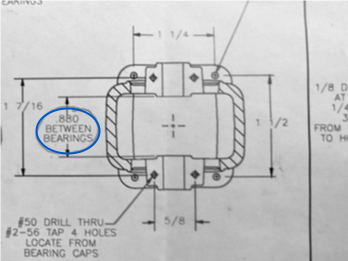
Boss Highlight.png

My main problem is getting a set up that allows me to find the center, have the base square to the table, and be very secure.

I am sure this is not that difficult, but I am having a hard time figuring out what the hell to do.

Cheers,

Tom
 
Staurt, the big problem right now is machining the inside surfaces of the journal bosses to the dimension indicated here:

View attachment 122109

My main problem is getting a set up that allows me to find the center, have the base square to the table, and be very secure.

I am sure this is not that difficult, but I am having a hard time figuring out what the hell to do.

Cheers,

Tom

You could drill and tap a hole in each side approximately centered and use buttons to get it dead on for position.

I'm talking about the bearing hole by the way , sorry about that I see the piston clearance space is what your talking about.

I recently had to line bore a part to get concentricity and that was a bit of a faff to get it secure enough.

Stuart
 
This is how I would do it. Using an angle plate clamp your set up shown in Post #9 to the plate. Adjust the horizontal plane and clamp it tight. Using an edge finder locate off the edge of the 1-5/16 diameter and move the Y axis to establish centerline.
again using the edge finder locate off the end of your part to establish a reference in the X axis. Move the X axis 4" and you will be centered on the crankshaft centerline. With this setup you will be able to bore for the crankshaft, mill the outer crankshaft boss face, and the cap mounting surface. Flip your angle plate over, reset your X and Y axis centerline references and do the same to the other crankshaft boss.

Milling the inside crankshaft boss is a bit trickier. I'd make a fixture plate with a register that fits the 1-5/16" end of your part. Clamp your part to the fixture then clamp this to the table. Clamp a precision rod in the previously machined crankshaft bores and adjust your setup to get the bores square and parallel to the X and Y axis. Remove the precision rod and machine the inner crankshaft boss faces.

I can't tell from your pictures and drawings if you can drill and tap the crankshaft boss from the bottom. If you can then your part is already setup. If not you will need a very long drill and tap guide to drill and tap from the top.

Hope this gives you some ideas on how to approach machining your part.


Tom S.
 
Tom,

Thank you for the ideas. I was trying to through-bore the crank journals, and couldn't do this because the journal caps are not aligned on the inside, so the drill would deflect upon getting to the second journal. Thus I wanted to clean up those inner surfaces first.

I guess I could bore them separately and hope for the best. Or, I could file the inner boss surfaces flat-ish but still oversized and do the through drilling. Hmmm.

Thanks tons for your help.

Tom
 
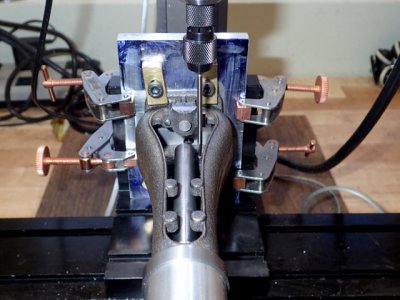
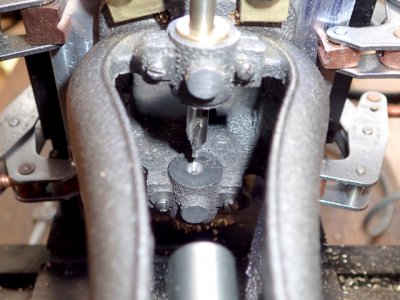
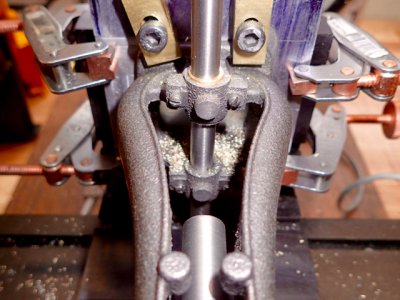
I decided to try the filing thing. I filed off the opposing journal's inner face as flat as I could make it. I then "line bored" using a center drill, drill, then long center drill, then drill, and then reamer to make the 5/16" crankshaft bores. Below are three pictures.

The first shows my general set up. I have the frame mounted to a fixture that has a .030 recesses that positions the piece with the base edges aligned with the mill table. Also present are some cute custom strap clamps. This is then clamped to an aligned 90° angle plate.

P2120072.jpg

The second is showing using the long center drill to spot the far side boss, the last shows a 5/16" drill rod as a temporary crankshaft. It is a tight fit, but it turns.

P2140083 (1).jpg

P2140087.jpg


Thank you all again for your help. I am going to start a new thread called "How would you center this under the spindle." If anyone still has comments on expanding or non-expanding mandrels, please continue here.

Cheers,

Tom,
 
Back
Top