2017 POTD Thread Archive

When gainfully employed I used that method (prick punch and hammer) to remove many broken/damaged screws. I'd forgotten about it, 'cause I don,t break screws any more.....But it is easy. I remember once, the Maintenance department brought into the tool room a large something with a 6" disc screwed into it that they couldn't get out. We used that method, walked it right out. Then we drilled a 1/8 hole in the middle, drove an appropriate sized EasyOut into the hole and sent it back to Maintenance. Never heard how they received that.
 
Looking at that first picture you should have had enough room to get the screw to move a bit then just pick a new point and keep going. I have changed those exact screw that way on a few Harley's when someone strips the hex or the torx.
 
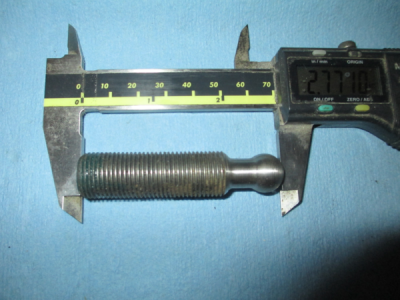
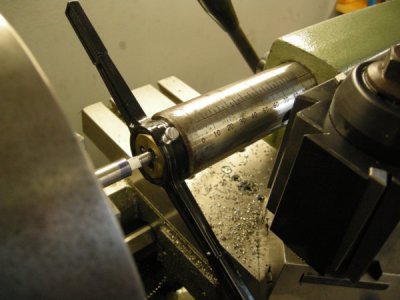
Today I had the first chance to play with my new ball turner http://www.hobby-machinist.com/threads/new-ball-turner.61524/

This is the project that I built it for. This is a part of a new product that my son is developing, 8-18 stainless steel all thread. I'll be able to tell you about that later.

upload_2017-9-3_16-2-27.png

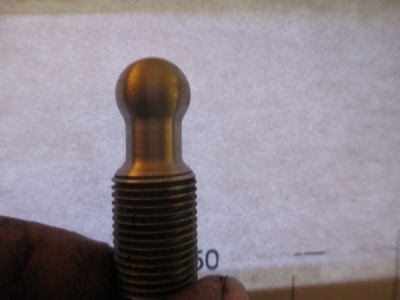
And I was playing around with background lighting. This is a piece of paper held up in front of a web browser window with a lot of white space on my computer screen. Trying to show the profile with good contrast.
upload_2017-9-3_16-8-15.png

I did the ball with the ball turner, but I did the other two radii by hand. An old machinist showed me that trick about 45 years ago. Think he would be about 135 by now if he were still alive. Anyway, just nibble out the area that you want the radius, and then for the final pass keep pressure on the carriage handwheel to keep the tool into the work, and at the same time crank the cross slide out. Once he showed me how to do it, I practiced until I was reasonably competent at it. Just takes a little practice to get a consistent radius.
 
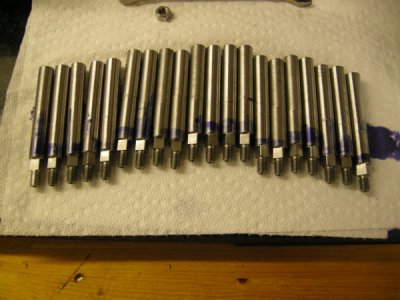
Got a bit further on the spindles last night. M6 thread the ends, undercut, and a lead in chamfer.

The one on the left wasn't done yet:
DSCN9960.JPG

The M6 die went on a bit crooked on the second one, so for the rest I brought the tail stock in to help keep it straight (also helped put pressure on the die to get it started).
DSCN9958.JPG

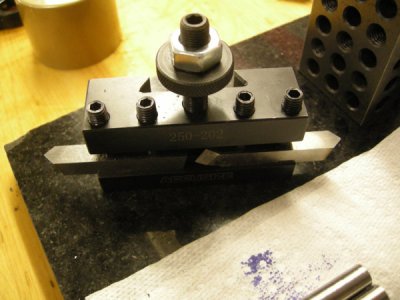
And I finally got a 45* chamfering tool holder set up.
DSCN9961.JPG
 
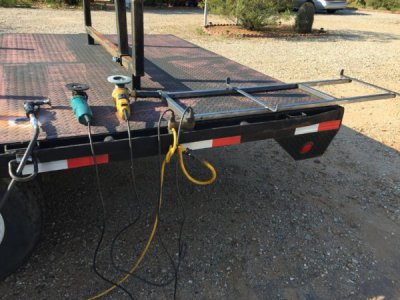
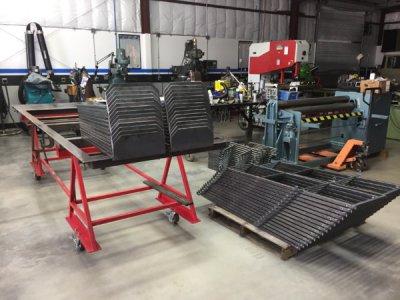
After 10.5 months recovering from shoulder surgery, I'm back to full duty and already have a tour behind me. I have been down to one crate (five units) of rescue carts since January with no signs of buyers, when two days away from a six day break I received a several calls from potential buyers like Grainger, Fastenal and alike. Honolulu airport was looking for bids on eight units to add to their fire/rescue department. This is how I spent my first six day break since returning to full duty. I hitched up the trailer and picked up a little over 1200# of steel. Cutting and prepping components for 28 unit takes time but I was finally welding by 2 pm on Saturday. I would normally wipe and stack the new matirial stock on the rack but decided to work off the trailer since it was close to the saw station and fairly close to the iron worker.

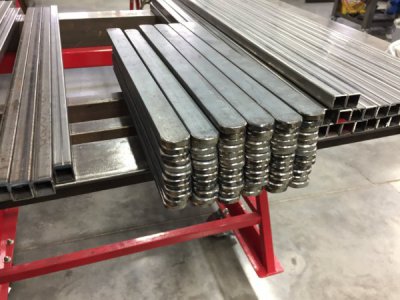
Wednesday POTD was pick up steel wipe and shear all flat bar stock (1/4" x 1", 1/8" x 7") for axel assemblies, cross supports, leg assemblies and toe plates.
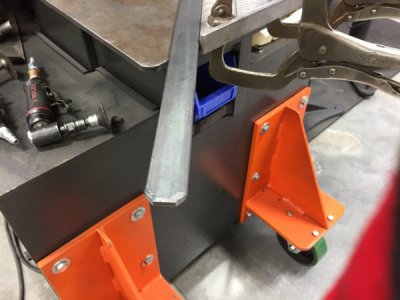
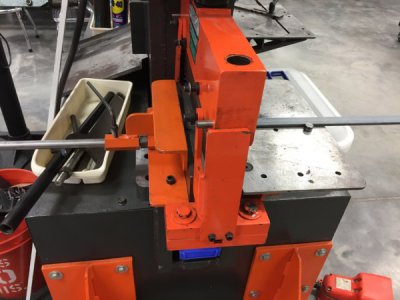
Nibbled the corners (iron worker notcher) on the flat bar to speed up the finishing process for a radius. The machine has stroke limit switches allowing for repeated travel.
IMG_1407.JPG
A quick pass on the finishing machine finishes up the radius and eliminates the shear burr.
IMG_1421.JPG
Setup the break to bend 90º for axels and cross supports. The table and back gauge make for a fast bend for all components. The table uses hardened pins to square up material and can be mover 90º-45º.
IMG_1410.JPG IMG_1420.JPG
Thursday POTD, cut 12 gauge x 1" round tubing (handle bar assemblies), main frame square tubing, 16 gauge x 3/4" round tubing (axel hubs) and 5/8" CR round bar. De-burred everything including the insides of tubing. This operation took most of the day.

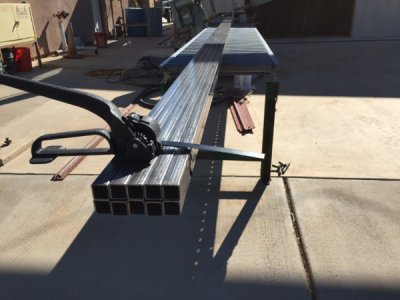
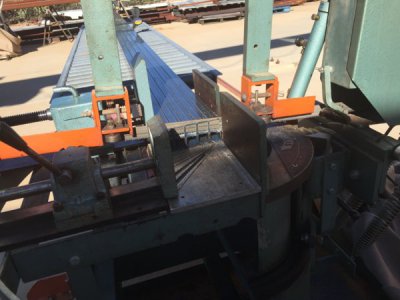
The main frames are 14 gauge 1"x1" and are gang cut in groups of ten. The cut lengths need to be within 1/64" (.015) to fit in the jig for welding. No back gauge is used for this operation and no more than ten at a time. A trick I have used with good success is to band the end hold the gang tight, then trim the opposite end for an even start. The band saw shaves just enough to prevent waste. The input/output rollers allow effortless fine adjustment. Everything must be level and rollers squared to saw. The saw could handle way more but I wouldn't have as much control. Round stock, both solid and tube is cut individually using a back gauge. 3/8" x 1" flat bar and 16 gauge 3/4"x3/4" is also gang cut on saw everything else is sheared on the iron worker using a back gauge and input rollers. Nothing fast about this operations but it will pay off when the time comes to jig up.

This is the opposite end of the cutting operation. The banding tool remains in place until the last cut, then replaced with a quick grip clamp and flipped around for final cut.

IMG_1395.JPG
The first cut shaves the gang even. Notice the quick clamp at 1/2 the distance.
IMG_1397.JPG
Friday POTD was to finish cutting (gang cutting) the toe plate assemblies (16 gauge 3/4" x 3/4" square tubing) then drilling all the holes on for the main frame components and toe plates. The weld seams are always kept facing down so keeping track of the right and left sides are also important during this operation. The 3/4" telescopes into the 1" and requires precise hole location for the "stowed and deployed" position. I use a jigs with drill bushing to accomplish this. The burr left inside must be removed for the push pin to rest flat and work smoothly. I use a ZIT-Burr tool that de-burrs going in and de-burrs coming out in a second operation. Lastly, I hand finished the toe plates using a flap wheel (80 grit) . Another 14 hour day.

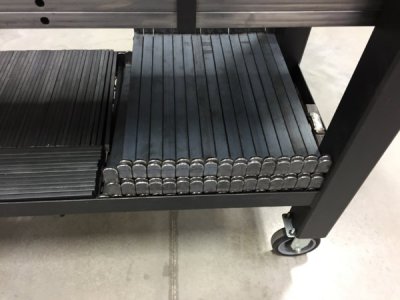
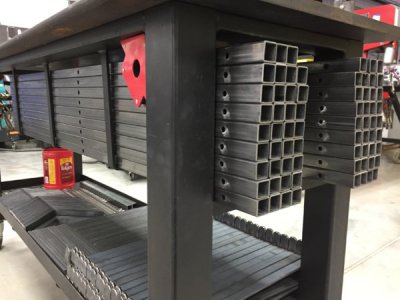
Here you can see the custom jig that holds all the main frame cart components in a organized fashion allowing me to pull each piece already oriented in the correct position for a efficient jig up.
IMG_1424.JPG
I'll have to post up Saturdays,Sundays and todays POTD later. I'm having photo transfer issues and I need to get more work done today as I head back to work tomorrow.
Stayed tuned, thanks for looking.
Turn and Burn!
Paco
 
Continued,
Saturday POTD was breaking the toe plates (1/8"x 7" x 14"). I used a pre WW II manual apron break for this operation. I sheared three 20' lengths and have extra.
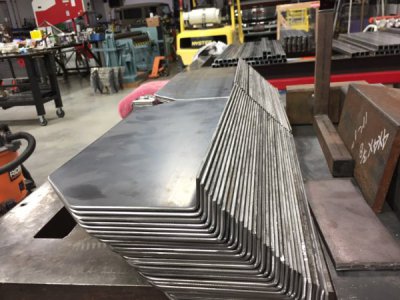
IMG_1423.JPG
Finally started welding after three full days of cutting. Started with the axel assemblies and legs.
The jig is compact and used for main frame, axel, leg and toe plate. It is drilled and tapped at the axel end to accept an add-on axel jig for larger 16" tires for our R/T (rough terrain) model.
The hub is 16 gauge 3/4" round tubing that fits snugly over the 5/8" CR axel, The axel assembly is 1/4" x 1" flat bar. The pulse mig is set at 230 IPM and a hot fast weld is required to weld the two different sized materials. If you dwell too long you'll burn through the lighter tubing.
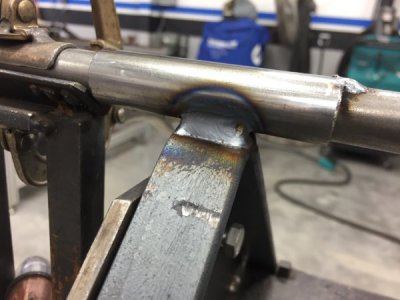
IMG_1416.JPG
A shot of the axel jig.
IMG_1414.JPG
IMG_1418.JPG
After burning though the axels, next up where the legs. The square tubing (14 gauge x 1" x 1") is welded to a 3/8" x 1' flat bar. The mig settings for this was 250 IMP. Same deal, HOT and FAST. Theres a little gap to ensure penetration. The legs where then cleaned up with a 2" roll-loc knocking off and stuck dingle berries. For those who have never used a pulse mig, they are fantastic for leaving a hot clean weld.
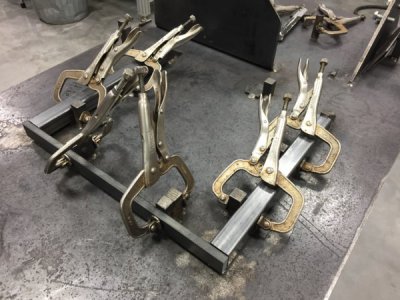
IMG_1417.JPG
IMG_1419.JPG
The last task for Saturday's POTD was to drill the toe plate tubing (16 gauge x 3/4"x 3/4") and de-burr the inside/outside hole. This hole is where the S/S snap push button will live once fully assembled. The button needs to sit flat and free of burrs for a reliable operation. Back in 2003 when I first started these, I used to use a small bremel grind stone and it took for ever. The ZIT-Burr is awesome and fast. I'll try to remember to get a shot of it for those who might need a clean hole in tubing. I run it at 350 RPM and it leaves a clean slightly chamfered (both sides) hole.

Sunday's POTD was to weld the main frames and toe plates. This took about 10 hours with no lunch break.
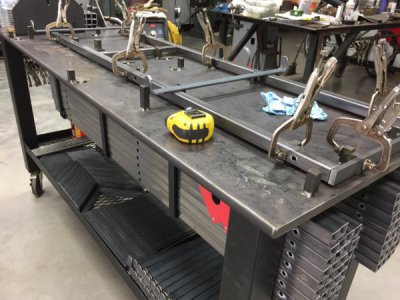
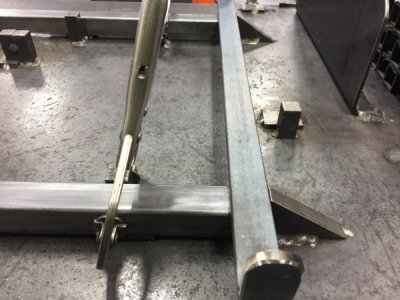
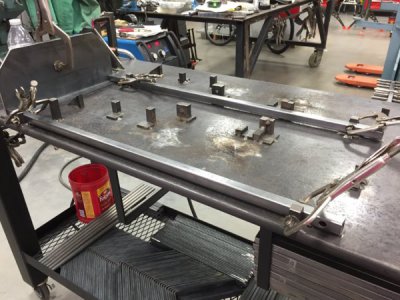
Here's some detailed shots of the jigged frame.
IMG_1429.JPG IMG_1430.JPG IMG_1431.JPG IMG_1432.JPG IMG_1433.JPG
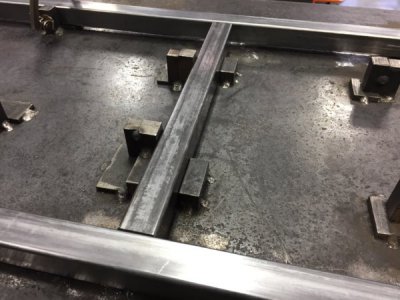
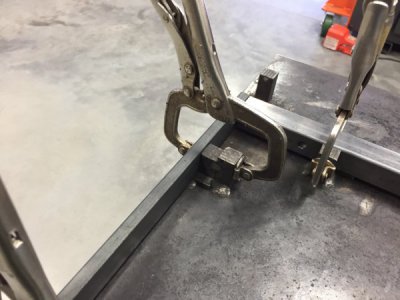
The cool part is of the jig design is the clamp points. You notice some points are thicker (cross bracing and end). This allows for all the clamps to be adjusted the same saving time adjusting for different material thickness. Once the frame is welded the clamps are piled up in the middle awaiting the next frame and BAM! you clamp them up regardless of which clamp you grab. I do stop production after 6-8 frames to vacuum the jig to keep things flat. The frames sit 1/4" off the table allowing complete vertical welds. You can also see the way the stock is stored for fast easy access.
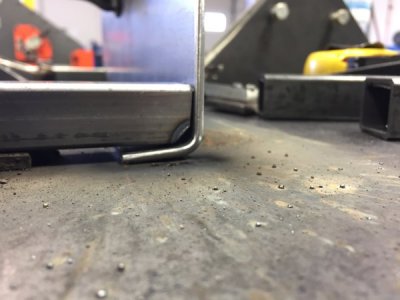
Next up for Sunday's task was welding toe plates. Same jig different area. The 16 gauge is welded to the 1/8" toe plate with a complete weld. The machine was set to 215 IPM.
You can see the heat zone on the backside of the plate. The square tubing was beveled to accommodate the break radius. All seams on tubing facing down (including the main frames).
IMG_1436.JPG
A close up of the joint. A tack weld at the bevel (first) prevents a burn through. Then run fast on the three sides. Unclamp and flip to weld the bottom.
IMG_1440.JPG IMG_1441.JPG
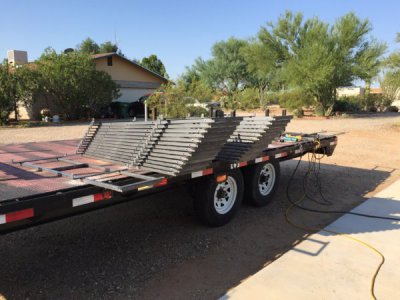
This bring us to today's POTD. Cleaning the main frames for preparation of welding the axel and leg. This is my least favorite task as I use a N-95 mask and grinder all done outside to keep the grit out/off of the machines. It was 99º today and with long sleeves, mask and face shield it was miserable. I did use the trailer for this and the hight was good for my back.
IMG_1438.JPG IMG_1439.JPG
Once done, I stacked them on a pallet and used the forklift to move back inside. The larger shop space is nice for rearranging the tables and locating the stacks of components for the next operation.
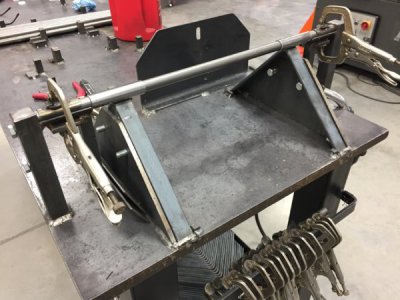
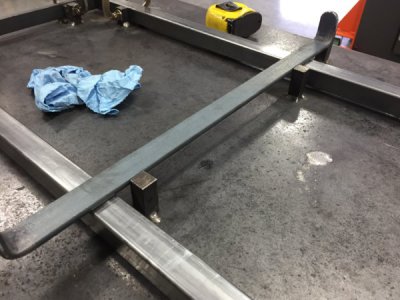
The Axel and legs are welded up using independent jigs. These two jig are by far the ugliest jigs I made, but they work very well.
IMG_1443.JPG
No measuring required. The leg jig indexes to the cross bar and the axel jig indexes to the end.
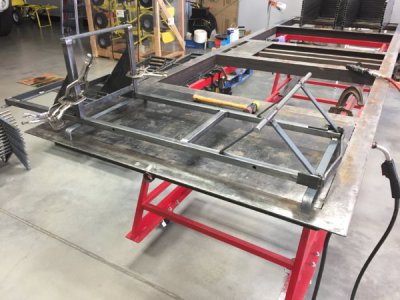
IMG_1444.JPG
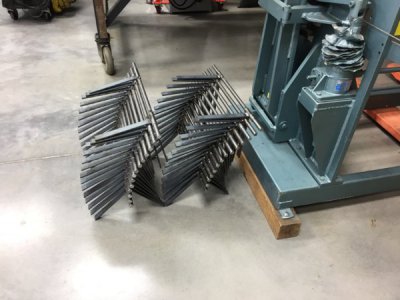
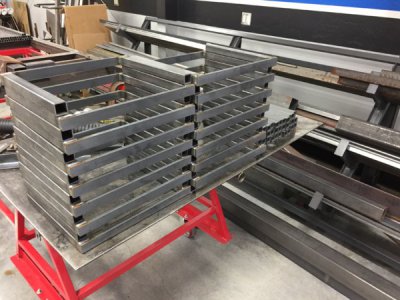
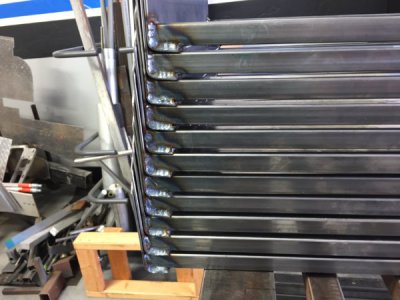
The finished frames stacked on transport fixture to be taken for sand blasting and a powder coated (safety yellow).
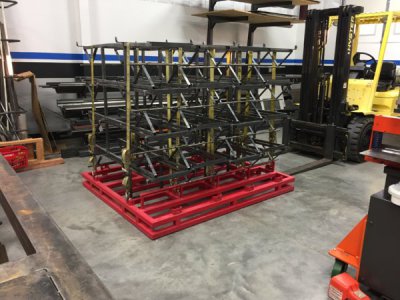
IMG_1445.JPG
12 hours of labor on Labor Day! I'm back on shift tomorrow and will be starting the handle bar assemblies first thing for Wednesday's POTD.
Honolulu request the delivery by October 10th. The powder coaters take up to 10 days and transit time is estimated at 7-10 days, hence the long work hours.
Stay tuned and thanks for looking.
Happy Labor Day!
Turn and burn!
Paco
 
Last edited by a moderator:
So Paco . . . you've performed a "Qualification Test" to verify that the shoulder is truly good as (or better than?) new.

I'm sure that every element of your mfg. process pays off in some marketable characteristic of the product.
Rather than focus on skills, accuracy, consistency, fully de-burred, radiused corners, etc, etc, I keep seeing a great volume of PRIDE.
What I (we?) loved about MADE IN AMERICA in (most of) the 20th Century isn't extinct yet. Just rare as hens teeth. You're an inspiration.

I wonder if you were always so damned squared away? Or did you "learn" it in the FD? You're an inspiration (now I'm repeating myself).
 
Boy Howdy!. That is some hobby.
Honestly, production work for me is boring as hell, but it helps keep my hobby going. I don't pay myself but do invest in retirement and more equipment/tooling in lieu.
You should have seen the operation when I was in my garage hehehe.

So Paco . . . you've performed a "Qualification Test" to verify that the shoulder is truly good as (or better than?) new.

I'm sure that every element of your mfg. process pays off in some marketable characteristic of the product.
Rather than focus on skills, accuracy, consistency, fully de-burred, radiused corners, etc, etc, I keep seeing a great volume of PRIDE.
What I (we?) loved about MADE IN AMERICA in (most of) the 20th Century isn't extinct yet. Just rare as hens teeth. You're an inspiration.

I wonder if you were always so damned squared away? Or did you "learn" it in the FD? You're an inspiration (now I'm repeating myself).

Yes!, the shoulder is as good as it gets at this point and I returned 1.5 months earlier than predicted. I had some very good Physical Therapist to thank for that. The only limitation/pain is when I press overhead with a load, so I don't do that and my weight lifting days are well behind me.
I sleep uninterrupted for a solid 4-5 hours now and feel like a new man.

Since I was a kid, I always put my signature on projects. Not really special, but you hit the nail on the head when you mentioned pride. The last step after assembly and prior to crating, each cart get a sticker of a US flag (made is the USA). When I signed up for the FD, I was 32 and had 10 of prior service behind me. Most folks I work with are squared away but they think I a little anal :cocksure:. Thanks for the nice words.
 
Back
Top