- Joined
- Apr 1, 2015
- Messages
- 76
I ordered a 2 axis DRO from Tpac Tools for the FrankenMill. Tom was quick in getting me the product and in helping get it set up.
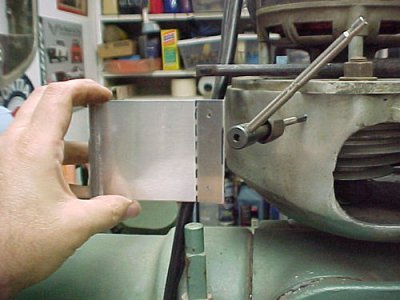
The first order of business was getting the display panel hung on the mill. I bent up a piece of .090 thick aluminum and drilled and tapped some 10-24 holes in the head to attach it.
The back side. It is very sturdy and the display is rock steady.
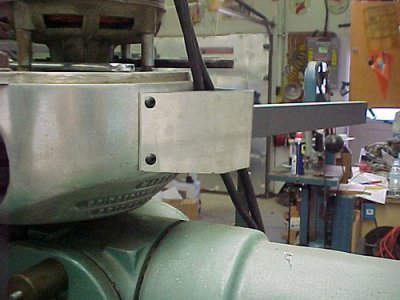
With the display arm atached.
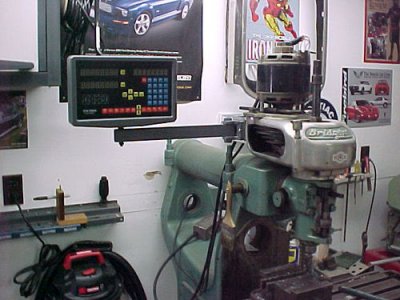
Hanging the X-axis scale.
I drilled and tapped directly into the Y slide for the reader and into the X slide for the scale. There was plenty of adjustment to get the scale leveled up and squared to the reader and slide.
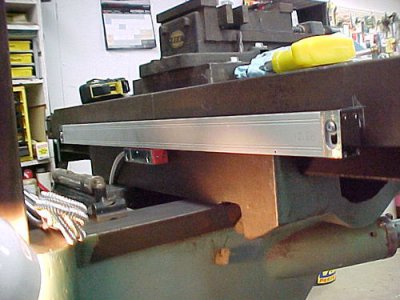
This did shorten up the Y axis travel but there was no other way to mount the scale and keep it out of harms way.
The Y scale took a bit more figuring. I used two of the supplied brackets, modifying one of them to get the positioning I needed.
Drilled and tapped directly into the knee for the right angle bracket. The bar you see sitting on the bracket came with the kit also. I drilled and tapped that on the narrow side for some 10-24's to attach it to the right angle bracket from the bottom.
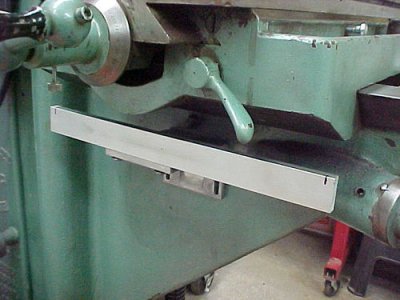
That bar also got drilled and tapped on the ends so the scale would bolt directly to it.
With the scale hard mounted to the knee I had to modify this kit plate to reach the slide on the underside of the scale.
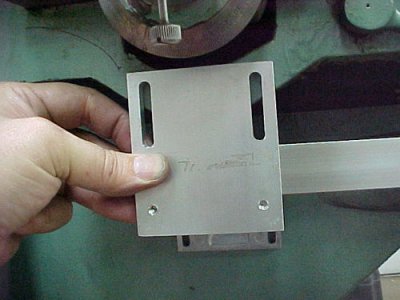
Opening up the slots on the end and drilling and tapping new holes farther down, got me there.
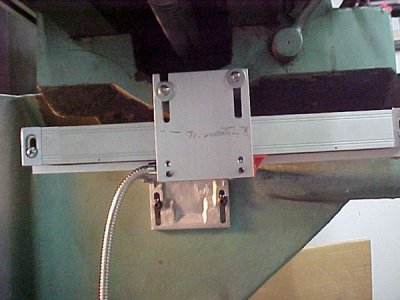
You can see the two screws at the top that attach the slide to the Y cross slide. I drilled and tapped those for some more 10-24's.
I got the chip guards installed today and also calibrated the DRO. I was pretty impressed with old FrankenMill. The difference in the readout from the actual dial travel was 0.521mm's over 20.5 inches. I checked this 4 times and that was the nominal I got.
The Y was out 0.250mm's over 6.63 inches of travel. I checked this 4 times also and took the nominal number for calibration. This should make the FrankenMill much more repeatable. I have a few hole patterns to drill and tap for an adjustable angle plate I am building. I'll let you know how it goes.
Mark
The first order of business was getting the display panel hung on the mill. I bent up a piece of .090 thick aluminum and drilled and tapped some 10-24 holes in the head to attach it.

The back side. It is very sturdy and the display is rock steady.

With the display arm atached.

Hanging the X-axis scale.
I drilled and tapped directly into the Y slide for the reader and into the X slide for the scale. There was plenty of adjustment to get the scale leveled up and squared to the reader and slide.

This did shorten up the Y axis travel but there was no other way to mount the scale and keep it out of harms way.
The Y scale took a bit more figuring. I used two of the supplied brackets, modifying one of them to get the positioning I needed.
Drilled and tapped directly into the knee for the right angle bracket. The bar you see sitting on the bracket came with the kit also. I drilled and tapped that on the narrow side for some 10-24's to attach it to the right angle bracket from the bottom.

That bar also got drilled and tapped on the ends so the scale would bolt directly to it.
With the scale hard mounted to the knee I had to modify this kit plate to reach the slide on the underside of the scale.

Opening up the slots on the end and drilling and tapping new holes farther down, got me there.

You can see the two screws at the top that attach the slide to the Y cross slide. I drilled and tapped those for some more 10-24's.
I got the chip guards installed today and also calibrated the DRO. I was pretty impressed with old FrankenMill. The difference in the readout from the actual dial travel was 0.521mm's over 20.5 inches. I checked this 4 times and that was the nominal I got.
The Y was out 0.250mm's over 6.63 inches of travel. I checked this 4 times also and took the nominal number for calibration. This should make the FrankenMill much more repeatable. I have a few hole patterns to drill and tap for an adjustable angle plate I am building. I'll let you know how it goes.
Mark

