Another 2-piece Brass Ballpoint Pen

ProfessorGuy

Registered
Registered
Joined
Jan 21, 2015
Messages
67
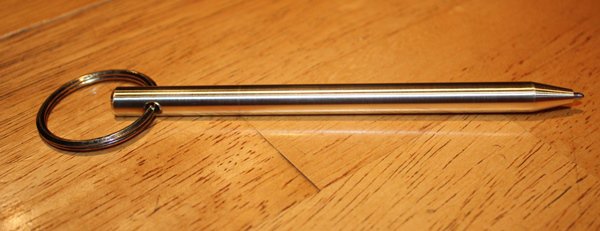
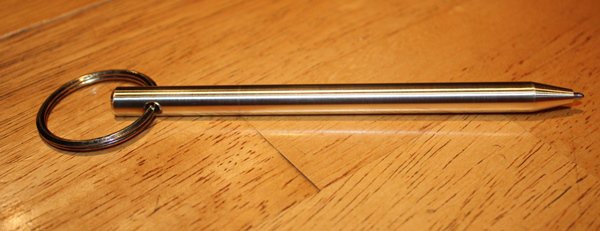
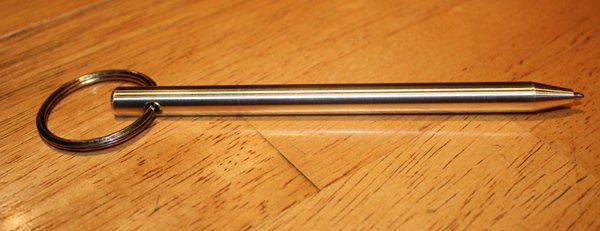
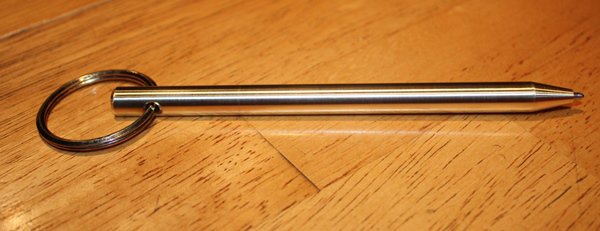
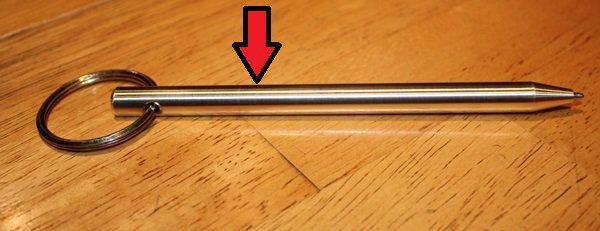
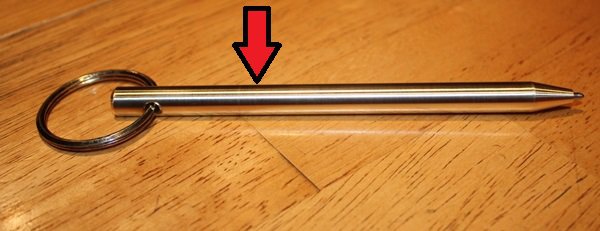
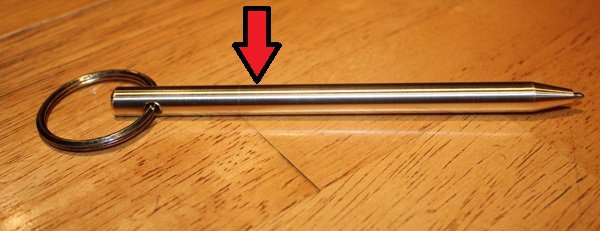
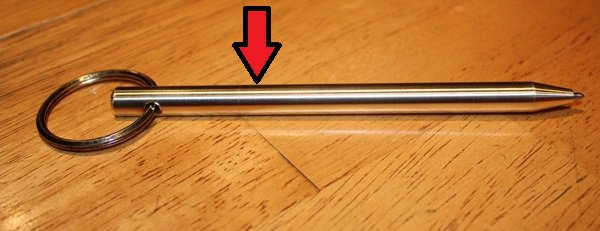
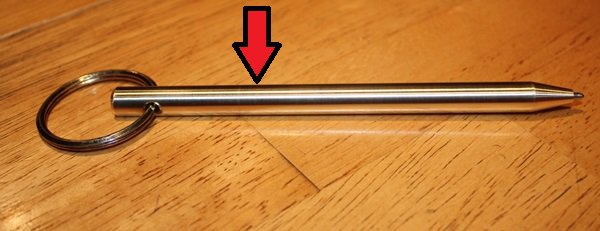
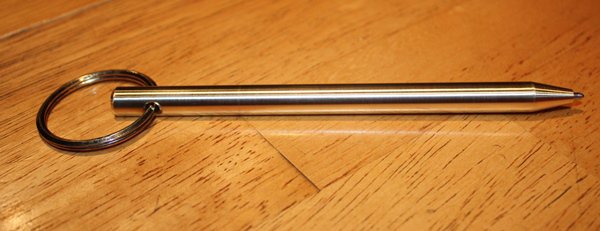
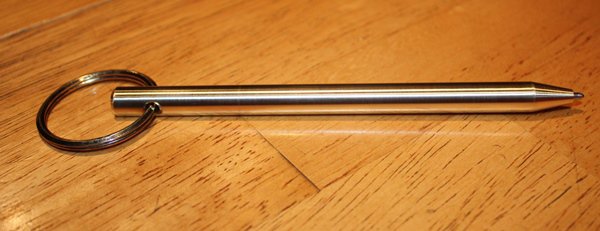
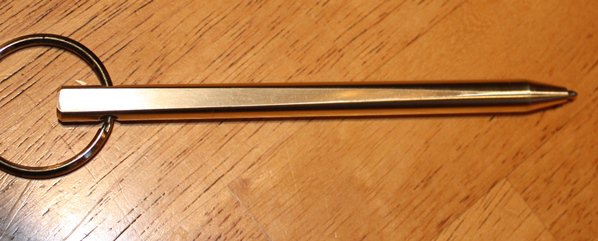
I owed a guy a favor, so since I had set up to make one pen for my wife, I thought I'd make a second as a gift. This is another 2-piece, screw-together, ballpoint pen. This one is all brass (my last one was brass/aluminum), and even though it is a mere 5.5 inches long, it is a heavy bastard. This one also takes a Fisher Space Pen refill so it writes upside down.
pen21.jpg

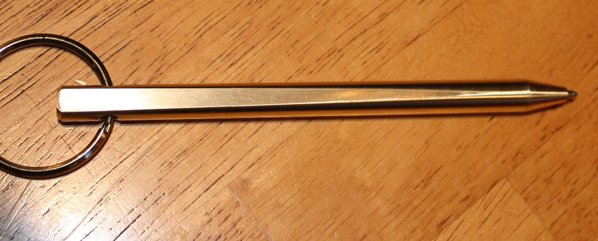
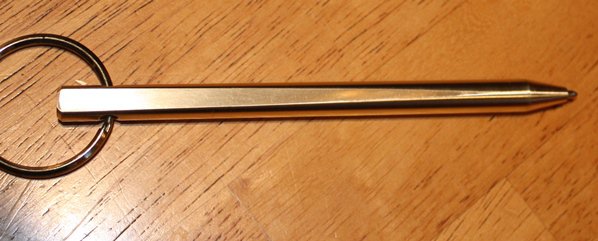
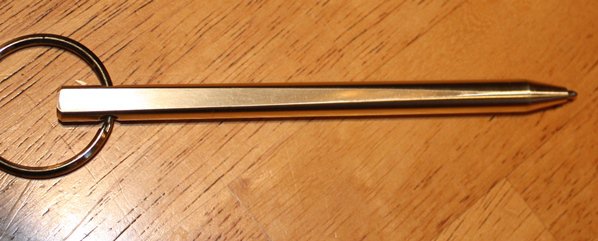
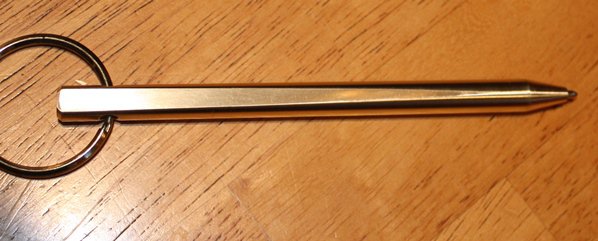
If it looks like it is sitting crooked on the table, that's because I milled a long tapering flat on one side. This prevents rolling (if the owner wants to remove the ring). But it keeps the barrel completely round down where sensitive fingertips grip it. Here's a pic of the milling:
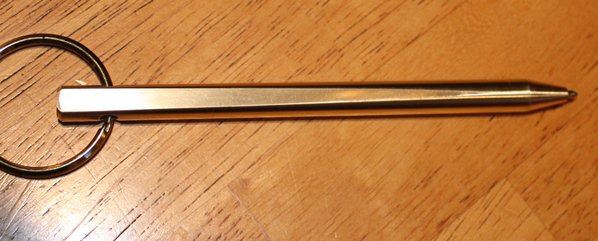
pen23.jpg

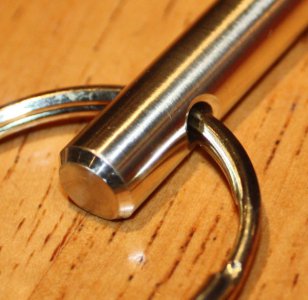
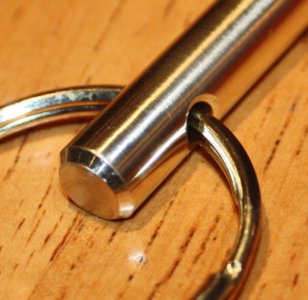
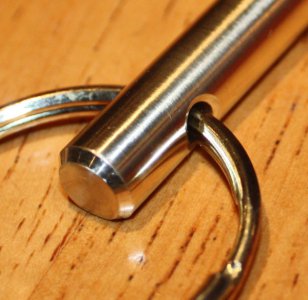
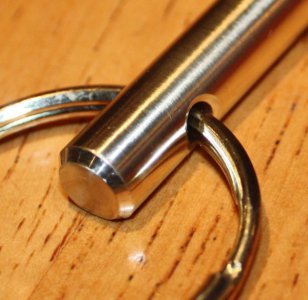
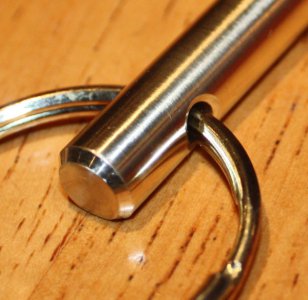
Notice that on this piece, the 2 screw together halves are hard to distinguish, the seam is pretty smooth. I milled notches before drilling through, so the holes would have a nice edge. Here's a detail of the end (notice the 'flat tire' effect of the flattened side):
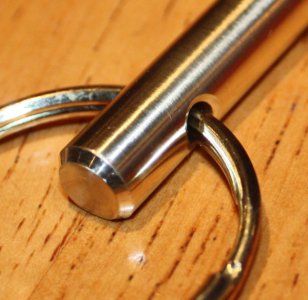
pen24.jpg

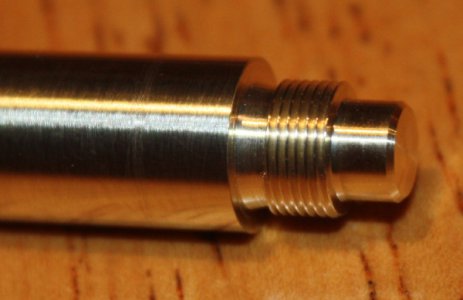
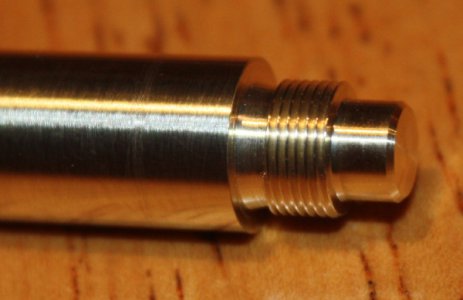
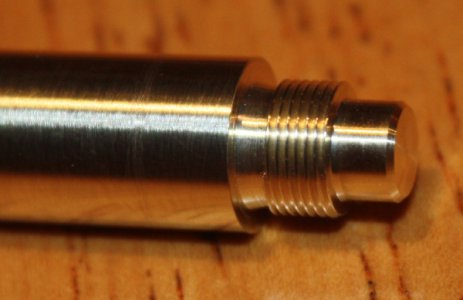
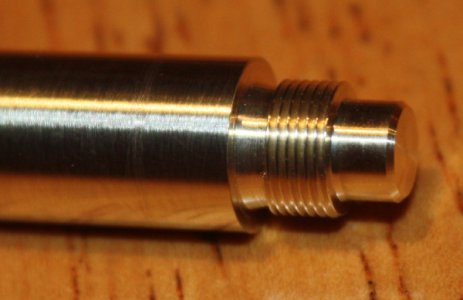
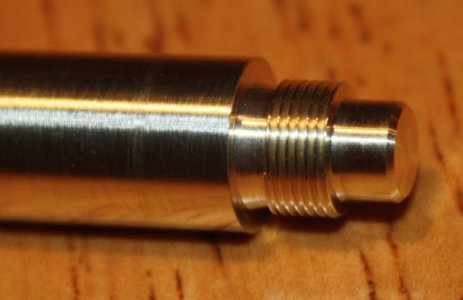
Once again, I used my hand-made (by eye!) threading tools to make matching 0.5mm pitch (51 tpi) threads. Look how nice that high-leaded brass cuts:
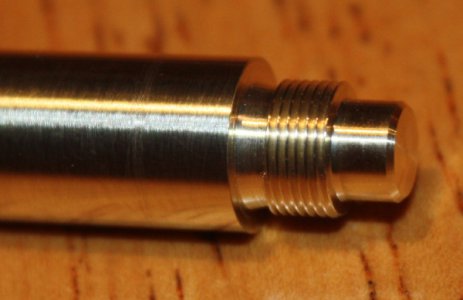
pen25.jpg

I believe I am done with pens, and I will move on to smaller and smaller projects as I try to get down to pocketwatch scale. My lifetime goal is to build a pocketwatch, so back to work.
pen21.jpg

pen23.jpg

pen24.jpg

pen25.jpg

pen21.jpg

pen23.jpg

pen24.jpg

pen25.jpg

pen21.jpg

pen23.jpg

pen24.jpg

pen25.jpg

pen21.jpg

pen23.jpg

pen24.jpg

pen25.jpg

pen21.jpg

pen23.jpg

pen24.jpg

pen25.jpg
 
Wow! You have definitely collected lots of skills already along the path to a pocket watch.
I know there is a joint there somewhere, but I cannot see it, even with your great photos.
Nice Work!

I'm still trying to work out how you hold it for secondary operations without leaving marks in the finish.....
-brino
 
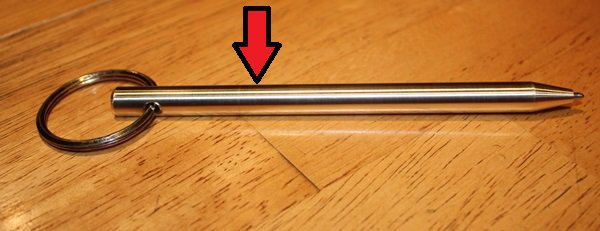
I leave the top part long, so I can grip it in the chuck, and use a live center on the tailstock in the pen-tip hole. I have the 2 parts attached with the threaded connection before turning the barrel, so the seam looks pretty good. Here's a picture where I've marked the seam. (The mark next to it is an error in the finishing which you can see in the thread picture above.)

pen26.jpg

I partially part off the top so I can put the chamfer on top, then I do all the finish work. Then remove the tailstock, unscrew the bottom of the pen leaving just the top in the chuck. Then I part off the top while carefully holding it with a soft cloth. On this one, I still had to polish the tapered flat after it came off the lathe, since that required sandpaper attached to glass for a nice flat surface.
pen26.jpg

pen26.jpg

pen26.jpg

pen26.jpg

pen26.jpg
 
Do you own a watchmakers lathe? I have a Levin. Those lathes are really neat, especially for small work. And a nice pen.
 
"Do you own a watchmakers lathe?"

I do own a vintage Peerless, but have not yet set it up. So far, all my lathe work is done with a Sherline 4410 (extended bed, metric) lathe. I also have a Sherline 5410 metric mill. These are set up completely manual with handwheels marked in 0.01 mm increments. Conveniently, my complete set of Sherline collets (17 english and 77 metric) and drawtube fit both the Sherline and the Peerless, so the most expensive part of getting a lathe running (getting a set of collets) is already taken care of.

I thought maybe the Peerless will end up being a polishing lathe, since as scale goes down, the requirement for perfect polishing goes up. When I get to the Peerless, I'll be sure to post photos, but so far the Sherline has proven sufficient.
 
A friend of mine is a clock repairer. I believe one of his clockmaker lathes is a Peerless. However, I do know that he does have a Sherline(nice lathe). The Levin was a package deal that also came with a complete set of collets that my wife and I got it at a good price. I assume that your collets are the WW size, but they sure are expensive if you buy them new. You have some nice equipment and better yet, you are producing some nice work.
 
You did a great job! Are all the refills the same size? Boring for it seems difficult. I would like to see your threading tool.

Chip
 
You did a great job! Are all the refills the same size? Boring for it seems difficult. I would like to see your threading tool.
This pen takes a standard Space Pen refill which are 86mm long, 5mm major diameter and 2.5mm minor (the tip section). The specs are at spacepen.com. I drilled out the barrel about 75mm deep (there's a spring to take up the extra length) with a long 3/16" bit. Drilling out the lower barrel was painful as the throw on my tailstock is less than 40mm. So I had to drill 5mm deep, then unlock and slide the tailstock to clear the chips, again and again. Then I reamed the undersized hole with a slightly bigger bit which, because it was taking a light cut, left a nice surface inside. I drilled the 2.5mm hole from the other direction so they wouldn't be perfectly lined up, which put a nice amount of tension on the refill to hold it tight.

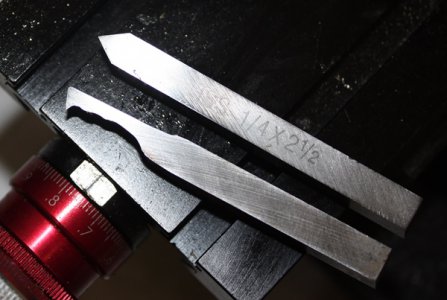
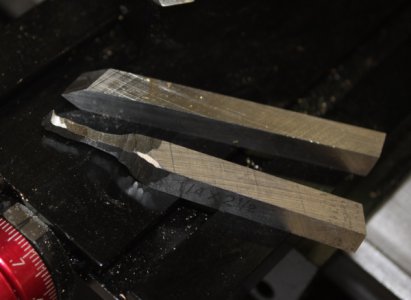
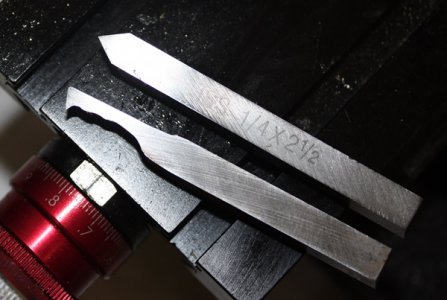
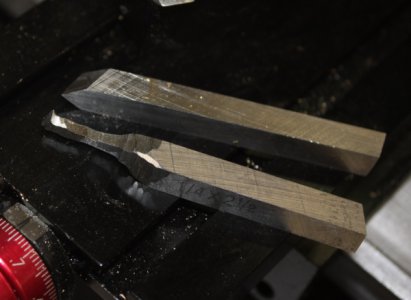
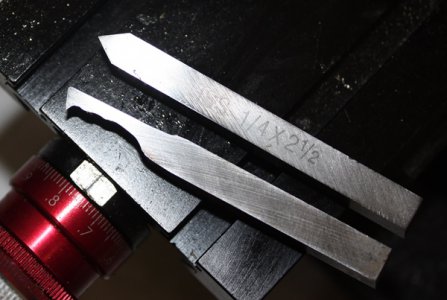
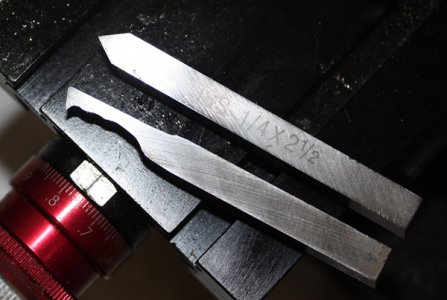
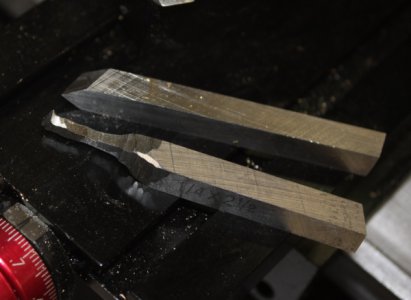
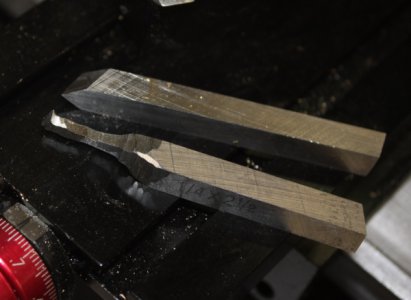
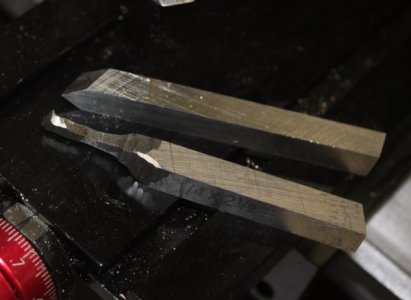
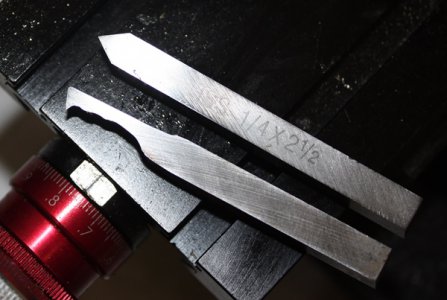
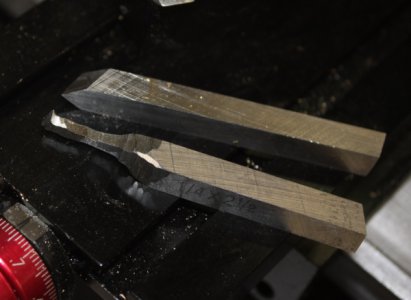
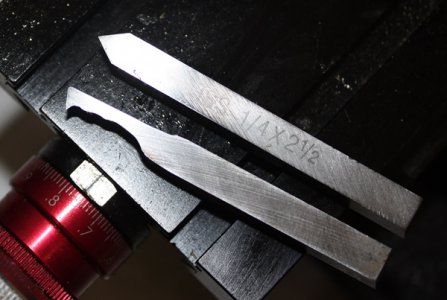
Here's the threading tools I ground from 1/4" square HSS blanks, the fat one for external threads and skinny for internal. They are supposed to be exactly 60*, but I did them by eye! I would guess that's not too common in modern machine shops.

threaders2.jpg

The internal threader had to go deep into the small hole in the lower barrel, so I kept grinding it down until it fit. Not a pretty job, but only the tiniest bit of the very tip is used (which I honed to a black polish), so the rest is not critical.

threaders1.jpg

As ugly as these tools are, the resulting threads are pretty nice. And certainly the cut threads function perfectly, which is the entirety of my concern.

threaders2.jpg

threaders1.jpg

threaders2.jpg

threaders1.jpg

threaders2.jpg

threaders1.jpg

threaders2.jpg

threaders1.jpg

threaders2.jpg

threaders1.jpg
 
Professor
I am wanting to go the same direction with clock and watches. I was lucky and come up with the WW collets before the lathe. I guess we all start somewhere. Love your idea of a pens on your keyring, you are never without a pin. Keep the good work up.

One other thing I'd like to share: to get the degree mark ° all you need to do is hold down the alt key and go to the numbers and type in 248, alt248 equals °
Cheers
Nelson Collar
 
I like it. I would like to know more on the threading process. What end did you cut thread first?
Jack

Sent from my SGH-I337M using Tapatalk
 
Back
Top