Fn32 Right Side Plate

Karl_T

H-M Supporter - Sustaining Member
H-M Platinum Supporter
Joined
Oct 14, 2014
Messages
1,970
First a bit of background.

It common for the militaries of the world to sell their small arms when they are surplus to their needs. They can be imported to the USA if dis-assembled and the receiver is destroyed. At this point it is called a parts kit. These kits are available for a great many weapons. US law requires the weapon to only be built as a semi auto NOT full auto weapon.

The FN32 is perhaps the finest example of the John Moses Browning machine gun. Only about 60 kits were imported to the USA from Portugal. Learn more about building the very similar FN30 here:
http://browningmgs.com/FN/07_FN30build.htm

This thread covers CNC machining a new receiver or right side plate. Also posted at:
http://1919a4.com/showthread.php?54588-FN32-build
 
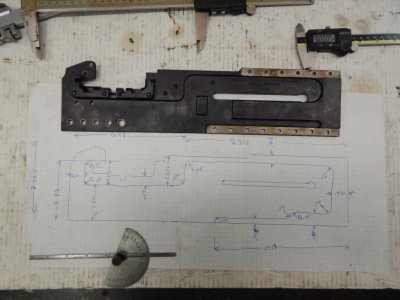
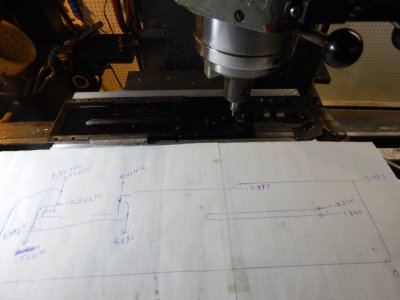
measure RSP.jpg measure with DRO.jpg First job is get a good drawing. I'm using the left side plate as its nearly a mirror image. You need to measure everything three ways from Sunday AND then double check and then cross check it again. It takes way less time to prevent errors at this stage than to machine a part and find something out of spec. Or worse yet, rivet the weapon and find find something not quite right. (I've done that)

I measure it first with calipers and make a sketch. Then check the measurements with mikes. then check again with the DRO on the manual mill.

couple pics of this step
 
Next draw it up in a CAD program. I use the free Draftsight X64. Did one layer for the outline, one for the relief or lightening cuts, one for the denial islands.
Then went back to step one and re double checked the drawing.
 

Attachments

  • FN32 RSP final relief dim.pdf
    15.5 KB · Views: 22
  • FN32 RSP final plate dim.pdf
    16.5 KB · Views: 21
  • FN32 RSP final island dim.pdf
    19.4 KB · Views: 15
The next step is decide how to machine the part.

I'll be holding a 14.85" by 4 by .25" stock in soft jaws on the cnc mill. Fist op will be just to spot drill and drill a few holes. Looks like only the return spring slot and a ruff hole at the back of the charge handle. I decided not to CNC all the rivet holes. Its actually better to just match drill these after clamping.

Next op will be the relief or lightening cuts with two tools, one to remove the bulk of the material and another to add the finish cut and all the radii. Plan "A" right now is a 1" Sandvik R390 to ruff out the bulk of the material. Then the final pass with a two flute HSS endmill custom radiused on my tool and cutter grinder.

Next step will be the outline of the weapon and charge handle slot. I'll be leaving several parts unfinished (see red lines on .pdf) so the part can stay clamped in the softjaws. These cuts will be done on the manual mill after the part is complete.

Then the part will be flipped over and denial islands cut. Right now, I'm thinking cut the backplate slot on the horizontal manual mill. This could easily be CNCed with a small endmill but a horizontal is light years faster. And I need something to do while watching the CNC do its thing. I'll also be doing the return spring slot with the manual mill.
 
Next step is to write and debug the Gcode for the CNC mill. I don't own a decent CAM program, nor do I like them for the work I do. Been writing my own gcode for 25 years now.

There is a neat short cut for the gcode routes that I like. Just draw them up in the same CAD program the part was drawn in. This is mostly just copying a layer, deleting unneeded objects and then drawing connecting lines to make a route
 

Attachments

  • FN32 RSP relief gcode.pdf
    2.2 KB · Views: 11
  • FN32 RSP island gcode.pdf
    2.9 KB · Views: 15
  • FN32 RSP outline gcode route.pdf
    2.3 KB · Views: 11
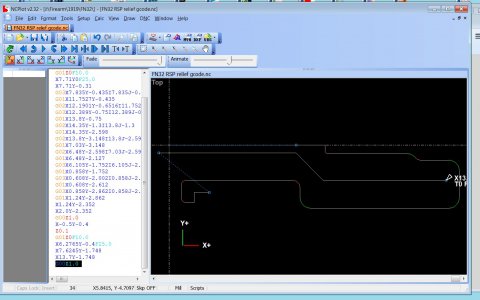
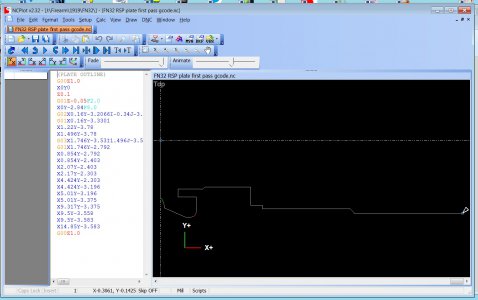
Then use a backplotter to convert the drawings to gcode. I use NCplot, got it for $60 back when it was developed. I've seen a free one for Mach 3 users.


NCplot.jpg

NCplot outline.jpg
 
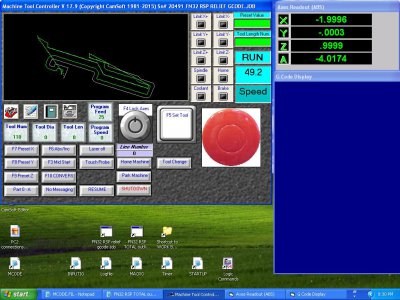
Next, write the actual gcode and test it on the CNC miil with NO tooling installed. My mill shows the route on the viewport. I included the actual Gcode for the outline cut and show a pic of the relief cut on the CNC's control screen.

i use something called parametric programming for the Gcode. That is the code has variables and loops (code repeated n times).RELIEF CUT RUN.JPG
 

Attachments

  • FN32 RSP FINAL outline gcode route.txt
    1.9 KB · Views: 15
THE POWER OF G41

Kind of an advanced topic, but I just figured it out and wrote the Gcode for this. G41/G42 is called cutter comp in Gcode parlance. It allows you to write the code for the actual outline and then tell the control what cutter it is using. That way you can change tooling (cutter diameter) and run the same Gcode to make the same part.

But you can lie to the control and really expand the use of cutter comp. If you tell the control the cutter is larger than it actually is, the control will offset the tool more and the part will be larger. One HUGE use of this is ruff your part out telling the control the cutter is a few thou bigger. Then for the finish pass, tell the control the right number. Now it will shave a few thou off for a perfect finish.

Here's an even more advanced trick. The relief, or lightening cut area, on the side of the RSP has a radius of 0.125". I want to make four passes each 20 thou deep for a total of 80 thou removed. The cutter route has to be farther away from the side each pass deeper. I've learned to always draw it out so a mistake isn't made. DRAW IT OUT should be the first commandment of machining.

I'm using a 0.5 inch radius or 1.0 diameter cutter for this. If the control is told these successively larger cuttter sizes, it will offset more and more to make the part just right.
 

Attachments

  • G41 example.pdf
    12.4 KB · Views: 15
Very impressive work! This makes me wish I'd picked up one of the few part sets.


Steve Shannon, P.E.
 
Hey Karl_T
I was going to suggest posting your info over here from 1919A4 but wasn't sure if you were a member here.
Then I simply forgot to ask you about it.:(

Glad to see you sharing the project among fellow machinists.o_O
 
Back
Top