- Joined
- Dec 18, 2019
- Messages
- 6,437
After my laptop of 7 years died without warning in January, I decided that one day I'd make a file server, and backup device. It will be a RAID 1 device, simple to implement and some fault tolerance. The idea is to have two of these, one on site and one off site. Fortunately, in the case of my laptop, it wasn't the disk that died, but that of the power supply on the motherboard. For a while, I managed to "live" running an RPI4, while waiting for my new laptop to arrive. The RPI4 is a tolerable cheap computer, if it is slightly overclocked and booting from a SSD. So I thought it might make a reasonable low power file server.
Many months went by, just trying to figure out what would work, and what computer hardware to use. I acquired the hardware, and assembled most of it. It became quite apparent that it occupied a lot of space and was a great tangle of stuff and cables. So this little project was born. I decided to stack the assemblies vertically to save counter space, and to tie everything down.
The server is composed of plates. The plates are 3.5" x 6" x 1/4" aluminum. On each plate is a "function". The first plate is the RPI4 (Raspberry Pi 4) with a small fan. The second plate is the SSD. The third plate is the USB hub plate. And finally, the last plate is the RAID 1 array, consisting of 2 1TB NVME memories. It took me about a month to design all the plates and brackets, primarily because I had to measure all the existing hardware and figure out how I was going to do all of this. Although it looks simple enough, some of it was a stretch for my abilities. At the moment, I don't have a good idea on how to manage the cables just yet, but somehow that will be taken care of.
Here's the RPI4. It's tied down with 4 long screws through a cheap laminated case. The laminated case has some silicone rubber feet. I haven't fired this up yet, but I'm half expecting a bit of vibration or hum. I may have to use some kind of isolator. The little green board I made has a driver circuit for the fan. The Pi makes a PWM signal proportional to the temperature. So the hotter the CPU is the faster the fan goes. The driver is just a resistor, a transistor and a flyback diode. That way the low powered Pi can drive a 200mA fan. The fan cycles off and on depending on CPU temperature. I have it set to 60C, which is well under the max limit of 85C.

Next is the SSD plate. On this piece I needed to come up with a spacer, since the SATA connector was thicker than the SSD. Found some 0.093" stock that was close enough. I also made a hold down for the connector that prevents the connector from detaching.


Next comes the plate for the hubs. At least for my RPI4, it won't boot connected to an active hub. Apparently this is a documented fact on the Raspberry Pi forum, for some brands of active hubs. My work around is to have both an active and passive hub. The SSD is plugged directly into one of the USB3 ports, and the passive hub is connected to the other USB3 port. Then the active hub is plugged into the passive hub. This works, so that's what I have to go with. To accommodate the square edges, I needed to make a mouse ear in the corners of the hold downs. I hogged out the material with a 1/2" roughing mill, about 2mm at a time. Then cleaned up the bumps in the corner. Here's a picture of the right side just before doing that. Initially, I wasn't sure if I would hit the screws with the mill. To drill the mouse ear, I did have to remove the corner screw, as the mill just hit the screw head. I then replaced the screw before hogging out the material. You can see that the mill dropped slightly, or something happened. Not sure why this happens. Kind of frustrating. It's only 0.01mm or so, but it can be seen. Oh well, I'm still pleased with how this one came out. The square bracket which follows, not so much. It's ugly underneath. Yes, I did the square one first, so I learned from it at least... I haven't mounted the active hub yet, but the hole pattern is there. I had to source some very tiny metric screws M2 x 12 from AliExpress to fit the active hub. They are kind of like sheet metal screws. I hope they truly are long enough, if not, I will counterbore the hub plate 3 more mm.


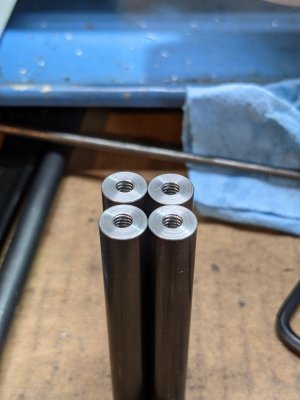
Finally, the RAID plate, which houses 2 NVME sticks. I made two "H"'s and a cover for this. The notches are 9.98 mm deep and the cases measure 10.00 mm. Nice and snug grip on the cases. The NVME cases are aluminum, and get pretty toasty in use, so I wanted some decent contact with metal. Used a radiused end mill for cutting the H. I'm pretty happy with it.

What's left to do? I need to make spacers for the plates. I have some 3/8" 1144 that I will cut to length and drill and tap for 8-32. I have a bunch of 8-32 all-thread that I will cut into about 1" sections. Probably go to the hardware store for some rubber feet - hope I can find some little ones. Worst comes to worst, I can get some felt feet with adhesive and glue it to the bottom of the feet.
Oh yeah, and the software. Need to set up the RAID array and to set up a cron job to rsync with all of our active computers we want to back up. Once it is all working, then I get to do it again! But also I need to add in firewalls and security, as one of these servers will be remote. That's going to be interesting - but not a topic for HM. What's nice is the actual machining didn't take all that long. Making the drawings took most of the time.
Many months went by, just trying to figure out what would work, and what computer hardware to use. I acquired the hardware, and assembled most of it. It became quite apparent that it occupied a lot of space and was a great tangle of stuff and cables. So this little project was born. I decided to stack the assemblies vertically to save counter space, and to tie everything down.
The server is composed of plates. The plates are 3.5" x 6" x 1/4" aluminum. On each plate is a "function". The first plate is the RPI4 (Raspberry Pi 4) with a small fan. The second plate is the SSD. The third plate is the USB hub plate. And finally, the last plate is the RAID 1 array, consisting of 2 1TB NVME memories. It took me about a month to design all the plates and brackets, primarily because I had to measure all the existing hardware and figure out how I was going to do all of this. Although it looks simple enough, some of it was a stretch for my abilities. At the moment, I don't have a good idea on how to manage the cables just yet, but somehow that will be taken care of.
Here's the RPI4. It's tied down with 4 long screws through a cheap laminated case. The laminated case has some silicone rubber feet. I haven't fired this up yet, but I'm half expecting a bit of vibration or hum. I may have to use some kind of isolator. The little green board I made has a driver circuit for the fan. The Pi makes a PWM signal proportional to the temperature. So the hotter the CPU is the faster the fan goes. The driver is just a resistor, a transistor and a flyback diode. That way the low powered Pi can drive a 200mA fan. The fan cycles off and on depending on CPU temperature. I have it set to 60C, which is well under the max limit of 85C.
Next is the SSD plate. On this piece I needed to come up with a spacer, since the SATA connector was thicker than the SSD. Found some 0.093" stock that was close enough. I also made a hold down for the connector that prevents the connector from detaching.
Next comes the plate for the hubs. At least for my RPI4, it won't boot connected to an active hub. Apparently this is a documented fact on the Raspberry Pi forum, for some brands of active hubs. My work around is to have both an active and passive hub. The SSD is plugged directly into one of the USB3 ports, and the passive hub is connected to the other USB3 port. Then the active hub is plugged into the passive hub. This works, so that's what I have to go with. To accommodate the square edges, I needed to make a mouse ear in the corners of the hold downs. I hogged out the material with a 1/2" roughing mill, about 2mm at a time. Then cleaned up the bumps in the corner. Here's a picture of the right side just before doing that. Initially, I wasn't sure if I would hit the screws with the mill. To drill the mouse ear, I did have to remove the corner screw, as the mill just hit the screw head. I then replaced the screw before hogging out the material. You can see that the mill dropped slightly, or something happened. Not sure why this happens. Kind of frustrating. It's only 0.01mm or so, but it can be seen. Oh well, I'm still pleased with how this one came out. The square bracket which follows, not so much. It's ugly underneath. Yes, I did the square one first, so I learned from it at least... I haven't mounted the active hub yet, but the hole pattern is there. I had to source some very tiny metric screws M2 x 12 from AliExpress to fit the active hub. They are kind of like sheet metal screws. I hope they truly are long enough, if not, I will counterbore the hub plate 3 more mm.
Finally, the RAID plate, which houses 2 NVME sticks. I made two "H"'s and a cover for this. The notches are 9.98 mm deep and the cases measure 10.00 mm. Nice and snug grip on the cases. The NVME cases are aluminum, and get pretty toasty in use, so I wanted some decent contact with metal. Used a radiused end mill for cutting the H. I'm pretty happy with it.
What's left to do? I need to make spacers for the plates. I have some 3/8" 1144 that I will cut to length and drill and tap for 8-32. I have a bunch of 8-32 all-thread that I will cut into about 1" sections. Probably go to the hardware store for some rubber feet - hope I can find some little ones. Worst comes to worst, I can get some felt feet with adhesive and glue it to the bottom of the feet.
Oh yeah, and the software. Need to set up the RAID array and to set up a cron job to rsync with all of our active computers we want to back up. Once it is all working, then I get to do it again! But also I need to add in firewalls and security, as one of these servers will be remote. That's going to be interesting - but not a topic for HM. What's nice is the actual machining didn't take all that long. Making the drawings took most of the time.
Last edited: