Packing up the Shop

Hi Tom, so who did you use for the move and what did it end up costing? was it estimated by weight? I'm a few years away from such an adventure but curious what it would cost for an out of state move.

We used North American Van Lines out of Redding, CA. Not cheap (~$10K) but they did an excellent job. Cost was based on estimated weight. At the end there were no added costs for miscellaneous packing materials or labor unlike some other movers. They also provided an enclosed trailer, truck and driver at no additional cost to move one of my cars.

A word of caution though. My shop equipment was loaded in a separate 28' box van along with miscellaneous potted plants. The inside of the van was like a hot house and the moisture given off by the plants left a nice uniform coating of surface rust on my machine tools. Not a big deal as steel wool and skotch brite cleaned it up but it was a bit of extra work on my part.
 
Looks good. Congrats on getting moved and looking forward to seeing the new shop all set up.

Mike

Thanks Mike. The shop is a bit more organized and I'm working on getting my machine tools set up. Had a new drip pan made up for my CNC mill and worked yesterday on getting it fit to the support frame and laying out the mounting holes. I finished up the air system last weekend so that is out of the way. I'll post more pictures as I move along.
 
We used North American Van Lines out of Redding, CA. Not cheap (~$10K) but they did an excellent job. Cost was based on estimated weight. At the end there were no added costs for miscellaneous packing materials or labor unlike some other movers. They also provided an enclosed trailer, truck and driver at no additional cost to move one of my cars.

A word of caution though. My shop equipment was loaded in a separate 28' box van along with miscellaneous potted plants. The inside of the van was like a hot house and the moisture given off by the plants left a nice uniform coating of surface rust on my machine tools. Not a big deal as steel wool and skotch brite cleaned it up but it was a bit of extra work on my part.

That's great info Tom, thanks! I keep thinking that when the time comes I should just sell all my current (starter sized) machines and upgrade to larger ones at the new location and avoid the hassles of moving them long distance. I'll still have to move my toolboxes but those aren't as big of a problem. I'll just have to plan/budget for the time and cost of getting the new machines. Time to skip the Starbucks lattes lol
 
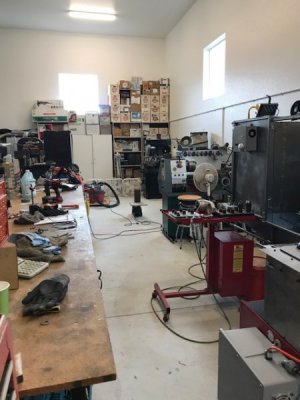
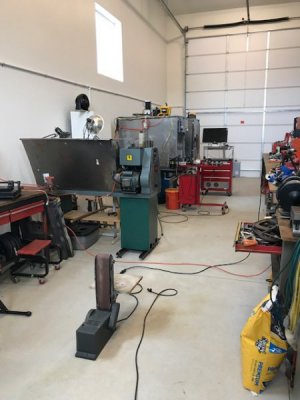
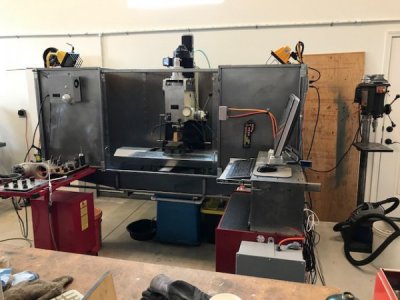
Finally got moved into the new house. Yesterday the internet provider and satellite TV technicians were here. Finally able to communicate and relax in front of the TV. The movers showed up this past Wednesday. The first picture is before they started moving my tools and equipment into their new home. The second picture shows what it looks like after they got done. This is going to be as test of my organizational skills.

View attachment 266297

View attachment 266299

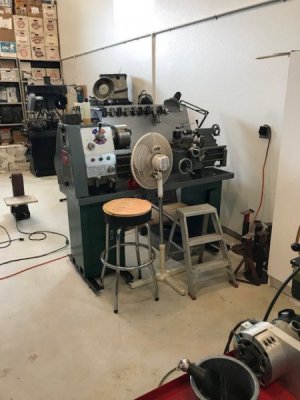
Remember these pictures? I finally got to the point where I can use my machines. It's been since mid-February. I still have some organizing to do but I now have a functional work space.

Next project is to build a mezzanine in this back corner for storage.
IMG_0365.JPG IMG_0364.JPG

IMG_0369.JPG IMG_0368.JPG

IMG_0367.JPG
 
nice. on the plus side at least you have plenty of space to move things around until you find the layout you like.
 
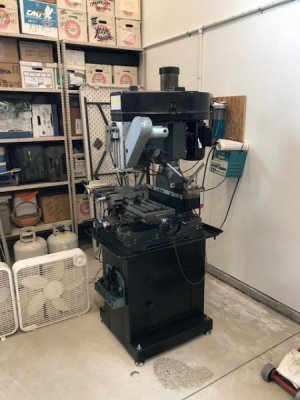
That's awesomel Tom! I'm very curious to see how you setup your new shop. BTW, I had no idea you had a RF30/31 with what looks like some cool upgrades...do you have them documented anywhere? :encourage:
 
That's awesomel Tom! I'm very curious to see how you setup your new shop. BTW, I had no idea you had a RF30/31 with what looks like some cool upgrades...do you have them documented anywhere? :encourage:

The shop is coming along. The machines are where they are going to stay. The rest of my "stuff" will get moved around (maybe to the dump) to maximize space.

You've got a good eye. Yes, I've done a few mods; quill DRO, X axis power feed, Z axis power feed, quill power downfeed and upfeed, Y axis travel extension, and a one shot lube system. What you can't see is the mods I made to minimize chip and coolant intrusion into the spindle bearings. I've posted some of these mods in various threads on this forum, mostly in response to others requesting info on this type of mill.

If you have an interest in any of my mods/upgrades ask away. I'll be glad to share.
 
Nice RF mods, of course,I'd love to see/read whatever you care to share about it. The chip/coolant in spindle prevention sounds good as does the the one shot lube system. Thanks!
 
Nice RF mods, of course,I'd love to see/read whatever you care to share about it. The chip/coolant in spindle prevention sounds good as does the the one shot lube system. Thanks!

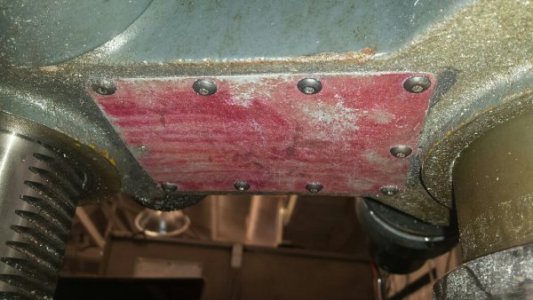
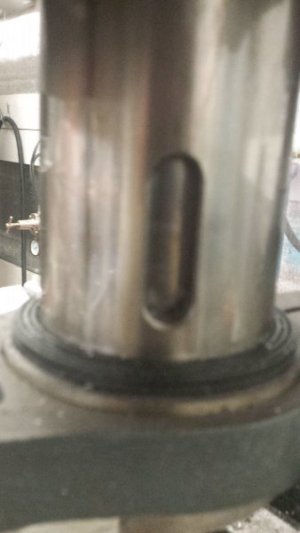
Here's a couple of pictures of the chip intrusion prevention mods I did. I can't find my pictures of the one shot lube system. I'll take some pictures in the morning.

This is the cover plate I made to close off the hole under the head. If chips and coolant get into the space behind this plate they can get into the rack gear on the quill and the fine downfeed mechanism. Chips could also cause problems with the head vertical movement.
20160725_114013_resized.jpg


This picture shows the visible portion of the sleeve I made to block off the drill drift slots. These slots are directly over the lower spindle bearing which has no seal thus allowing chips and coolant easy access. This mod is a bit more involved because the quill is quite long and hangs out of the chuck a long ways. I had to take light cuts at low RPM to keep the quill from moving in the chuck and to keep chatter under control.
20160725_113841.jpg

The sleeve has worked out great but was a lot of work. When I converted my PM-932 to CNC I had the same concerns with the drill drift slots and I didn't relish the idea of boring the quill and pressing in a sleeve. I did some internet surfing and found where someone had filled the slots with epoxy. Seemed like a good idea so I disassembled my spindle, thoroughly cleaned the quill interior paying particular attention to the slots. Using duct tape as a backer I filled the slots with epoxy (can't remember the specific type or brand) and let it dry overnight. That was about two years ago and the epoxy is still there, and no chips or coolant are getting into the bearing.

Hope this is helpful and I'll be posting pictures of my lube system tomorrow.
 
Back
Top