We did some thinking about process today and here's what we came up with.
Current Materials:
- 1 1/2 x 1/8 wall 6061 round tube (for the main tube)
- 1 1/2 6061 solid round bar (for cone end)
- 1 1/4 x 1/8 wall 6061 round tube (for the nut end, not shown above)
Current Process:
- Turn cone end
- Turn, bore & thread nut end
- Cut tubes to length with Evolution chop saw
- Ream tube cone end to 1.250
- Chill cone end & heat tube
- Drop cone end into tube
- Swage in manual press
- Chill nut & and heat tube (reaming was not needed for the nut end)
- Swage in manual press
New Materials:
- 1 1/2 x 1/8 wall 6061 round tube (for the main tube)
- 1 1/2 6061 solid round bar (for cone end)
- 1'' Sch 80 (1.315 x 0.957 nominal) 6061 pipe (for the nut end, not shown above)
Changing to the Sch 80 pipe allows us to adjust the tube bore size, and won't add more than a few seconds to the cycle time of making the nuts. The real key here is to get control of the tube bore.
New Process:
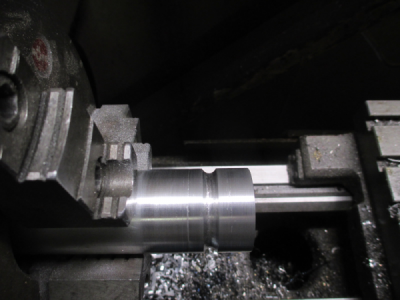
- Turn cone end, turn to 1.260 OD
- Turn, bore & thread nut end, turn to 1.260 OD
- Cut tubes to length with Ridgid pipe machine
- Ream tube cone end to 32mm (1.2608) with Ridgid pipe machine
- Ream tube nut end to 32mm (1.2608) with Ridgid pipe machine
- Insert cone end
- Swage in C-frame press (or maybe roll swage)
- Insert nut end
- Swage in C-frame press (or maybe roll swage)
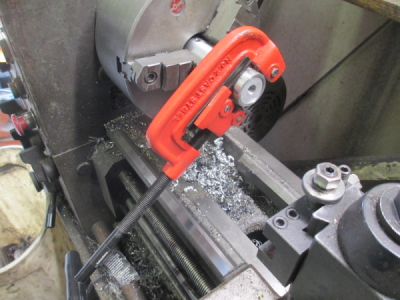
Our first thought was to rotary swage the ends, so this was done a few months ago. This is the first prototype rotary swaging tool made from a Harbor Freight pipe cutter.

Did a pretty good job, but difficult to control because the thing was so sloppy and out of alignment. But what do you want for 15 bucks.

The process worked so we bought a Ridgid pipe cutter ($150) and built new swaging rollers for it. It worked fine, nice and tight and everything was in alignment, except the process was a bit slow.

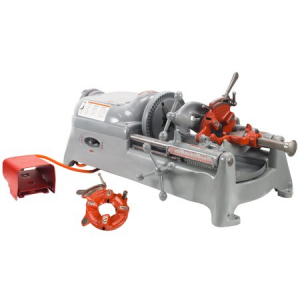
We chose the Ridgid 535 pipe machine because it has a hand wheel/rack & pinion setup for the carriage. A few quick modifications will make it work just like we want. A few more modifications to add some automation would make it an automatic machine, but that depends on our product volume. Roller swaging
is not out of the question at this point, I already have the swaging rollers built for a Ridgid pipe cutter. Roller swaging is one of the first things that we will try once we have the machine. As
@extropic noted, the pipe jaws in the 535 chuck might be a bit too aggressive so some soft jaws would be in order. This will come in handy for those plumbing jobs around the house too.

About $1200 used on the local market, there are about a half dozen of these machines within 250 miles.

To speed up the swaging process we built a press swaging die, much faster than roll swaging. For power swaging in our die, a C-frame press is ideal. Enerpac makes a nice little 30 ton C-frame for $2700, that's just the frame. Then the cylinder and power unit runs another $5000 or so. So you can have a nice 30 ton C-frame press for about $7700

..................Or.....
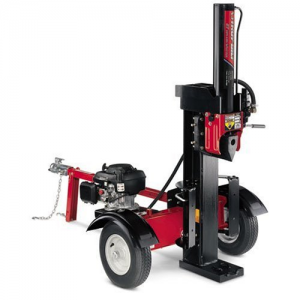
Troy Bilt sells a 27 ton C-frame press for about $1200, new, complete............
And you can split wood with it.

There are a couple of these locally on the used marked for about $900. We have been talking about getting one anyway.
A few mods like replace the gas motor with a 5 hp electric and replace the wedge with a more appropriate push block and you have an instant C-frame press that is perfect for our needs. We could hang this on the side of the H-frame press or build a seperate stand for it. We wouldn't do any irreversible mods to the unit so we would still have a wood splitter.

We won't get back to making any more tubes for a few weeks, but I guarantee we won't go through what we did on this first run.

It's a learning and problem solving process, sometimes requiring some outside-the-box thinking.
I thank you all for your great suggestions and comments.

I'll update this thread when we make more, and show the entire process, including the CNC lathe work if I can figure out how to get some pictures through the flood coolant.


 It would add about 30 seconds to the cycle time to turn the cones, but would save a lot of time on assembly. Sounds like a good trade off.


 There are a couple of these locally on the used marked for about $900. We have been talking about getting one anyway.
