2021 POTD Thread Archive

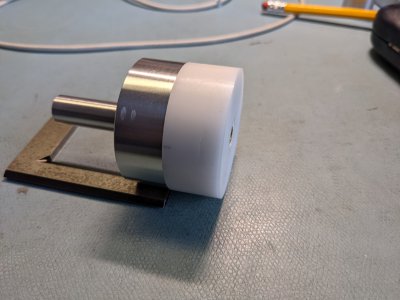
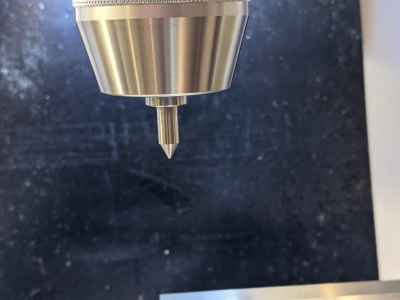
Finished (for now) the demagnetizer. I can report my version does work. It is a lot better than the Wiha tool commonly sold. The Wiha mag/demag tool leaves a lot more residual magnetism. If the delrin were to spin relative to the aluminum, I was thinking of machining a slot in the delrin and a key in the aluminum that goes all the way across the diameter. Something around 0.2" high and 0.125" wide would be sufficient. Don't like the idea of using a dowel pin in plastic. I left material in both pieces to allow for this. 1/2" diameter section is 1.5" long to allow use in a drill chuck.
PXL_20210927_190209676.jpg
Thumbs up for this little tool! Was fun making, and useful too. First thing I did was to demag my cheapo calipers. Then my tweezers, ...
 
Trying to learn MIG welding, so my first real project was a welding cart. Have a bunch of lab table legs that I've been moving out of the way for years and slowly repurposing as the need arises (see the grinding table in the background of the first photo). A pair of them became the starting point for the sides of the cart. I suspect I created my own learning trial by fire using them, since the walls are rather thin and very easy to burn right thru, but it was a great learning experience.

Didn't come out too bad for a 'design as you go' project. The lower rack has room for a small plasma cutter if the day ever comes that I can't resist that siren's call any longer.

View attachment 379995

View attachment 379997
That is a very nice welding cart! You did a good job on it.
 
Well the machine gods were sure shining on me today, I’m having a hard time believing my good fortune.

I’ve been fooling around with the bent shaft from the arm of my Singer 306 (the one that gave me such a headache trying to get out of the machine). With all the parts off the shaft now I got a better idea of the bend, and it was pretty significant. The min-max deviation easily exceeded once around on the indicator (0.030”) and it’s pretty easy to see the droop on the end of the shaft in the photo. My hopes at being able to press that out were not great, I must say.
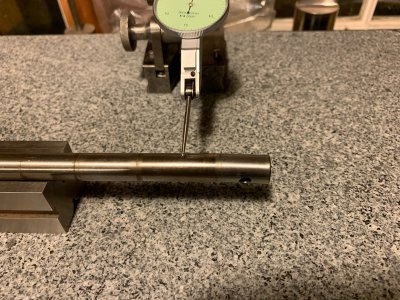
1632776790275.jpeg

I have several different pairs of v-blocks but I didn’t want to risk putting dents or other deformities into the shaft so I decided to make a couple out of aluminum. They’re lower too, which I thought ought to make them more stable in the press. I used the shaper and just stepped my way down from one side first and then the other. Depth was not critical, only enough to hold the shaft stable. I also flattened one edge of each disc thinking it would be easier to register off of I needed to but in the end it wasn’t needed.
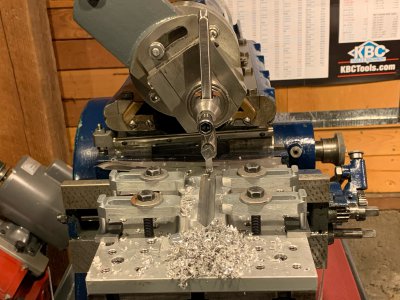
1632776824172.jpeg

Here’s what the setup looked like on the press, minus the shaft. It’s a 10-ton (supposedly) press and on the first go I took it to 2. The bend was really localized because of how the shaft is supported within the machine chassis and I wasn’t sure how to position it to bend back at the right place. In the end it was kind of “… wheh, that looks about right…GRONK….”.
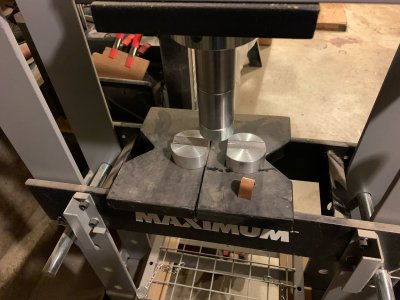
1632776858516.jpeg

After three or four runs at it and going back to measure any progress each time I had it about as good as I thought I could get. The indicator was showing me about three thou either way so after a bit of final massaging to make sure all the necessary pieces could still slide on I took it back for a test in the chassis. Here’s what that looked like…
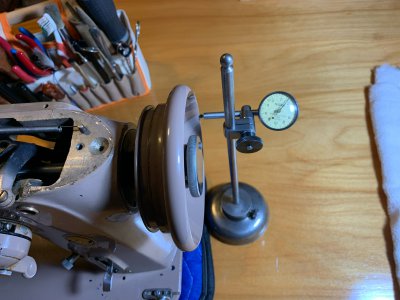
1632776897162.jpeg

Like, almost imperceptible to the eye. Where before the hand wheel had wobbled nearly a quarter-inch it was now down to dang near perfect! Well, not perfect but you know what I mean. Pretty pleased with that, now to see if I can put it all back together again ;)

Thanks for looking.

-frank
 
I started yesterday out attempting to install new front wheel bearings in my old Toyota truck... the hubs are a press fit into the bearings, so I opted to order the assemblies with new hubs already pressed in... mainly because I don't own a press...

I began with the drivers side... had everything disassembled and reassembled... all I had left to do was install the hub 'dust cap'... and... it wouldn't fit...

The original Toyota hub bore was 3.778"... the new hub was 3.760"... not gonna fit...

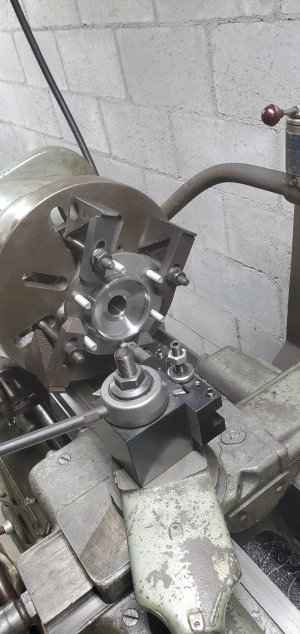
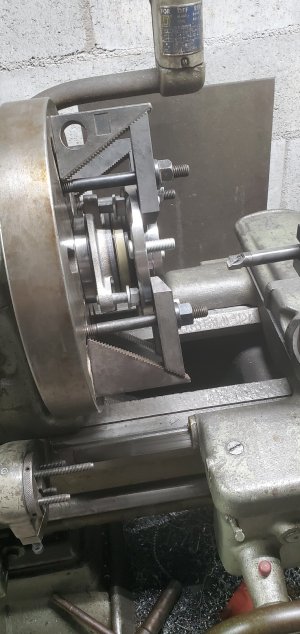
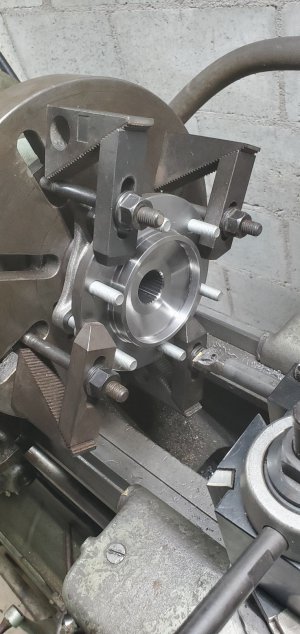
So, I did what anybody here would do... I mounted the uninstalled bearing in the lathe and opened the bore up to fit the cap...

I had to get 'creative' with the setup...

20210927_120838.jpg

20210927_120830.jpg

20210927_120821.jpg

Now I have to remove the bearing that I installed and machine it...

I was telling my wife about it later... she said it might be time to buy a press...

-Bear
 
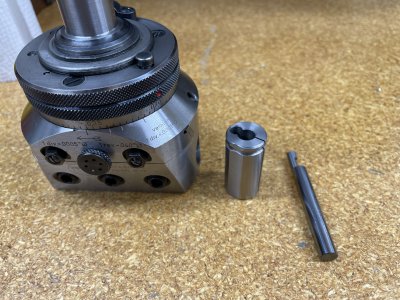
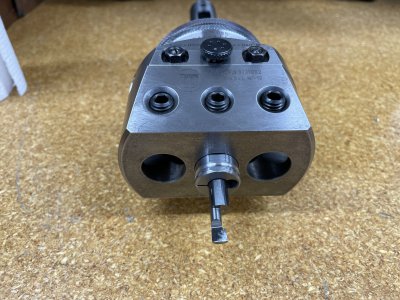
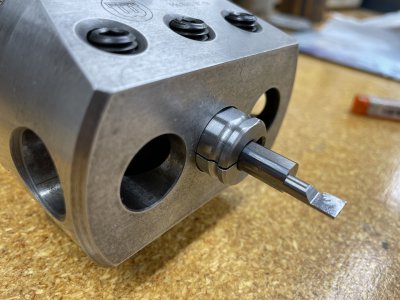
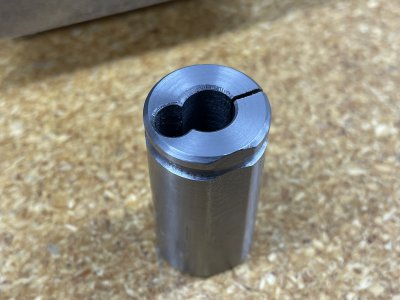
I made a bushing for my Wohlhaupter UPA3 boring head. Took me all evening but I'm pleased with how it turned out.

The UPA3 accepts 3/4 boring bar shanks, but I need to bore a very small hole. So I made a split / relieved bushing to accept a 5/16"-diameter Micro100 boring bar.

The little groove near the top is just for something to hang onto when inserting/removing from the boring head. The genuine Wohlhaupter bushings have that feature and I though it was pretty nice, so I emulated it.

I made it from O1. I might harden / temper it, but I'm a little worried about distortion. So I'll probably just leave it as is. With how little use it'll get, I'm sure it'll outlast me 10x over without being hardened.

IMG_1118.JPG IMG_1115.JPGIMG_1116.JPG IMG_1117.JPG
 
So, I did what anybody here would do... I mounted the uninstalled bearing in the lathe and opened the bore up to fit the cap...
Haha, would have done the same probably, it needs to roll, stop and look as stock as possible. Don't mind the dents scratches, they give it caracter. :eagerness:
 
My oldest was installing an Eibach lift kit on his Ranger. He had the front end pretty well disassembled when the grinder with a cutting wheel grabbed and ripped it out of his hands. It kicked back at him and cut him up pretty good staples in one leg and stitches in his forearm. It exposed muscle and tendons but didn’t sever them. After spending 16 hours in the ER with him, I took a nap and picked up where he left off. It took a day and a half but I got’er done. It has 34” BF Goodrich KO’s on Method wheels. I had to fab a tool to clock the struts because he forgot to mark them when he had the new springs installed it was basically a really big spanner wrench it was overkill but I wasn’t sure how hard it was going to be to spin them View attachment 379719
Dang man!@!
I hope he will fully recover!
Truck looks great. It's a Ford, why wouldn't it?
 
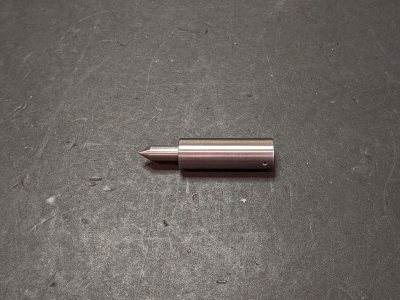
I call this the SST. (Super Stubby Tap follower)

1632880252155.png

1632880269001.png

This drops almost entirely into the drill chuck. This will come in very handy when I don't have adequate head clearance on the mill or drill press. It only has 1/2" of travel but honestly that is enough for most holes and certainly enough to get the tap started straight.

Robert
 
Back
Top