-
Welcome back Guest! Did you know you can mentor other members here at H-M? If not, please check out our Relaunch of Hobby Machinist Mentoring Program!
You are using an out of date browser. It may not display this or other websites correctly.
You should upgrade or use an alternative browser.
You should upgrade or use an alternative browser.
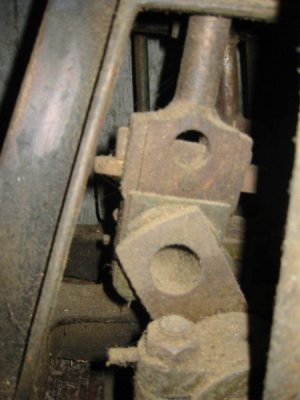
1/6th scale 1890's 30ft navy steam cutter (live steam)
- Thread starter tghsmith
- Start date
.JPG")
.JPG")
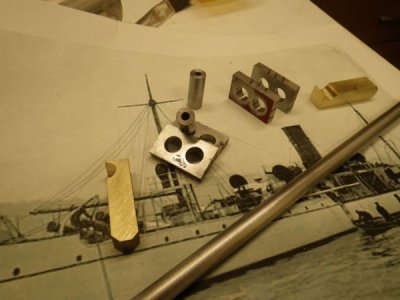
sliced a finger monday in a non metal-working task.. maybe could have needed stitches, decided to just keep it wrapped well and stay away from oils and crud.. did have a small photo-etching project in the works,, the plus side you need to rubber glove to keep the parts clean and the chemicals off your skin.. the boiler makers plate at 1/6th scale is at the lower limit of home etching.. large-sized artwork needed to made in the reverse,, reduced on the computer,, transparencies printed,, to several attempts to get the correct exposure,, the third one looks to be the keeper,, just needs to sawn free with a jewelers saw and edges filed.. it will get tucked away untill the boiler is made..
.JPG")
.jpg")
https://www.micromark.com/Micro-Mark-Pro-Etch-Photo-Etch-System_2 basically using a resist layer that protects metal while the etching solution removes metal from the unprotected areas,, a photo reactive layer is adhered to the metal, exposed to UV light while you have a negative of your image overlaying.. the areas were light hits harden,, a developer fluid removes the un-cured regions giving you an etch ready metal piece..
Super glue (cyanoacrylic) works pretty good for cuts.sliced a finger monday in a non metal-working task.. maybe could have needed stitches, decided to just keep it wrapped well and stay away from oils and crud.. did have a small photo-etching project in the works,, the plus side you need to rubber glove to keep the parts clean and the chemicals off your skin.. the boiler makers plate at 1/6th scale is at the lower limit of home etching.. large-sized artwork needed to made in the reverse,, reduced on the computer,, transparencies printed,, to several attempts to get the correct exposure,, the third one looks to be the keeper,, just needs to sawn free with a jewelers saw and edges filed.. it will get tucked away untill the boiler is made..View attachment 291491View attachment 291492View attachment 291493
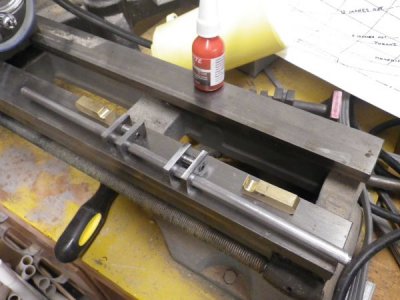
work was for stalled for a few months due to relocation of my workshop,, new shop is a bit smaller but it will have to do,, squared up my castings for the cross-head slippers,, then milled the areas that will ride on the frame slides, both were milled at the same time followed by filing and lapping for a nice fit.. If I hadn't added the DRO's to my little mill this would have taken much longer.. hopefully with the new shop space up and going progress will be a bit better
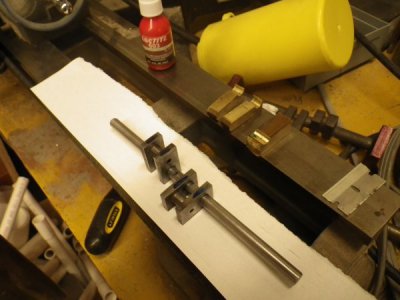
did some drawing and think I have figured out how to make the connecting rods look like the navy engine and not a stuart,, the stock to make the rods arrived, started the built-up crankshaft, I milled up some width gauges to help with getting the webs correctly spaced.. all has been loctited and pinned waiting a few days before grinding, shaping,cutting and filing.. hoping to have the bottem-end of the engine together in a few weeks..