10" LD Utilathe Standard Modern manual.PDF

BrentH

Registered
Registered
Joined
Jan 3, 2020
Messages
62
Hello,

I have attached - or at least tried to, a PDF of the 10" LD Utilathe Operators manual. I have updated the manual and re-typed it out and added a few things to make it as complete as possible. This manual is a hard one to find and typically the 10" is wrapped up with the 12" lathe.

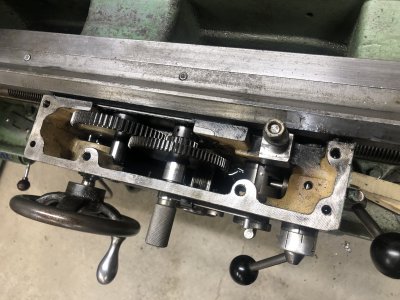
What I have found is that a lot of Utilathes are products of many years of changes and developments and part replacements may actually be parts from other series of lathes. My Utilathe has similar features to that of the 11" series 2000 lathe and I found several overlaps with the 12" LD.

Hopefully this manual will help someone out. I have pretty much disassembled the entire 10" lathe as well as a 9" Utilathe so if you have any questions I may be able to help you out.
 

Attachments

  • 10 INCH UTILATHE Operators Handbook_Revised 2019.pdf
    3.6 MB · Views: 81
Hi Brent' perhaps you can help with my SM 10" machine.
The carriage is able to move without turning the hand wheel. When end facing a piece the carriage moves away from the part. In the parts list, page 22 item 51 lists a "saddle clamp". Is this the only piece that puts pressure on the carriage so as it does not move in its own. You can see the top of the nut in the picture I have attached. Are you expected to tighten the nut on top to a point that there is enough drag that the carriage doesn't move on its own?
I see we are almost neighbors.
Thanks in advance
Stephen
 

Attachments

  • image.jpeg
    image.jpeg
    2 MB · Views: 20
Hi Brent' perhaps you can help with my SM 10" machine.
The carriage is able to move without turning the hand wheel. When end facing a piece the carriage moves away from the part. In the parts list, page 22 item 51 lists a "saddle clamp". Is this the only piece that puts pressure on the carriage so as it does not move in its own. You can see the top of the nut in the picture I have attached. Are you expected to tighten the nut on top to a point that there is enough drag that the carriage doesn't move on its own?
I see we are almost neighbors.
Thanks in advance
Stephen

Hey Stephen,

Yes, that is the point of the nut. Mine is a bolt that pulls up on the square block and locks the carriage. Typically if I am facing things off and it needs to be flat flat I will tighten this up so the carriage cannot move.

When you say the carriage is able to move without turning the handwheel, you mean there is enough play that you can rock the hand wheel? I recently took my apron all apart and found out a few interesting things - the backlash between the handwheel drive gear (27 rack Pinion shaft) and the rack was excessive. When I was threading there was enough of a difference that the handwheel would sort of bump around and the finish was not all that great. I luckily had a newer rack from an old SM 9 that fit perfectly and the backlash was greatly diminished after install.

Also there is a "Gib Plate" ( item 3 on original manual page 13) that can be adjusted to give a better fit between the apron and the lathe bed. You set the gap using the 4 socket head cap screws. I have lots of write up here : https://canadianhobbymetalworkers.c...irs-on-a-10-ld-utilathe-standard-modern.1475/

If you are not having good success locking the carriage with the nut, check to make sure the stud is not stripped and the nut is not tightening up, also check the block to be sure the machined lip is contacting and locking down on the lathe bed lip when you secure the nut.

For fast jobs I was also holding my handwheel with some slight pressure ahead so it could not back off during a face cut.

Yes- we are very close in proximity! Let me know if you run into problems - I have re-built most of the parts for the lathe and have some of the tooling (ACME taps) to redo the cross feed nut and compound nut

Brent
 
The clamp and nut/bolt are in good shape. With the nut loose, I am able to push the carriage along the bed of the lathe without the aid of the hand wheel. It just seems very free to me. Why not put a knob on the bolt of the clamp and be able to adjust the friction more easily if one is to lock the carriage in place when performing parting or end facing operational?
I will read your other articles when I have more time.
 
Does the hand wheel spin when you push the carriage along?

I do not think I can push mine without great effort. If you crank your handwheel does the carriage move?

The gib on the back of the carriage (rear saddle gib) and the gib in the apron (gib plate) should be the adjustment to make sure the carriage is just snug to the lathe bed and allowed to move, but it should not be slip sliding away.

Apron 3.jpg

My original measurements were 0.614 and 0.624. The measurement from the apron to the lathe bed was 0.610. I adjusted to 0.612.

Apron 1.jpg

Apron 2.jpg

Apron 4.jpg

You do not really want the small surface of the carriage lock to be dragging along the bottom lip of the lathe but rather the long length of the Gib to set the clearance.

On the back of the apron is the rear saddle Gib. The nuts that secure this should be a locking type (like a nylock) so you can tighten these up and then loosen a bit to set the clearance to be snug but still moveable. The combination of the Gib Plate and the Rear Saddle Gib should allow to to establish the carriage with some "drag" so to speak and then just use the carriage stop to lock it in position.

Hope that helps?
 
Impressive. Thanks for that. Yes, the hand wheel does turn when I move the carriage along. The whole thing works as it should except for the ease that it moves. It looks like I have to remove the rest or the assembly from the bed in order to make the gib adjustments.
Is this gearbox supposed to be oil filled. I see a plug in the bottom but no site glass or level mark.
 
"Should be" a site glass on the front and it will be about 1/2 full (1 pint)

Apron
 The box construction of the apron completely encloses all moving parts and prevents the entry of dust or dirt.
 The lower half of the apron forms a large oil reservoir in which all the gears run to provide an even distribution
of lubricant.
 Service the apron reservoir through the 1/4” pipe plug in the saddle casting.
 Fill with oil to the centre of the oil sight gauge using an S.A.E. No. 30 oil. The reservoir capacity of the apron is 1
pint. (0.57 Litre)
 The apron oil reservoir should be drained, flushed with kerosene, and refilled with fresh clean oil at least once
every 6 months.
 Two individual oilers service the half-nut and the feed dial.

IMG_3259.jpg

Yes, sadly the one gib is a bit of a bugger to adjust as it is not readily accessible, also it is not mentioned in the manual or adjustment mentioned. I took off my tailstock and brought the whole assembly to the back of the lathe, using a flash light just behind the front of the apron (near the handwheel) you can peer down behind the apron and see what kind of gap you have between the Gib Plate and the lathe bed. Should not see much light if any. The rear saddle gib I Loosened off just until things were running smoothly. You can get this set up with the apron removed - slide the saddle back and forth while adjusting the nuts for a better fit. It should slide but take a bit of force to do so. You should be able to take off the site glass (3 screws) and clean it with some light oil like WD40 or kerosene to dissolve the gunk and make it readable.
 
Things are starting to make a little more sense now that I know a little more what I am looking for. The front gib has not been close to the bottom of the bed for a very long time. When I Put the saddle back on and set a couple of screws back in to hold it to the apron, I can lift the thing off the bed a good 1/16. Maybe a reason for my inability to get any sort of a finish.
Now the next step, how do I remove the apron? It appears both the lead screw and feed rod come off with it but how do they come off from the feed gear box? Do I knock the two shear pins out and then just pull them from the couplings?
Thanks
 
Yes, so that is the easiest way to to pull the assembly off. be sure to support the apron so it cannot drop off and bend anything. Tap out the two pins each holding the lead and feed. They are tapered so be sure you get the correct direction. I then advance the apron assembly closest to the front of the lathe (where you disconnected the shafts) Support things as you go. Take out the screws for the end bearing of the lead and feed screws and you should be able to tap off the bearing bracket. It is pinned in place.

If you have two people you can release the apron from the saddle and then tap off the end bearing. With one person, loosen the apron screws and then tap off the bearing and remove it from the ends of the lead and feed screws - pull off the whole apron with the lead and feed screws. There should be enough flex to get the bearing off over the 2 locating pins without damaging anything.
 
I managed to get the apron assembly off the machine. It did not come off without a fight. Someone had been into the coupling of the feed rod before I got there and I suspect the shear pin was bent.


The gap from the top of the apron to the gib was in the .640" range , I measured the saddle to bottom of the bed at .616"
image.jpeg

The bevel gear on the back of the Apron is in the same shape as yours. Were you able to find a replacement?
image.jpeg

The oil level sight glass, or lack of, is a plastic plug with silicon sealer filled in the back.
image.jpegimage.jpeg

I got the thing back together and have a couple of issues.
1) the carriage now moves with some friction, until it gets towards the right side of the bed and then binds. I measured the gap closer to the headstock. Is it possible the bed is worn enough end to end to cause this. I could adjust the gib so as it has more clearance on the one end.

2) the cross slide feed now only works if I pull the Feed Selection Plunger and hold it in place. Guess I have to pull the apron back off again.
Thanks for you help on this. You never really know a piece of equipment until you take it apart.
My father told me years ago, "the first lesson in creative tinkering is to save all the pieces"
 
Back
Top