
My 9A is an early 1947, with the South Bend cast into the bed webs, and there are no clamps. It is very much "through bolted" as you guys are describing. I don't know the reasoning, it may or may not be a good way to have done it. By all appearances though, and after examining all the evidence, it seems to be plenty good enough.

-
Welcome back Guest! Did you know you can mentor other members here at H-M? If not, please check out our Relaunch of Hobby Machinist Mentoring Program!
You are using an out of date browser. It may not display this or other websites correctly.
You should upgrade or use an alternative browser.
You should upgrade or use an alternative browser.
$150 South Bend 9B
- Thread starter Aaron David
- Start date
- Joined
- May 16, 2016
- Messages
- 190
OK, now, after hearing from other '47 owners, I will leave it the way it is. I always prefer to go back to original when I can.
- Joined
- May 16, 2016
- Messages
- 190
This mornings work:
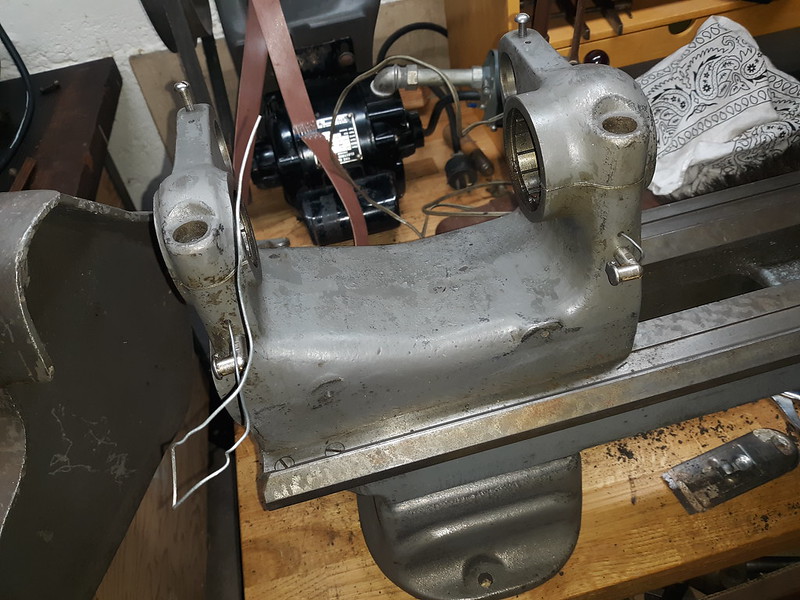
I installed/test fit the new headstock felts and per the book, used wire to hold them down for the installation of the spindle. Also, got the front of the bed cleaned:
hard to see in that pic, but I got a little too aggressive cleaning off the old grease and muck. Stripped off the top layer of paint on the left side. Oh well, can't be perfect at everything.
Also, see if you can spot the mistake I made in the photo.
Last edited:
- Joined
- Dec 30, 2022
- Messages
- 40
Your gits oilers are turned sideways?Also, see if you can spot the mistake I made in the photo.
")
Just kidding, I don't see the mistake.
Do yourself a favor though and make a note to pull the belt over the spindle before you push it all the way through. I've made that mistake too many times
- Joined
- Dec 9, 2021
- Messages
- 723
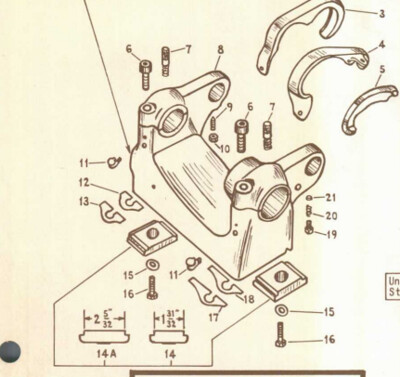
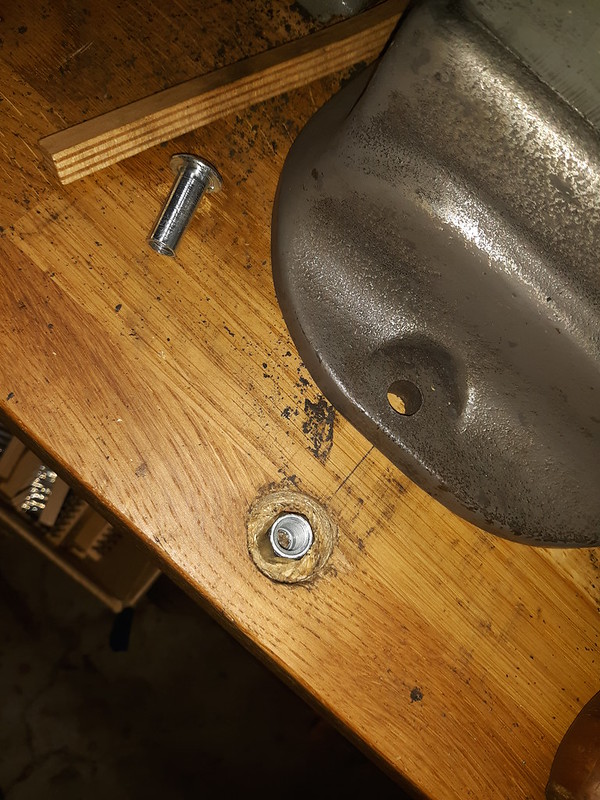
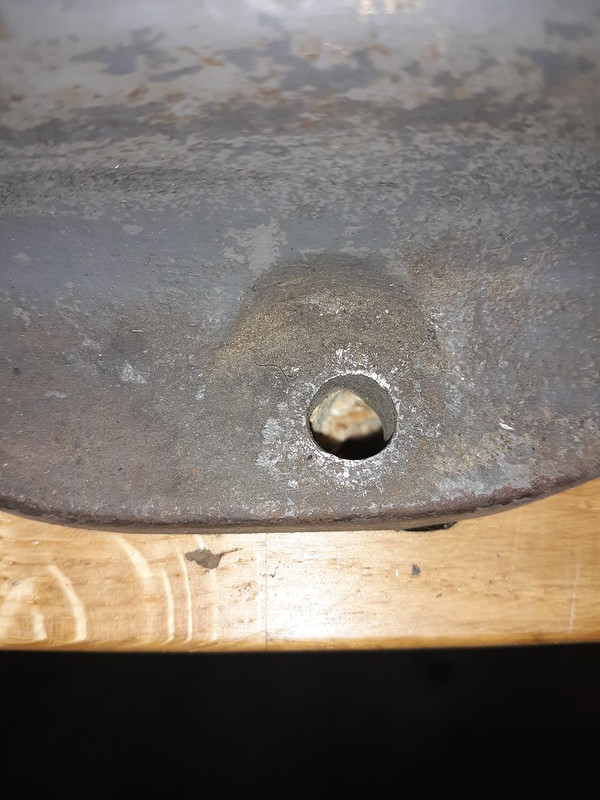
If you have the dimensions we can knock that out pretty quickly. Let me know if you want to do that.Going through the lathe and cleaning while fixing the few issues that I have found, I realized that, while I thought I misplaced them, my lathe did not come to me with headstock clamp pads, #14 in this picture:
I ordered some on eBay, but no matter how I tried to explain to the seller, he could not give me a good measurement of the distance across the machined surfaces. So, what I got were, of course, too wide for my vintage of 9". And I have not found another pair that I think might work.
My lathe had the headstock clamped against the through holes, which I don't think is great as it could lead to a cracked bed. At this point my plan is to use a friends mill (hi Provincial!) and shorten these two to the correct dimensions. I can't think of any reason not to do it this way, but if someone has a different idea, I would love to hear it.
EDIT: It looks like I can get these cleaned up enough with my little Unimat, so I should be good to go here pretty quick. I think that they aren't the wrong size so much as bunged up enough to hinder things.
- Joined
- May 16, 2016
- Messages
- 190
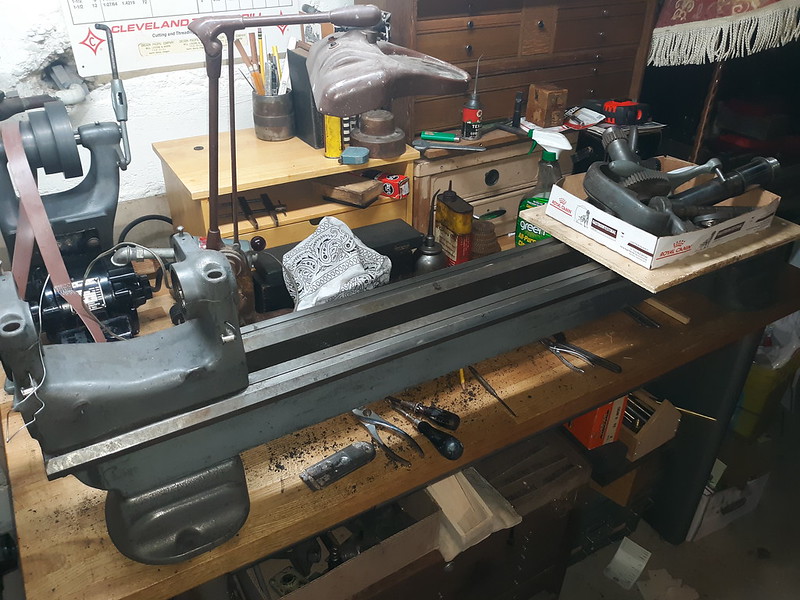
Ok, I was finally able to get some time carved out, and get a few things done on the lathe the last few days. I hate that feeling of stalled projects, so it was good to get a few things done. Earlier, I asked if anyone noticed the mistake I had made. Well, no one chimed in with an answer, so I guess I must show everyone.
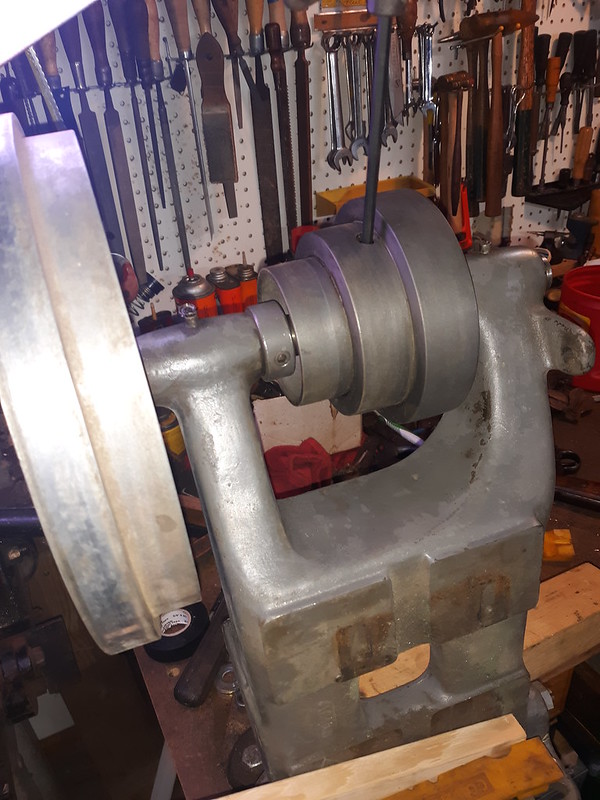
Here is the jack shaft after I had first reassembled it. Notice were the cone pully is and which direction it is oriented towards?
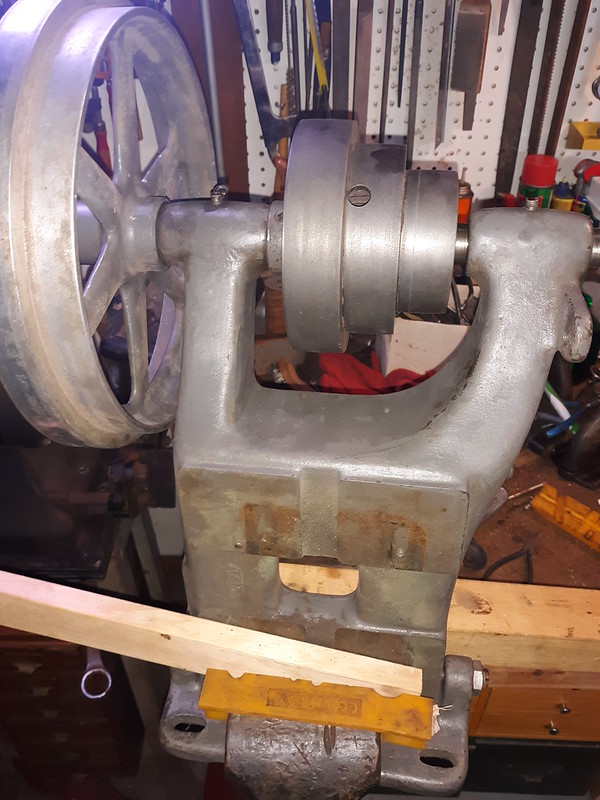
And now it is oriented correctly. I don't like rework, but I like to make sure it is fixed as soon as possible. Better now than latter.
I was also able to tie the lathe at the headstock into the table with a coupler nut, and this should increase the rigidity even more.
Of course, the tailstock end is 3/4" short of perfect. Be better, 1940's South Bend!
I also wired the drum switch, and as soon as I know the length I want the control cable to be, I will wire in the 1/2hp motor. Mostly, I want to use the 45" laced belt I have, and I hope I can get it to work, although it will be tight. Here is the current rough stance of the drive end

Here is the jack shaft after I had first reassembled it. Notice were the cone pully is and which direction it is oriented towards?
And now it is oriented correctly. I don't like rework, but I like to make sure it is fixed as soon as possible. Better now than latter.
I was also able to tie the lathe at the headstock into the table with a coupler nut, and this should increase the rigidity even more.
Of course, the tailstock end is 3/4" short of perfect. Be better, 1940's South Bend!
I also wired the drum switch, and as soon as I know the length I want the control cable to be, I will wire in the 1/2hp motor. Mostly, I want to use the 45" laced belt I have, and I hope I can get it to work, although it will be tight. Here is the current rough stance of the drive end
- Joined
- May 16, 2016
- Messages
- 190
Finally got some shop time in, and not just moving things from one side to the other. I spent time getting the control wiring for the drum switch the way I like them:

New wire in place
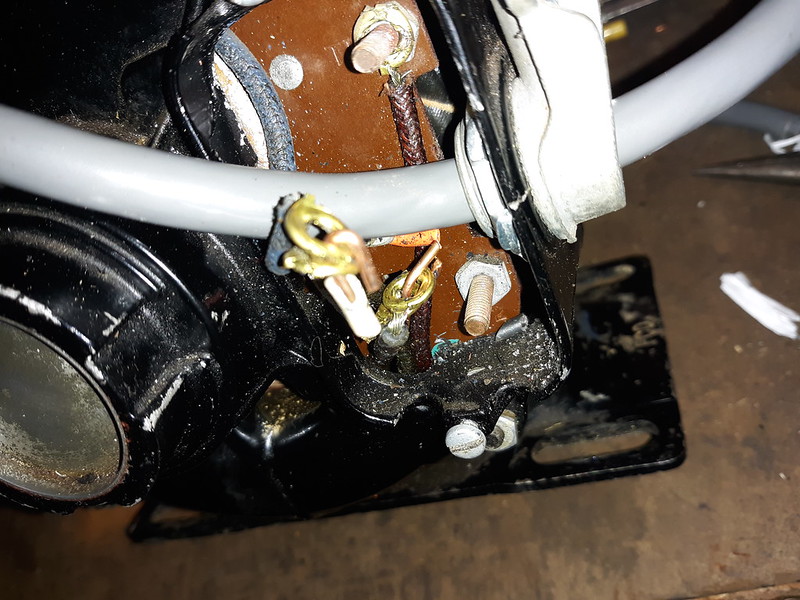
not too happy with the old wiring methods, but no matter, they are gone now.
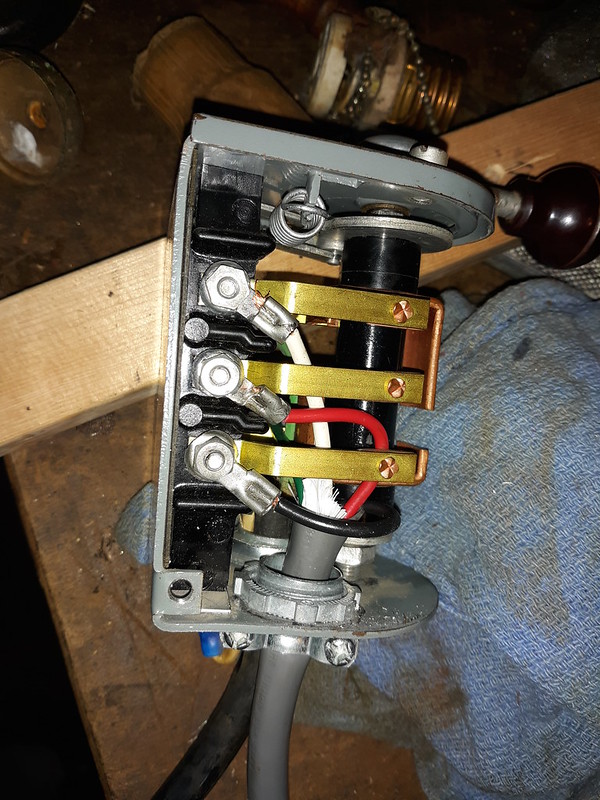
Drum switch wired using the pattern the that it was wired before.
And it only switches in one direction. I am guessing that the former owner wanted it that way, as I spent the day looking at wiring diagrams and this isn't correct for actual reversing. It seems to need a jumper between the second and third terminals. Easy enough to fix, but it was a bit of a time waste today. It did feel good to be at the bench though, as opposed to doing house work.
New wire in place
not too happy with the old wiring methods, but no matter, they are gone now.
Drum switch wired using the pattern the that it was wired before.
And it only switches in one direction. I am guessing that the former owner wanted it that way, as I spent the day looking at wiring diagrams and this isn't correct for actual reversing. It seems to need a jumper between the second and third terminals. Easy enough to fix, but it was a bit of a time waste today. It did feel good to be at the bench though, as opposed to doing house work.
- Joined
- Sep 22, 2019
- Messages
- 938
YEAH BUDDY!Nice machine for $150

To a high degree at that!!
- Joined
- May 16, 2016
- Messages
- 190
I have done one before, on my old lathe, and it really isn't that hard. I figured that, as this motor came with a drum switch when I bought it, albeit on a 8" lead, that it was wired correctly. But, I should have checked first, so it is on me.I have not tackled my drum switch wiring... right now, not matter where I switch it to, it rotates in one direction... On my list of things to fix on my Logan, but afraid to do so...