- Joined
- Apr 21, 2015
- Messages
- 581
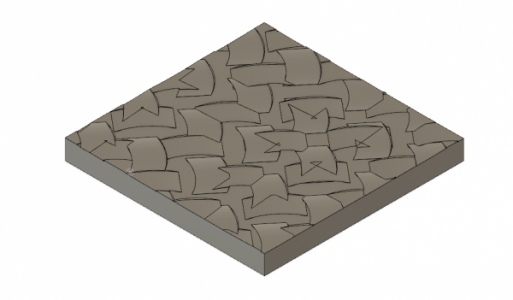
In my never ending quest to understand more about hand scraping, I decided to create a somewhat crude but instructive model of the process. Not sure if I've learned anything new from the model, but I thought others might find the pretty pictures interesting. (laugh)
The scraper blade has a radius, typically 60-90mm. It also has a negative rake angle of about 5-10 degrees:
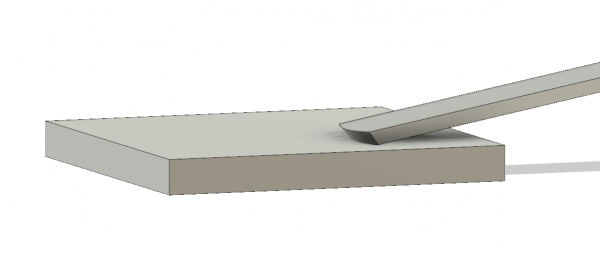
This isn't a precise model, it's just for illustration and reasoning about the process (in particular, I'm trying to think about how to increase the bearing percentage vs. the number of points per inch). The radius, rake-angle, etc. aren't modeled exactly. In practice, you'd normally grind the rake bevel on both sides of the blade for convenience (just flip the blade when it gets dull).
The blade and scraper assembly has some flex/give. Fine scraping is easiest with the longer biax-style blades because they have more flex. The shorter blades are best for flaking where you want to create deep grooves.
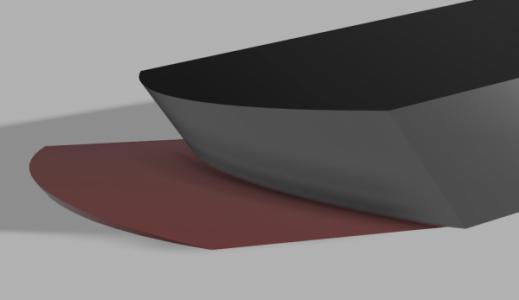
Anyway, when the blade meets the surface of the part, the blade is pushed forward and it creates a furrow or groove in the surface of the part:
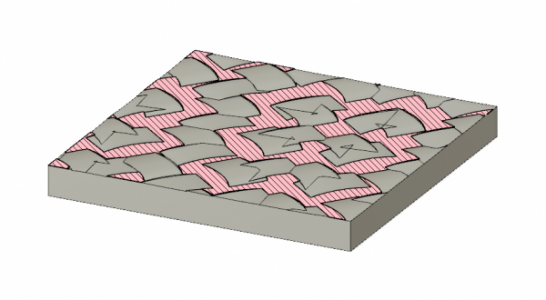
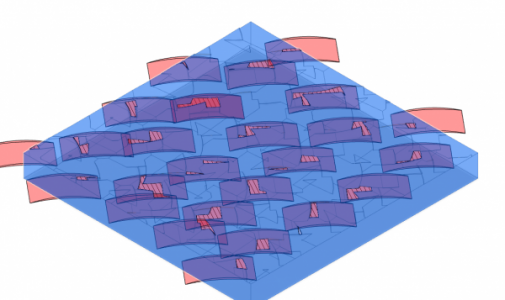
Once you've ground down the very highest areas and got the part relatively flat (with about every square inch showing at least 5 points of bearing or so) you lay down a grid of scrape marks on the surface:
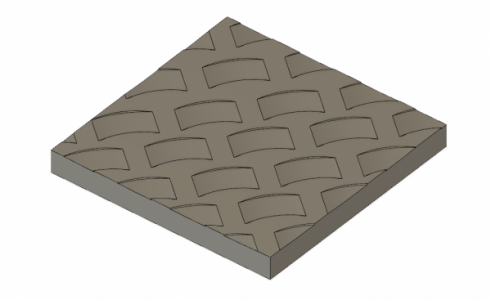
Unlike what this simple model shows, you'd normally have the scrapes longer than wide. As shown, you want to strive for equal spacing both side-to-side, as well as between rows (fore and aft). Unlike what's shown, you want the space between the scrapes (in both directions) to be about the same as the scrape marks themselves.
At the start of the cut, as the blade is pushed forward it cuts into the surface of the part and starts removing metal. If you maintain a constant downward force on the scraper, the pressure between the flexed blade and the hardness of the part soon equalizes so the depth of the furrow stays fairly constant.
At the end of the stroke (the top of the image) material piles up and forms a burr that you'll need to stone off. I've not modeled the burr, but here is what they look like in the real world on cast iron:
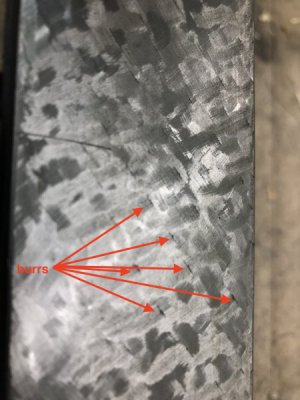
If you run your fingers lightly over the surface, you'll feel these burrs quite easily, and your fingernails will catch on them. It's very, very important that you stone off all of them every single time you complete a pass. Not only will they throw off your results and create confusing markups, they will also scratch up a granite surface plate surprisingly easily.
The other thing to note about the arrays of scrape marks is that you want to stagger them. This isn't something you need to pay too much conscious attention to as human variability inevitably causes each row to start in different locations, but it's worth knowing what you don't want:
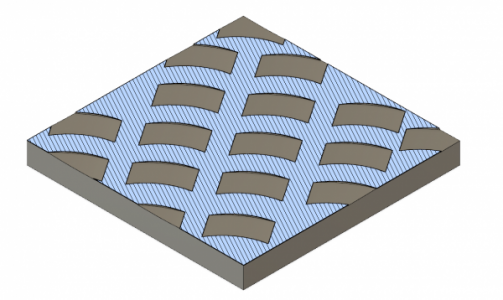
Don't do this! If you ever notice "rivers" forming like this, you're doing it wrong. Try to stagger each row (in practice it's harder to create the bad example, but I goofed when I cloned the scrape marks in my model and thought I'd point it out).
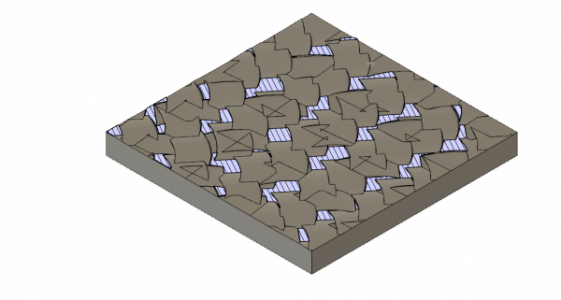
The scrape marks are normally angled at roughly 45 degrees from one side of the part. Then next pass of scraping rows then proceeds angled from the other side (90 degrees from the first pass):
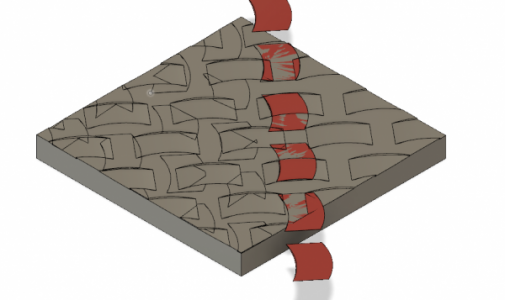
[To be continued]
The scraper blade has a radius, typically 60-90mm. It also has a negative rake angle of about 5-10 degrees:

This isn't a precise model, it's just for illustration and reasoning about the process (in particular, I'm trying to think about how to increase the bearing percentage vs. the number of points per inch). The radius, rake-angle, etc. aren't modeled exactly. In practice, you'd normally grind the rake bevel on both sides of the blade for convenience (just flip the blade when it gets dull).
The blade and scraper assembly has some flex/give. Fine scraping is easiest with the longer biax-style blades because they have more flex. The shorter blades are best for flaking where you want to create deep grooves.
Anyway, when the blade meets the surface of the part, the blade is pushed forward and it creates a furrow or groove in the surface of the part:

Once you've ground down the very highest areas and got the part relatively flat (with about every square inch showing at least 5 points of bearing or so) you lay down a grid of scrape marks on the surface:

Unlike what this simple model shows, you'd normally have the scrapes longer than wide. As shown, you want to strive for equal spacing both side-to-side, as well as between rows (fore and aft). Unlike what's shown, you want the space between the scrapes (in both directions) to be about the same as the scrape marks themselves.
At the start of the cut, as the blade is pushed forward it cuts into the surface of the part and starts removing metal. If you maintain a constant downward force on the scraper, the pressure between the flexed blade and the hardness of the part soon equalizes so the depth of the furrow stays fairly constant.
At the end of the stroke (the top of the image) material piles up and forms a burr that you'll need to stone off. I've not modeled the burr, but here is what they look like in the real world on cast iron:

If you run your fingers lightly over the surface, you'll feel these burrs quite easily, and your fingernails will catch on them. It's very, very important that you stone off all of them every single time you complete a pass. Not only will they throw off your results and create confusing markups, they will also scratch up a granite surface plate surprisingly easily.
The other thing to note about the arrays of scrape marks is that you want to stagger them. This isn't something you need to pay too much conscious attention to as human variability inevitably causes each row to start in different locations, but it's worth knowing what you don't want:

Don't do this! If you ever notice "rivers" forming like this, you're doing it wrong. Try to stagger each row (in practice it's harder to create the bad example, but I goofed when I cloned the scrape marks in my model and thought I'd point it out).
The scrape marks are normally angled at roughly 45 degrees from one side of the part. Then next pass of scraping rows then proceeds angled from the other side (90 degrees from the first pass):

[To be continued]


