8 x 12" HF lathe 3 Jaws chuck runout adjustment

kreutz

Active User
Registered
Joined
Dec 25, 2011
Messages
30
I recently acquired a used HF 8" x 12" lathe. It was like new. I disassembled the whole lathe into small assemblies in order to move it from the trunk of the car into my shop. After complete cleanup (it still had the factory shipping grease) I began to adjust it following tips from this and many other sites on the internet. My knowledge about machinery is almost null, took shop classes in High School about 40 years ago, so what is a big issue for me might be trivial to anyone else.

The original 5" 3 jaws chuck's runout, measured on a 1/2" drill rod, 1/4" from the chuck, was 6 mils. I took out the chuck, cleaned and oiled it. Installed it again (3 times) rotating the position of the chuck, respective to the spindle, each time (while measuring also measuring runout on each position) and found out that one of the positions was more favorable (measured runout approx. 4 mils). Marked the position with permanent marker on both the chuck and the spindle. Started looking for standard runout values for this kind of chuck and some people said that 2-3 mils could be considered OK, so I was not happy with my 4 mils runout.

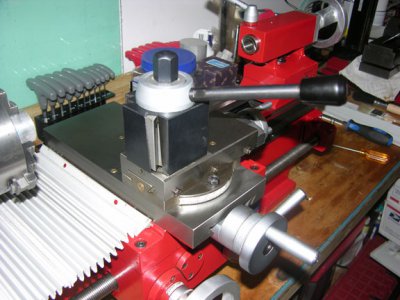
I know that between the shoulder on the spindle and the boss on the chuck there is a few mils space, so I left the drill rod installed on the chuck, installed a carrier on the AXA toolpost and grabbed the rod on the free end with the carrier (by moving z and x for centering and the adjusting carrier's height with the adjustment nut) the setting screws on the carrier were not tightened. I rotated the chuck and found the minimum height of the rod. Marked the position on top of the chuck and tightened the setting screws on the carrier.

Now I loosened the 3 chuck holding screws (slightly), repositioned the mark on top and elevated the rod-chuck assembly approx. 2 mils by turning the axa carrier's adjustment nut, re-tightened the chuck and tested for runout. New measured runout is approx. 1 mil.

This procedure took about 25 minutes.

Best regards,

kreutz
 
Last edited:
Nice work. I'm not familiar with the construction of that chuck. Would it be possible to add setscrews to help with maintaining that optimum position? If the backplate is set into a recess, you should be able to do it.
 
Nice work. I'm not familiar with the construction of that chuck. Would it be possible to add setscrews to help with maintaining that optimum position? If the backplate is set into a recess, you should be able to do it.

I wil try to get a camera in order to show the chuck and spindle construction. I can't figure out a way to add set screws... the alignment procedure is fairly simple and now that is done it will be faster next time.

Regards,

kreutz
 
Last edited:
Hi,

I have the same lathe and I really like it. Very accurate and solid to work with. That little locating flange only sticks out about 1/8" from the spindle face. And has a pretty healthy under-cut. So I wouldn't try to be pushing on the edge of it with screws of any kind. You roll that edge, and you won't be able to get a chuck to fit properly again. At least not without some filing of burrs, (never a good thing in that spot).

There can be a few things that can cause excessive run-out with any 3-jaw chuck. A good clean and true mount is a good place to start. And if you think you have the best holes picked out, I would center punch the edge of the spindle face and the chuck. Permant marks are best for this.

Other things than can affect the trueness may be the jaws. How you put a part into them and how you tighten them can greatly affect accuracy. And every chuck is a bit different. You may find using one hole to tighten the chuck gives best results. And most 3-jaw chucks tend to favor one wrench hole over the others for best accuracy. Or you may need to tighten all three a bit, I know mine does.

I personally don't get too worked up over how accurate a 3-jaw might be. Mine has about .003" run-out on average. And I've used far worse. I'd be satisfied with your chuck's run-out. And if I needed better, I'd switch to a 4-jaw independent or work between centers. Just keep in mind that these chucks are maybe $50- $60 chucks at retail, (and perhaps only $20 wholesale),. They will never compare for accuracy and repeatability with a $1500 chuck.:biggrin:

Enjoy your HF8x14, in my opinion it's one of the best of the new Chinese benchtops you can buy these days.

dalee

I am enjoying it while I learn, made a couple of small modifications already.

Today I used it to make a couple of 1/2" to 1" adapters for my new grinding wheels (norton white aluminum oxide 80 grit and 120 grit respectively). I will use the grinder to grind my HSS tool bits, it is an old taiwanese 1/3 HP 3600 rpms. As soon as I replaced the old wheels it started running around the workbench, making new bushings did the trick.

Thanks,

kreutz
 
My 7X had a good bit of run out when I first brought it home and assembled it. One of the things I did to eliminate some of it was to run a very thin pass across the chuck backing plate especially at the edge of the raised lip and it helped a good bit. I installed an A2Z QCTP and made a few holders for various tools and did some of the other improvements mentioned on the Yahoo 7X lathe group and it has really come alive. I have added the quick release tailstock lever and a stop to prevent chuck and tool crashes as well as modified the "salad bar" safety shield to allow use closer in to the chuck. I also fitted a spring onto my chuck key to prevent my stupidity from causing a thrown key if I forgot to remove it and turned on the lathe. I really like the 93212 7X10 but wish I had waited for the 8X12(14) to be available. Oh well live and learn, and it gives me good reason to "need" another larger lathe. I am thinkin 12X36 if money ever permits. Being on Medical retirement really cramps your wallet. Regards
Bob

One of the first steps I took was to check the spindle for runout, if present I cannot measure it with my indicator. I also installed an AXA QCTP and added a spring to the chuck's key as you did, just in case... Also added a spring to the tailstock's shoe in order to make less painful releasing the lock before moving it back and forth (used valve lapping compound to the under the ways sliding tracks in order to make it slide smoothly and finished with a finer grit polishing compound). I plan to modify the tailstock in order to make a cam driven locking mechanism in the near future.

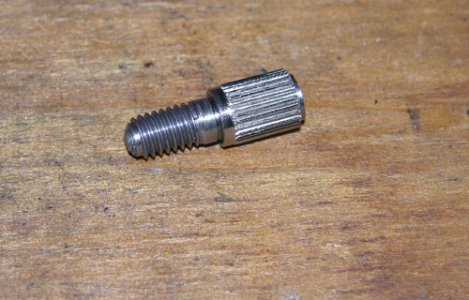
I also have been planning to post some photos but didn't have my digital camera back until late this afternoon. One of the first parts I turned were a couple of screws to replace the belt changer's cover locking and the rear spindle cover screws. Parting was a problem back then so they are not that pretty but now I don't need a screwdriver anymore for those tasks.

Best regards,

kreutz.
 
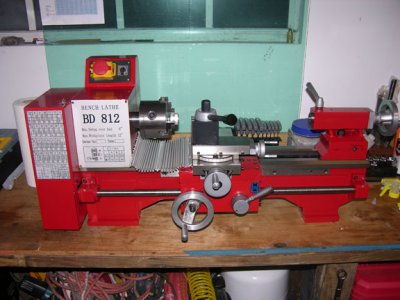
lathe_8x12.jpg

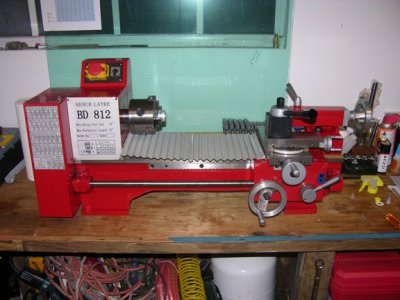
My 8 x 12 lathe. The thread indicator is not installed.

lathe_8x12.jpg
 
screw2.jpg

My first turning test. Since I didn't have a parting blade at the time the top side is really ugly...:(

screw2.jpg
 
Back
Top