- Joined
- Dec 29, 2012
- Messages
- 394
Some 15 years ago a relative of mine gave me a broken air compressor for parts.
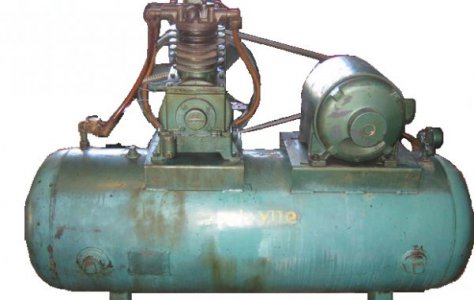
It was a small unit (0.5 HP motor) with separate motor and compressor over the air tank unit similar to the following (internet) photo.
I used the air tank right away, as I had an all-in-one model with a small air tank. As at the time my only tools were a drill, a hammer and some spanners, I threw the compressor and the motor in a box put them deep in the basement and forgot it.
Last weekend I was cleaning the basement and planned to throw away stuff to make some space. When I opened the box and saw the compressor and the motor I thought: I CAN FIX IT!!
Needless to say cleaning stopped instantly!
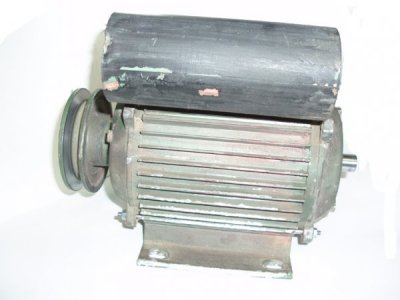
After a thorough visual inspection & some continuity measurements, I connected the motor to the mains (220V over here) and it worked ok with some bearing noise though.
Next thing the compressor.
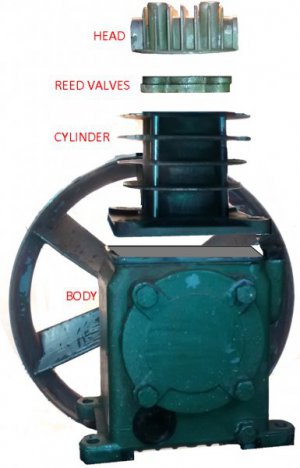
The compressors consists of 4 parts:
Body, cylinder, reed valves and head.
The main problem with the compressor was the cylinder.
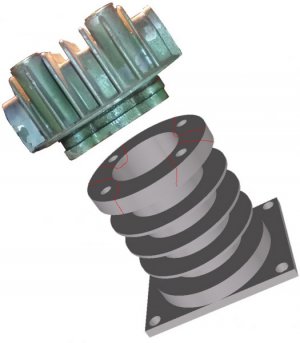
As the head was bolted on the top part of the cylinder and probably due to air leaks previous user over tighten the head bolts and broke the cylinder top. The cylinder top was full of cracks (red to the following sketch)…
To find a part for a 30+ years old no-name compressor is out of question, so it is time for a quick, easy and long lasting solution…
The problem of the cylinder is on the top part where the piston compresses the air and great forces, heat and tremendous pressure applies to the cylinder…
I was holding the cylinder and squeezing my brain for a solution to the problem for some time.
Can I weld it?
It is cast iron and I’m not sure I can do it.
Can I machine a new one?
Too much trouble for an old compressor. I’d rather clean the basement twice!
I slept on the problem and next morning the solution came while I was finishing my cup of coffee. As I lifted the cup to drink the last drops of coffee I solved it!
I WILL REVERSE THE CYLINDER!! with the square side to the top and I will add a plate to the bottom.
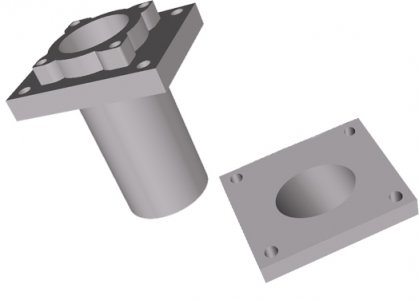
In the shop in no time. Measuring, looking for parts, bolts and gasket material…
A few details needed sorting out though. As the bottom of the “reversed” cylinder had cracks all around it would be impossible to seal it or to support it properly. It needed to be removed!
Cylinder to the lathe cleaning the broken part and adding an aluminum ring to keep the proper stroke distance.
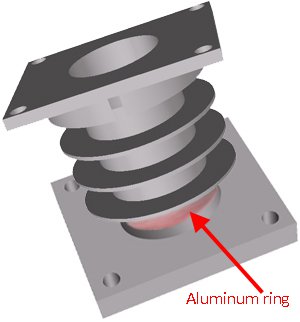
After a couple of hours the results were very satisfying
I made the Bottom plate for the cylinder that will connect directly with the head using long bolts (you can see the round bolt heads)
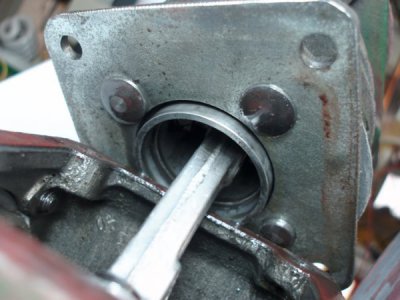
I machined the ring that press fits the bottom of the cylinder (you can see the bolts that connect plate and head also)
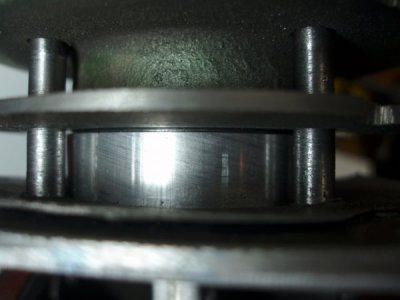
The inside-view of the ring below the piston (7.2 mm internal width 13.1 external)
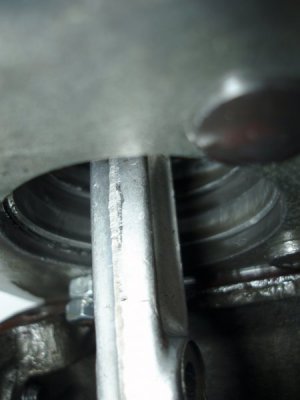
Gaskets below plate (red) and between ring and plate (gray)
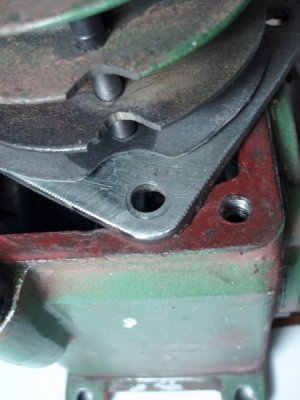
At the top of the cylinder there was a need for a gasket between reed valves and the cylinder top.
The best material I could think of was copper. So I annealed a piece of copper to make it soft and I cut the gasket.
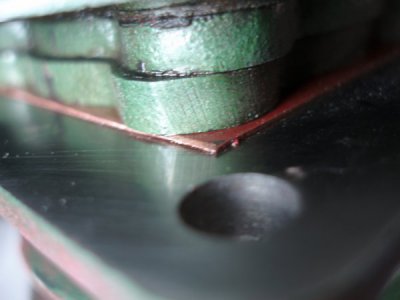
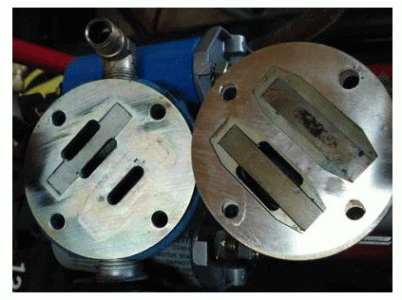
Trying to remedy the initial problem that caused the whole issue (i.e. the possible air leak at the head of the compressor), I used my surface plate and cleaned both surfaces of the reed valves using 600 and 1000 grit sand paper . Sorry, I was too busy and focused to take photos, my reeds are similar to those (internet photo)
Final compressor unit assembly
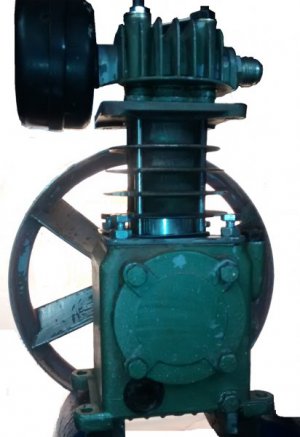
And ready to be tested with it's 0.5 HP motor!
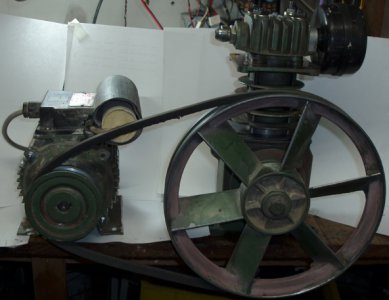
IT RUNS FLAWLESLY
Thanks for reading
Petros
It was a small unit (0.5 HP motor) with separate motor and compressor over the air tank unit similar to the following (internet) photo.

I used the air tank right away, as I had an all-in-one model with a small air tank. As at the time my only tools were a drill, a hammer and some spanners, I threw the compressor and the motor in a box put them deep in the basement and forgot it.
Last weekend I was cleaning the basement and planned to throw away stuff to make some space. When I opened the box and saw the compressor and the motor I thought: I CAN FIX IT!!
Needless to say cleaning stopped instantly!
After a thorough visual inspection & some continuity measurements, I connected the motor to the mains (220V over here) and it worked ok with some bearing noise though.

Next thing the compressor.
The compressors consists of 4 parts:
Body, cylinder, reed valves and head.

The main problem with the compressor was the cylinder.
As the head was bolted on the top part of the cylinder and probably due to air leaks previous user over tighten the head bolts and broke the cylinder top. The cylinder top was full of cracks (red to the following sketch)…

To find a part for a 30+ years old no-name compressor is out of question, so it is time for a quick, easy and long lasting solution…
The problem of the cylinder is on the top part where the piston compresses the air and great forces, heat and tremendous pressure applies to the cylinder…
I was holding the cylinder and squeezing my brain for a solution to the problem for some time.
Can I weld it?
It is cast iron and I’m not sure I can do it.
Can I machine a new one?
Too much trouble for an old compressor. I’d rather clean the basement twice!
I slept on the problem and next morning the solution came while I was finishing my cup of coffee. As I lifted the cup to drink the last drops of coffee I solved it!
I WILL REVERSE THE CYLINDER!! with the square side to the top and I will add a plate to the bottom.

In the shop in no time. Measuring, looking for parts, bolts and gasket material…
A few details needed sorting out though. As the bottom of the “reversed” cylinder had cracks all around it would be impossible to seal it or to support it properly. It needed to be removed!
Cylinder to the lathe cleaning the broken part and adding an aluminum ring to keep the proper stroke distance.

After a couple of hours the results were very satisfying
I made the Bottom plate for the cylinder that will connect directly with the head using long bolts (you can see the round bolt heads)

I machined the ring that press fits the bottom of the cylinder (you can see the bolts that connect plate and head also)

The inside-view of the ring below the piston (7.2 mm internal width 13.1 external)

Gaskets below plate (red) and between ring and plate (gray)

At the top of the cylinder there was a need for a gasket between reed valves and the cylinder top.
The best material I could think of was copper. So I annealed a piece of copper to make it soft and I cut the gasket.

Trying to remedy the initial problem that caused the whole issue (i.e. the possible air leak at the head of the compressor), I used my surface plate and cleaned both surfaces of the reed valves using 600 and 1000 grit sand paper . Sorry, I was too busy and focused to take photos, my reeds are similar to those (internet photo)

Final compressor unit assembly

And ready to be tested with it's 0.5 HP motor!

IT RUNS FLAWLESLY
Thanks for reading
Petros

