Another Anodising query - sorry

torxx

Registered
Registered
Joined
Jul 25, 2019
Messages
17
Hi All,
Bit long winded so kindly bear with me.

Bought anodising kit from reputable company and set-up to the letter. Only difference I made was I bought a proper power supply from Amazon.
Ok, piece part area calculated as 0.084 sq ft / 12.09 sq inchs and using 720 calculator I determined 0.5 amps/15v for 120minutes.
Part thoroughly de-greased and etched for 30 secs in Sodium Hydroxide solution, then rinsed in de-ionised water. Part suspended with 3mm aluminium wire and cooked as described, then again rinsed in de-io.

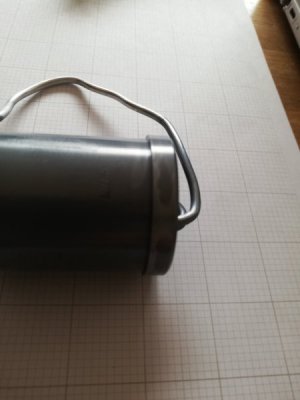
Black dye heated to 40°C and part immersed for 20mins but straight away I can tell the dye is not taking as I'd like. Here my friends lies the problem I just can't get the part as black as night. What am I doing wrong? This is the 5th attempt and I just can't get the parts any darker than a light grey? I also notice there are some lighter patches which I cant explain as I didnt handle this at all between procedures?
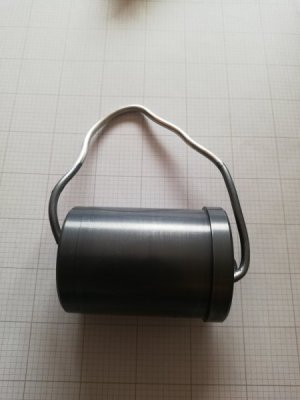
2019-07-27 12.34.35.jpg

2019-07-27 12.34.50.jpg

Can somebody please advise your help would be invaluable and greatly appreciated. Many thanks in advance
 
I'm not an expert on dyed anodizing as my attempt ended up much like yours. I believe where I went wrong was heating the dye solution. The heat closes the pores in the anodize before the dye has a chance to penetrate thoroughly. After my failed attempt, I didn't pursue it any further.

As to the splotches, aluminum can be very tricky that way. I found that mechanical scrubbing in the prewash and desmutting steps was effective. In my case, I had a matte finish so I used a fine bristled stainless steel brush. I did quite a bit of clear anodizing as a protective coating with success.

FWIW, we had sent parts out to an anodizing shop for a deep black anodize. Thge coating was photosensitive and where exposed to sunlight, the coating faded to a rose color so even the professionals get it wrong sometimes. Their explanation was a bad dye batch.

Another thing that we discovered was in our laboratory environment, the chemicals used would eat the coating. We sprayed with a urethane clear coat. I got several of these scrapped plates which I use for stock. Before cutting or machining, I like the strip the anodize coating and I have found no chemicals to date that will remove the urethane. I have the scrape it off with a razor blade so I can dissolve the anodizing beneath it.

I will be interested in the results of your efforts. Please keep us posted.
 
Hi RJ,

Very interesting thank you. I have another part anodising as we speak, this time I will indeed try without heating the dye.

Results to follow.......
 
Your aluminum wire it is suspended from may be taking the anodizing and once it does the electrical connection is lost or reduced. At that point it doesn't matter much how long you leave it in there nothing is happening.
Also I started wrapping the suspension wire around the aluminum rod I was suspending from and also adding an alligator clip to help it make connection there.

You should be able to see the bubbling action of the anodizing happening, if not it's not working.
You can always increase the voltage if it appears the connection is failing and the process is stopping.

Definitely heat the dye, and watch the anodizing acid temp it should be cool.
 
Hi rgray,

I'm convinced it's the connection thats the problem here tbh. I noticed at first the bubbles are clearly visible but as time goes by they get less and less.
Any good tips on attaching the part would be greatly appreciated.
 
Some of the parts I do have a threaded hole. I build threaded aluminum rods to tighten into them. Then I stainless lockwire that rod to the overhead aluminum rod and then add the alligator clip.

Aluminum wire sucks, but is necessary if it's going in the acid.

Often times there are areas you don't want or need colored. Like your bushing if the inside was not colored would it matter? If not shove it on an aluminum rod that is long enough to wire and clip to your overhead rod.

Size of the center hole will change slightly smaller with anodizing. Also anodized aluminum is aluminum oxide (think grinding wheel) so you may not want the inside of a spacer/bushing that aggressive.
 
It could be a number of things.
What alloy of aluminum are you using, there are some that do not take anodizing well.

Are you doing a desmuting step?

where your suspension wire is making contact with the part you have to have a very good contact, Anodize is an electrical insulator. As the part starts to anodize it will insulate its self from the wire. If the part has a through hole put some S bends in the wire so that it is making contact in as many places as possible. it also helps if the part can not move on the wire. If the part is moving on the wire then it is easier for the anodize to get between the wire and the part to break the connection.

Heat is used to seal the pores of the anodize after they are filled with dye, You want the dye warm but not hot, you have to keep the pores open to allow the dye to fill them before you do the sealing step.

There are many dyes that will fade in direct sunlight, it is not an issue with your process, it is just an issue with the dye itself.

Remember that anodize will make your part bigger. Anodize converts some of the aluminum to the coating. If you anodize to .002 thick the part will measure .001 bigger as the process will have converted .001 of aluminum into anodize. This is all per surface. If you later strip the anodize to try again the part will be .001 smaller that where it started from. Something to keep in mind if the part has precision fits.
 
I noticed at first the bubbles are clearly visible but as time goes by they get less and less.

This is normal as anodized aluminum is non-conductive.
Problem is if it loses connection early then anodizing stops.
 
Thanks guys all good points and I've learned a lot from this first post as I'd hoped.

Great to reach out to people with experience and hopefully answers to my problems. Very frustrating as I'm so close I can taste it and as I said my first piece came out amazing! I will persevere and I will succeed and I will keep you up to date on my progress.

RJSakowski - I tried dyeing at room temp and it made no difference so we move on to next trial lol

Regards,

Torxx
 
titanium wire is better to hang the parts with - you can reuse it over and over with no need to strip it in sodium hydroxide before use.

did you base your SA value on the ID as well as OD? The speed/ current density with which you annodise a part affects the pore size - I think it's higher current = larger pores and vice versa. May be worth double checking your sums and playing around with the values.

I don't bother with a sodium hydroxide dip generally, unless I want a matt finish or the piece already had an oxide layer.

did your part pass the water break test?

did it turn slightly golden/ yellow coloured in the annodising bath? That's a good visual sign that the annodising went properly.

did you use distilled water for all steps and dilutions? Did you rinse the part off with distilled water between the ano bath and the dye bath?

dye should be heated to 160F

what type of aluminium is it? 6061 I'm guessing, but if it's one of the more copper rich alloys (2000 series?) you'll have problems with smut.
 
Back
Top