

-
Welcome back Guest! Did you know you can mentor other members here at H-M? If not, please check out our Relaunch of Hobby Machinist Mentoring Program!
You are using an out of date browser. It may not display this or other websites correctly.
You should upgrade or use an alternative browser.
You should upgrade or use an alternative browser.
Another carriage stop design
- Thread starter Dranreb
- Start date
- Joined
- Jul 5, 2016
- Messages
- 39
hi like you my first attempt to make one would not grip the bed way good enought to be solid ......im gonna build one like yours ....thanks for posting the pictures .......if anybody is interested you can go to toms techniques and see the orginal atlas one he made for his dad ....he has drawings in pdf you can down load.........im gonna make that one too ....and try to make the dial ..................thanks again .......Eric....Just my take on a carriage stop for flat ways, I found with my previous attempt at making one, that a slight knock was all it took to dislodge it slightly.
I think this was due to the stick out needed to mount the DTI and stop in the same piece, unlike the Atlas design which is very close to the front of the ways, and has double bolts for extra grip.
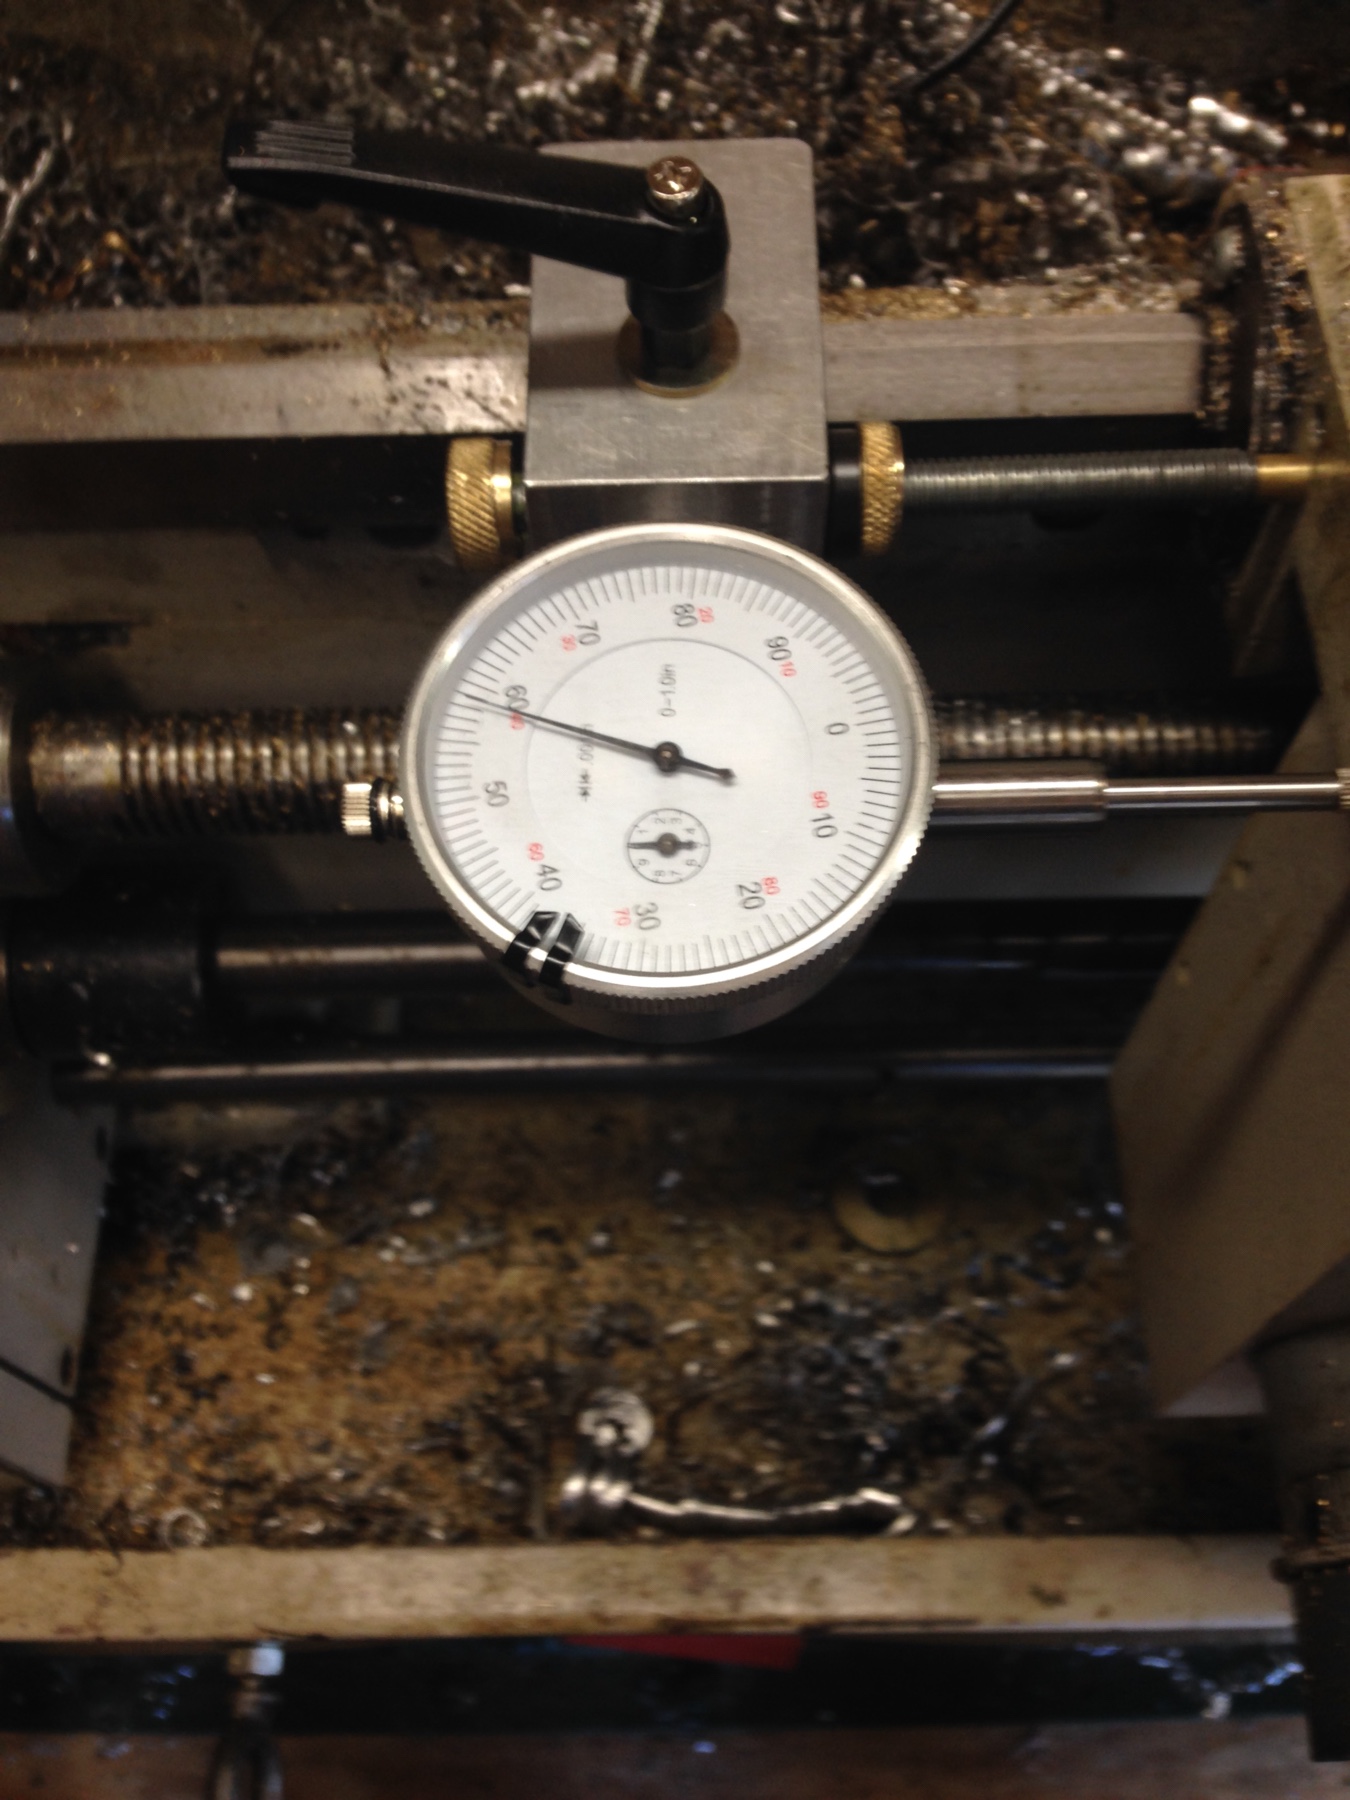
Having nothing positive to clamp on as per a V way bed, I made mine to reach across and positively locate across the ways. The only downside is that it it doesn't pass by the side of the headstock, this hasn't been a problem for me so far.
The clamping piece is held snug against the body by the screw shank, it's depth enables it to be opened wide enough to allow fiddle free placing onto the ways.
View attachment 51646
The eagle eyed picture clickers amongst you will have noticed the glued on shim, this of course is a sacrificial way wear strip.....that's my story and anyway I'm sticking to it...View attachment 51650
View attachment 51647
I milled this on my lathe using TCT wood router bits, held in the three jaw, just working with what I've got..
View attachment 51648
The positive stop screw and nut are work in progress as knurling is not yet one of my skills..
View attachment 51649
Thanks to all who have posted your designs on here previous, you will probably spot ideas from various others in mine..
Bernard
View attachment 51646 View attachment 51647 View attachment 51648 View attachment 51649 View attachment 51650
- Joined
- Sep 20, 2012
- Messages
- 560
hi like you my first attempt to make one would not grip the bed way good enought to be solid ......im gonna build one like yours ....thanks for posting the pictures ......Eric....
Hi Eric, since then (6 yrs
 ) I've reduced the width of the 'finger' by about 2/3rds, to allow it to go a tad further past the chuck, and it's still working well.
 ")
- Joined
- Jul 3, 2015
- Messages
- 144
I have been thinking about building a stop for a while and this thread got me off my butt and out into the shop. I have DRO's on my 12" Craftsman so I didn't feel like I needed anything much more than a simple adjustable stop but there is room to add a dial if needed. My chuck is bigger than the standard 4" so I had more wiggle room and didn't have to notch the stop around the head stock. The design is based around the single piece of scrap alum that I had and ideas from some of the previous stops shown above. Thanks to everybody for sharing your projects.

- Joined
- Mar 29, 2017
- Messages
- 737
Well done, all of you. Like 38Bill, I have been procrastinating. I have the G4003 clone, called Birmingham 1236. I have got the lump of scrap unknowium squared, and the v-way cut. At that point, the project died as other priorities arose. I WILL get back on it, and post my results.
I appreciate seeing the various approaches taken.
I appreciate seeing the various approaches taken.
- Joined
- Mar 17, 2018
- Messages
- 1,400
38Bill that is a sexy carriage stop! It makes me want to re-do mine.I have been thinking about building a stop for a while and this thread got me off my butt and out into the shop. I have DRO's on my 12" Craftsman so I didn't feel like I needed anything much more than a simple adjustable stop but there is room to add a dial if needed. My chuck is bigger than the standard 4" so I had more wiggle room and didn't have to notch the stop around the head stock. The design is based around the single piece of scrap alum that I had and ideas from some of the previous stops shown above. Thanks to everybody for sharing your projects.
View attachment 286197