

-
Welcome back Guest! Did you know you can mentor other members here at H-M? If not, please check out our Relaunch of Hobby Machinist Mentoring Program!
You are using an out of date browser. It may not display this or other websites correctly.
You should upgrade or use an alternative browser.
You should upgrade or use an alternative browser.
Atlas lathe 10d restoration
- Thread starter Cobrage401
- Start date
- Joined
- Mar 21, 2020
- Messages
- 81
Thought I might show a closer look at at least how I go from rust to done for people that might not have brought back to life something before.
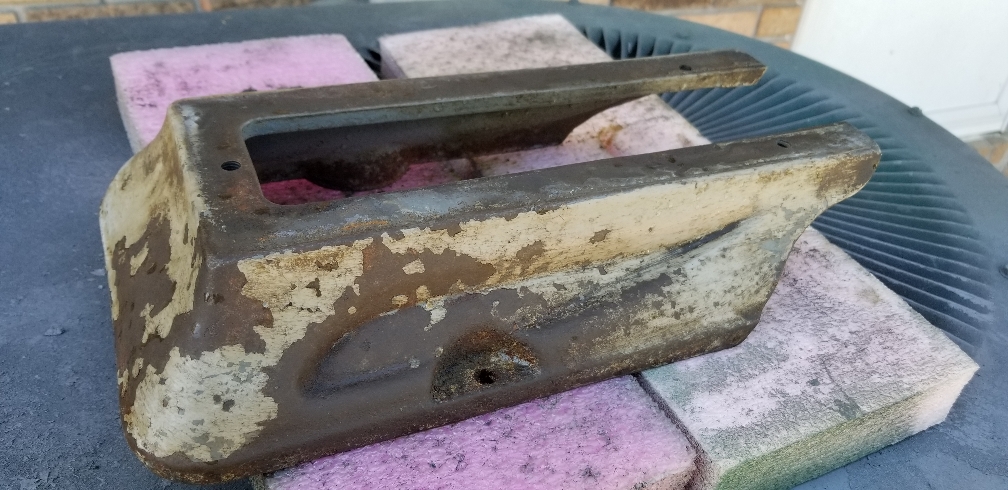
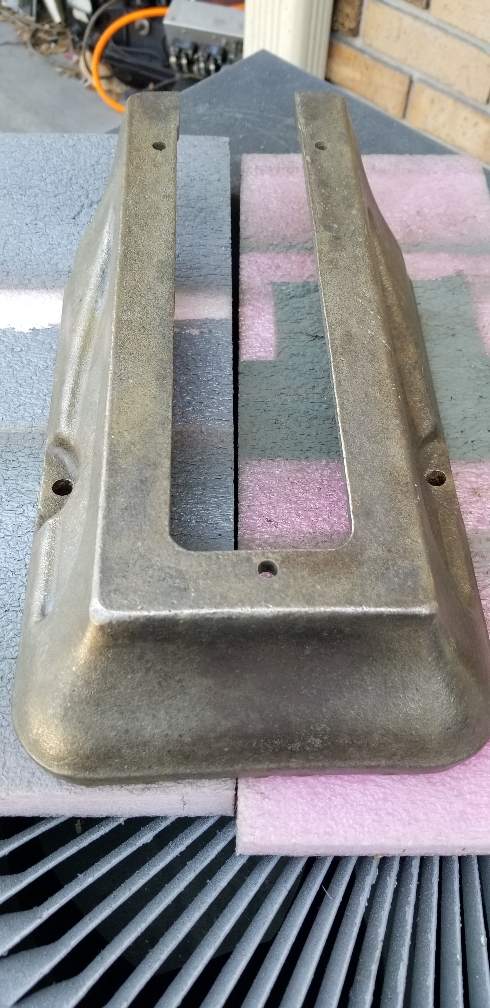
Below is a photo of the other base foot after cleaning the dirt off. I use Krud Kutter and let it soak for around 15 minutes then wash off all the dirt, grease and oil with soap and water using a green scrubber. Dont tell the wife you stole it from the dishes lol.
Will be back when I get it down to cast iron.
Dave
Sent from my SM-N950U1 using Tapatalk
- Joined
- Mar 21, 2020
- Messages
- 81
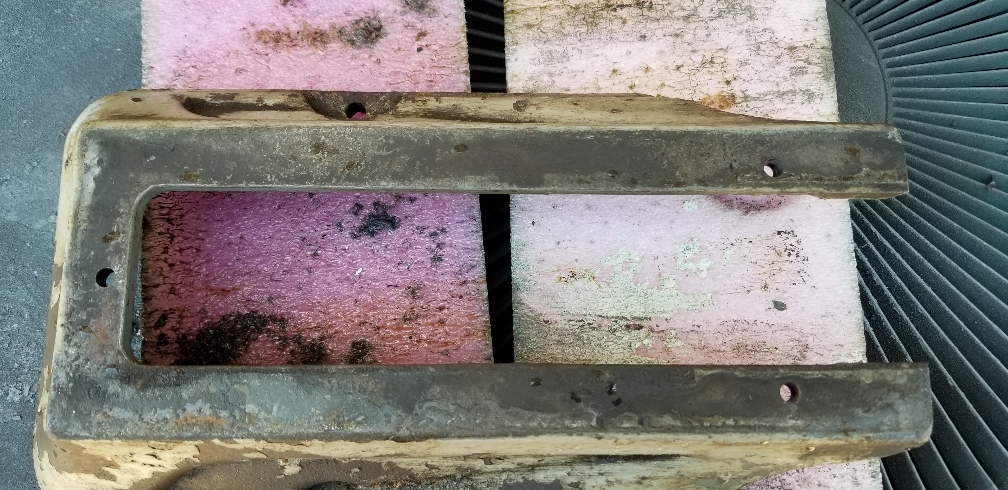
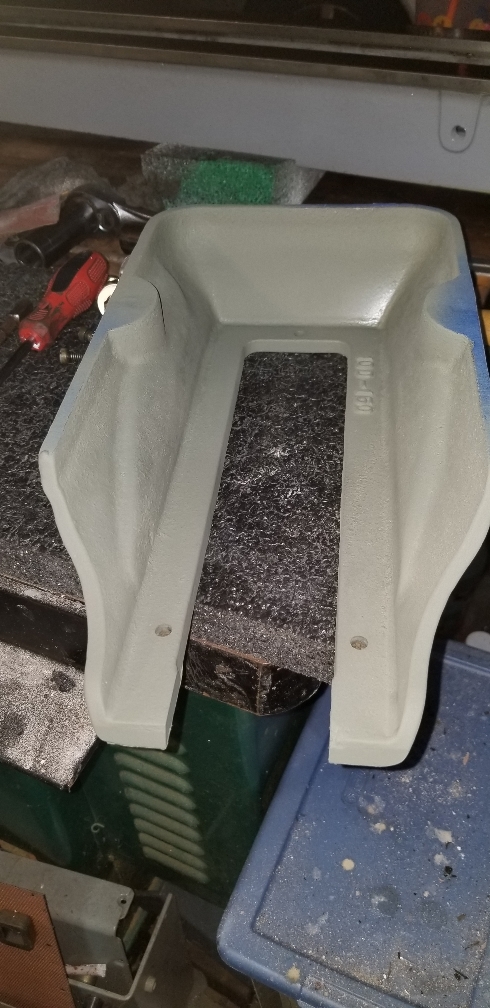
Back in the shop today and below is the foot now down to casting ready for prime.
This casting is much better than the other and looks like no bondo is needed.
Normally I use my die grinder and a brass wire brush to remove the paint and rust however I broke the collet errrr. So I used the old standby.... removed all the dirt and grease with Krud Kutter and gave it a bath. Removed all the old paint with the wire brush and electric drill then paint remover then back to the drill. This process takes much longer then using the die grinder and is much cheaper then rust removal products.
Back when primed.

Sent from my SM-N950U1 using Tapatalk
This casting is much better than the other and looks like no bondo is needed.
Normally I use my die grinder and a brass wire brush to remove the paint and rust however I broke the collet errrr. So I used the old standby.... removed all the dirt and grease with Krud Kutter and gave it a bath. Removed all the old paint with the wire brush and electric drill then paint remover then back to the drill. This process takes much longer then using the die grinder and is much cheaper then rust removal products.
Back when primed.
Sent from my SM-N950U1 using Tapatalk
- Joined
- Mar 21, 2020
- Messages
- 81
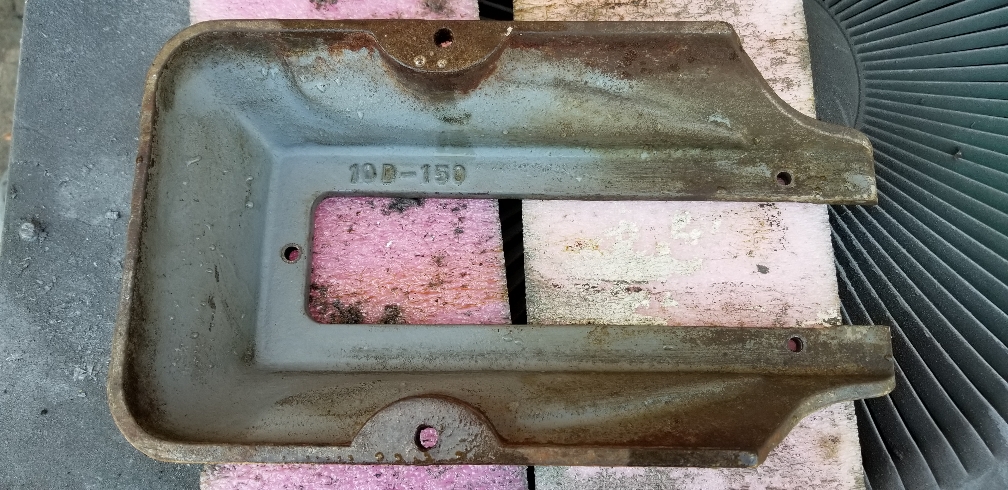
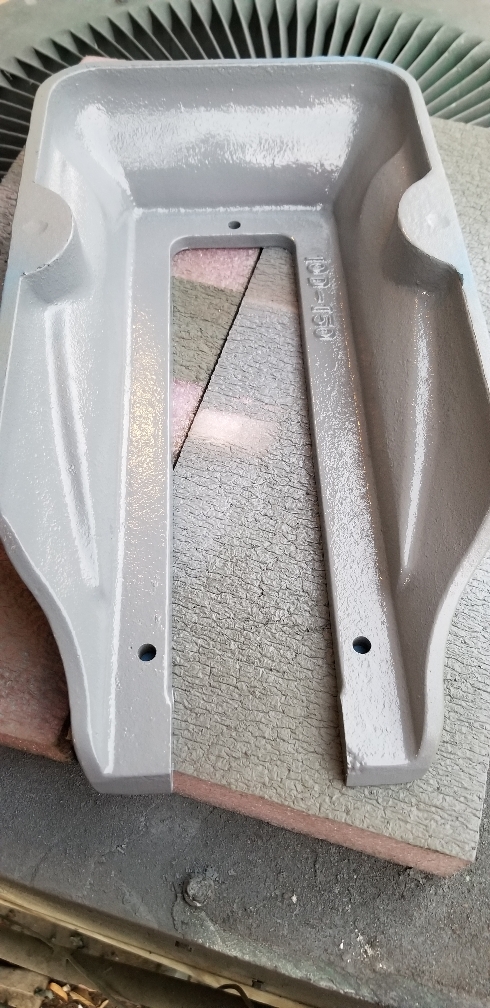
And now with primer... sorry forgot to take the topside photo with the primer on it however looks the same as the bottom nothing exciting lol.
I use Rust-Oleum self etching primer and it works great for cast iron. Its very hard to remove when fully cured.
I didnt sand this down for again I'm going for the paint over cast look and not a smooth car type finish. If I wanted the smooth look I'd probably would have used glazing compound on all the parts and sand and sand and sand lol. Not to practical for in a week of use the machine will be dirty anyways")
Back when painted
Dave
Sent from my SM-N950U1 using Tapatalk
I use Rust-Oleum self etching primer and it works great for cast iron. Its very hard to remove when fully cured.
I didnt sand this down for again I'm going for the paint over cast look and not a smooth car type finish. If I wanted the smooth look I'd probably would have used glazing compound on all the parts and sand and sand and sand lol. Not to practical for in a week of use the machine will be dirty anyways
Back when painted
Dave
Sent from my SM-N950U1 using Tapatalk
- Joined
- Mar 21, 2020
- Messages
- 81
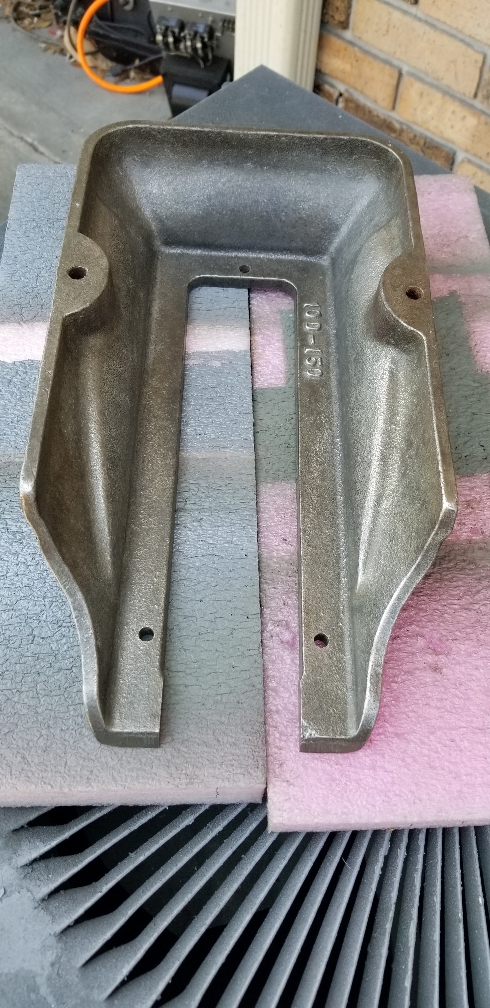
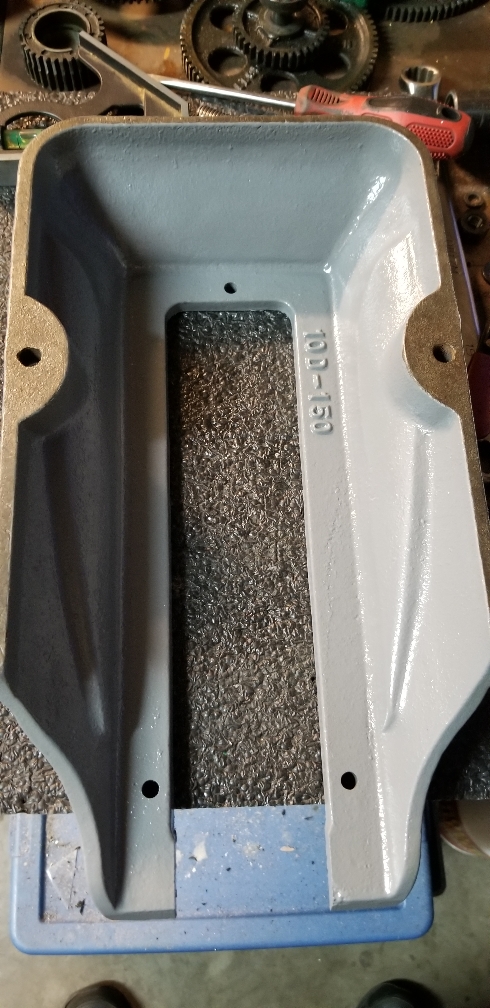
Foot:
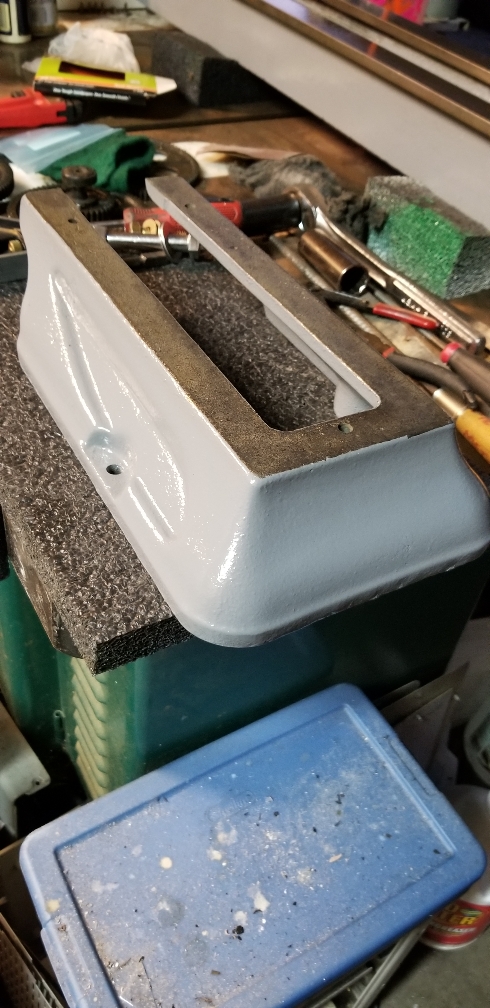
Below is the finished second foot. Painted with Rust-Oleum Gloss smoke gray.
Now off to the bottom of the head stock.
Dave
Sent from my SM-N950U1 using Tapatalk
Below is the finished second foot. Painted with Rust-Oleum Gloss smoke gray.
Now off to the bottom of the head stock.
Dave
Sent from my SM-N950U1 using Tapatalk
- Joined
- Mar 21, 2020
- Messages
- 81
Forgot one
Sent from my SM-N950U1 using Tapatalk
Sent from my SM-N950U1 using Tapatalk
- Joined
- Mar 21, 2020
- Messages
- 81
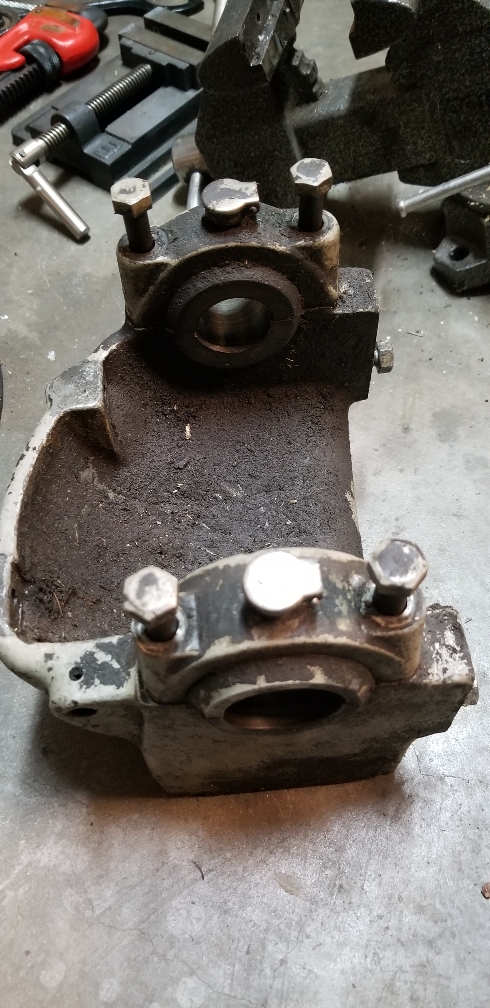
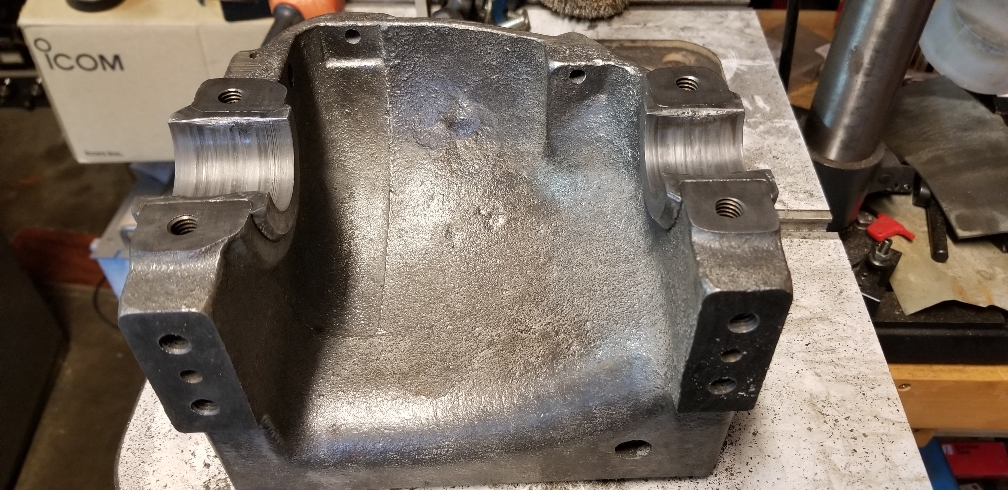
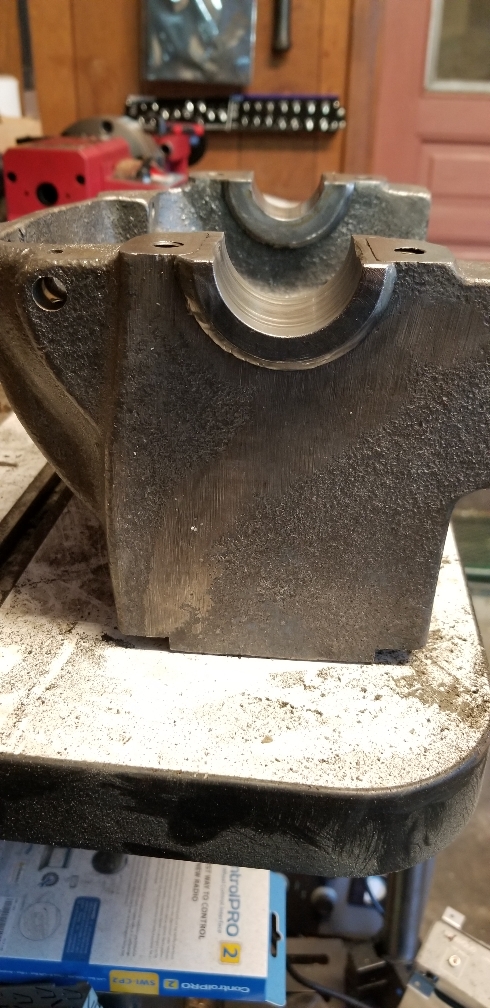
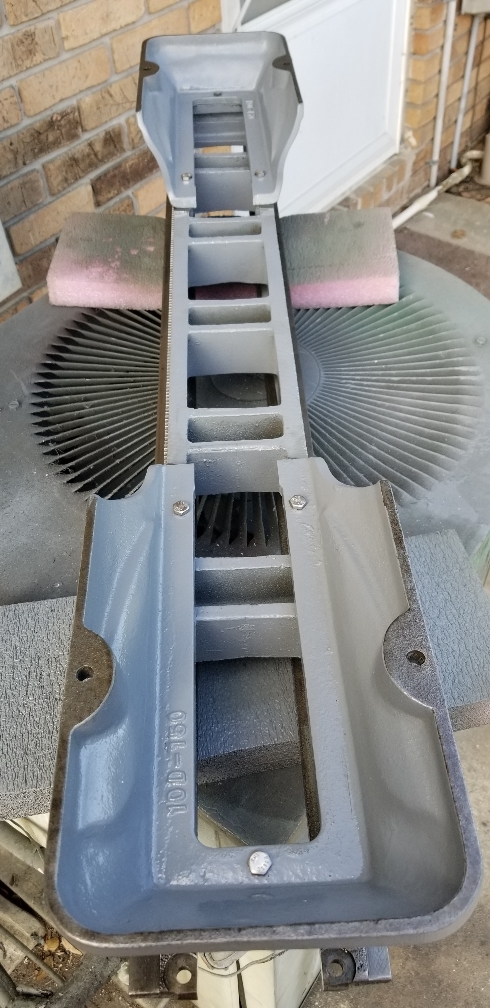
Headstock:
Well now that the two base legs are down and ready to bolt down I'm moving to the base of the headstock. Below are before and after photos. Now down to cast.
This will need some bondo to hide the front tooling gouges.
Dave
Sent from my SM-N950U1 using Tapatalk
Well now that the two base legs are down and ready to bolt down I'm moving to the base of the headstock. Below are before and after photos. Now down to cast.
This will need some bondo to hide the front tooling gouges.
Dave
Sent from my SM-N950U1 using Tapatalk
- Joined
- Mar 21, 2020
- Messages
- 81
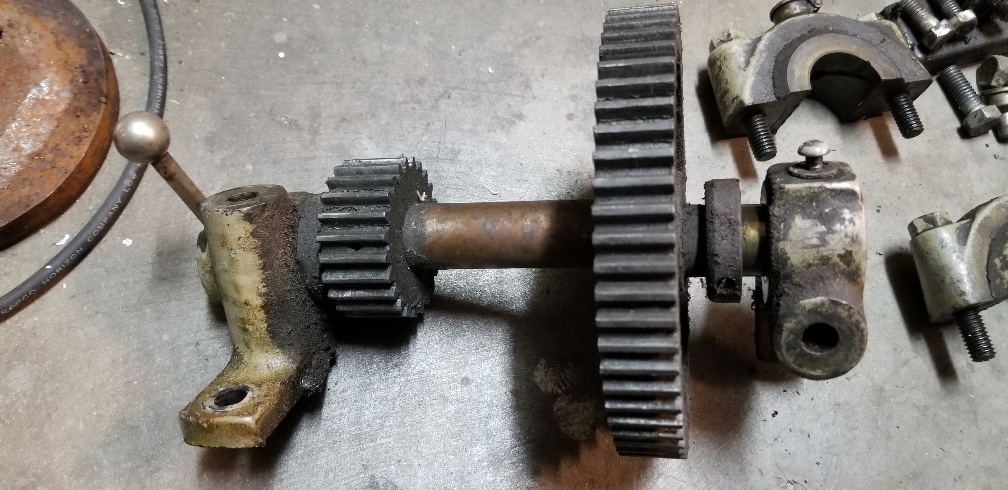
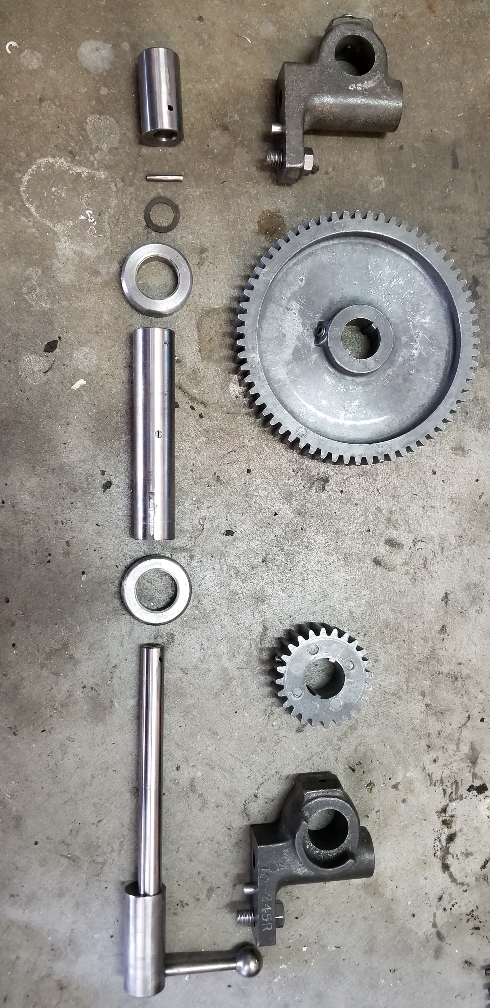
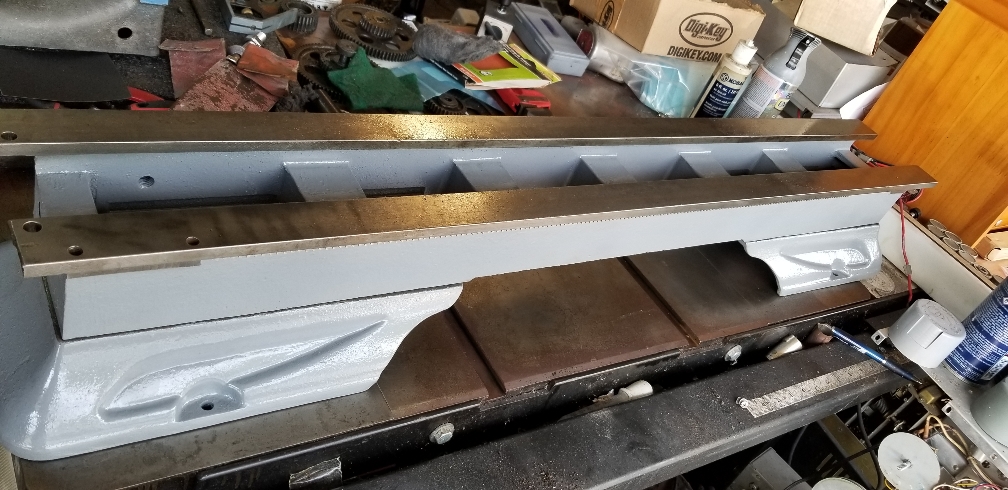
Back Gear Assembly:
Small packages sometimes give you big problems lol...
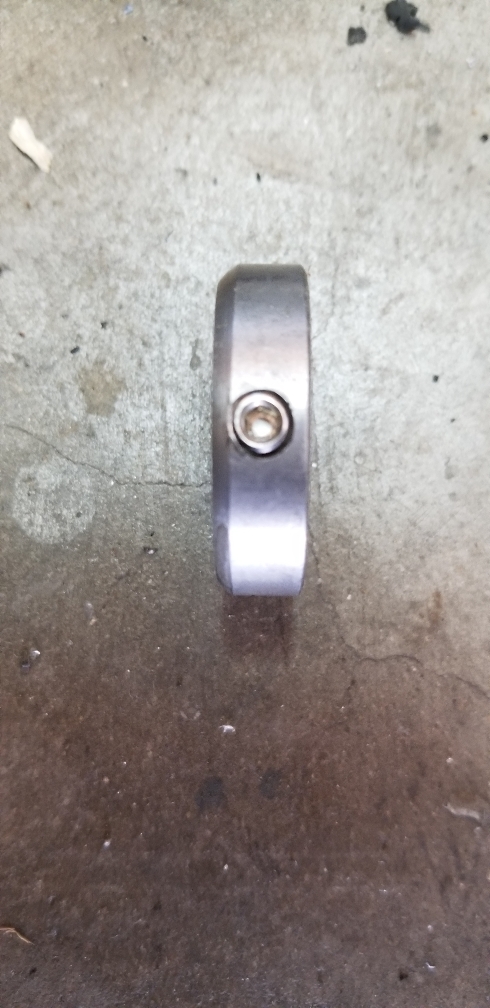
First if your working on one remember you have set screws on the washers and in between the gear teeth.
Well I had a hard time disassembling this. Problem is they used flathead screws on the gears and washers and overtime they scored the outside shaft. No dimples were used on the shaft for it would probably be impossible for you need to adjust the gears and washers during assembly. I replaced all the screws with socket head set screws so one can torque them down a bit more then standard screws hopefully preventing slipping around.
You will see this assembly again when the ends are painted and installed on the finished headstock.
Also below is the bed and feet assembly's. New screws were installed for I had some broken screws that I removed from the casting.

Sent from my SM-N950U1 using Tapatalk
Small packages sometimes give you big problems lol...
First if your working on one remember you have set screws on the washers and in between the gear teeth.
Well I had a hard time disassembling this. Problem is they used flathead screws on the gears and washers and overtime they scored the outside shaft. No dimples were used on the shaft for it would probably be impossible for you need to adjust the gears and washers during assembly. I replaced all the screws with socket head set screws so one can torque them down a bit more then standard screws hopefully preventing slipping around.
You will see this assembly again when the ends are painted and installed on the finished headstock.
Also below is the bed and feet assembly's. New screws were installed for I had some broken screws that I removed from the casting.
Sent from my SM-N950U1 using Tapatalk
- Joined
- Mar 21, 2020
- Messages
- 81
Help:
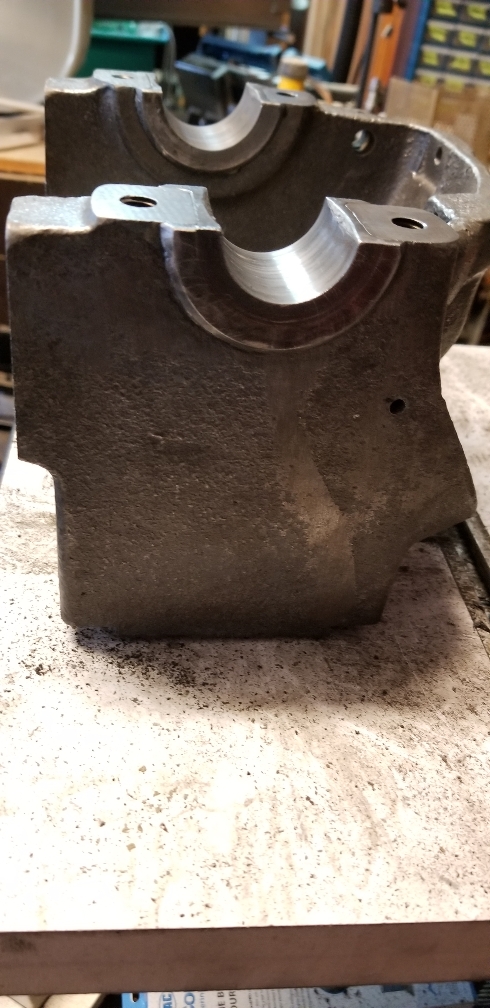
Well I need some advice at this point...
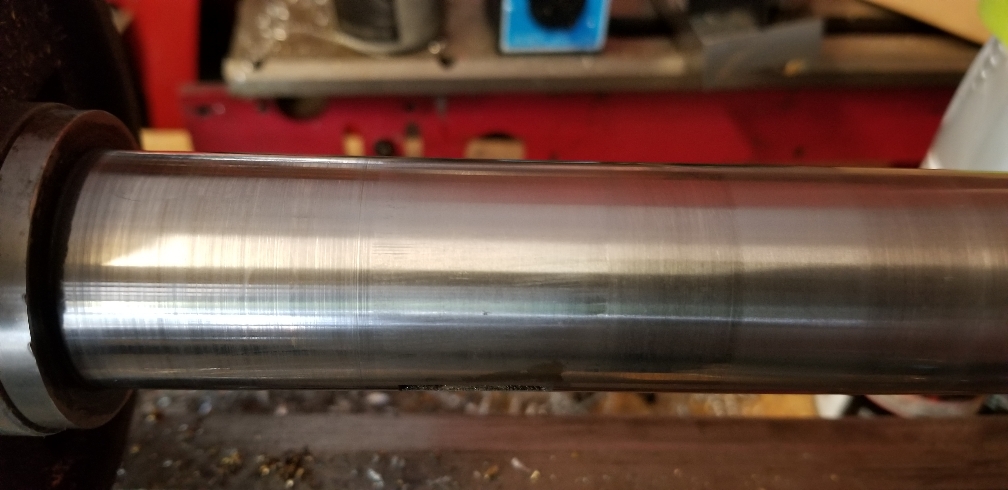
I'm continuing work on the headstock and below is the spindle. You can see the marks in the spindle were it runs around the babbit and on the end were the thread is that turns the change gears you can see a big amount of ware.
Now my guess is that the babbit wasn't oiled properly during operation and started to cut into the spindle ends.
Should I replace or have someone make a new spindle or since the spindle should actually run on the oil will the groves actually help with the flow of the oil?
Any thoughts?

Sent from my SM-N950U1 using Tapatalk
Well I need some advice at this point...
I'm continuing work on the headstock and below is the spindle. You can see the marks in the spindle were it runs around the babbit and on the end were the thread is that turns the change gears you can see a big amount of ware.
Now my guess is that the babbit wasn't oiled properly during operation and started to cut into the spindle ends.
Should I replace or have someone make a new spindle or since the spindle should actually run on the oil will the groves actually help with the flow of the oil?
Any thoughts?
Sent from my SM-N950U1 using Tapatalk
- Joined
- Apr 23, 2018
- Messages
- 6,508
Since replacing the babbitt bearings is a difficult path to pursue, it is my inclination to leave the existing wear pattern in place. I don't know of any way to renew that bearing surface to include both the babbitt side and the spindle side. If you are lucky, you still have a clearance shim or two under each cap. If you're out of shims, and your spindle deflects, then you are looking at making an oversized spindle or doing a sleeve or buildup job on the spindle you have. Whatever you do, consider your options carefully, this is the "heart" of your lathe.