Atlas lathe 10d restoration

If one wants to develop an real old school skill, have the shaft polished. File a thou at a time off the bearing cap mating surfaces, blue the bearing, fit the shaft and with a bearing scraper carefully shave the babbit until you have an even fit. Easy to write, hard to do, but was SOP back in the day. I've still got a set of bearing scrapers and a tin of Prussian blue that I hope never to use again.

jack vines
 
Thanks...

I'm also considering the 10a-2b headstock replacement with the bearings instead of the babbit.


Sent from my SM-N950U1 using Tapatalk
 
Headstock:

Well been busy at work and things slowdown a bit in the garage for it's getting hit now in Florida.

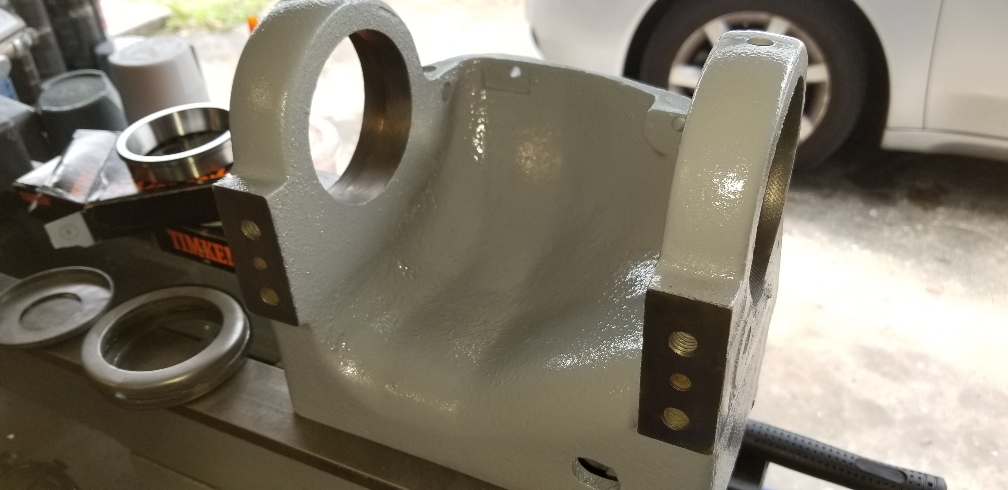
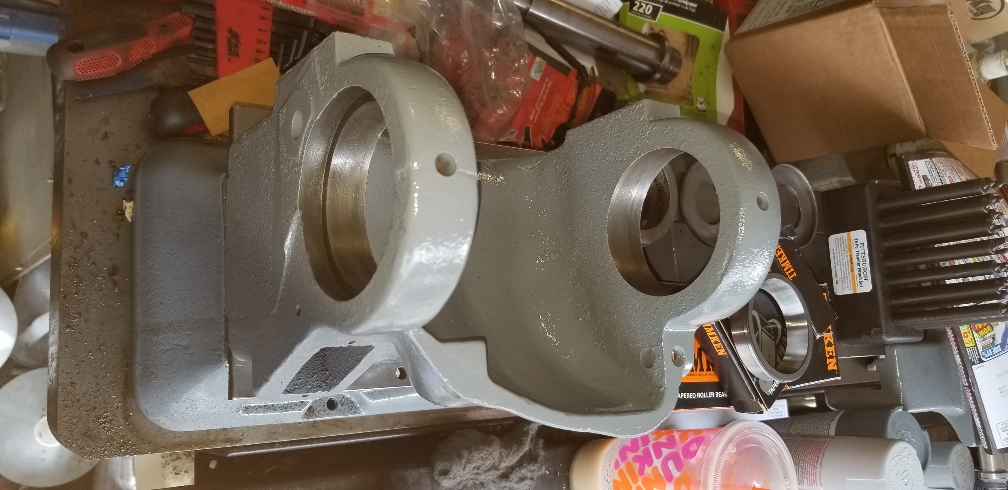
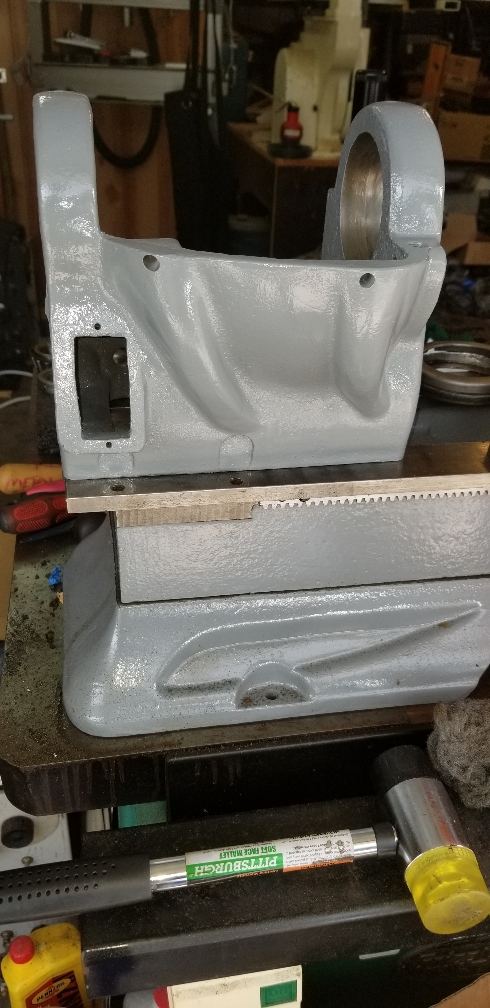
Wanted to share my progress... decide to go with a 10a-2B Timken bearing headstock to replace the original 10D headstock. This was a factor update to the 10D and they also had a partial upgrade that included the casting, spindle, pulley assembly and gears according to what my research found.

You can see the headstock is now repainted and ready for installation.

If you have a atlas lathe with the timken bearings and need to replace the bearings hold onto your wallet for the two bearings and two racers will coast you anywhere from $250-$300. I was able to find them on Ebay and Amazon for around $266 total.

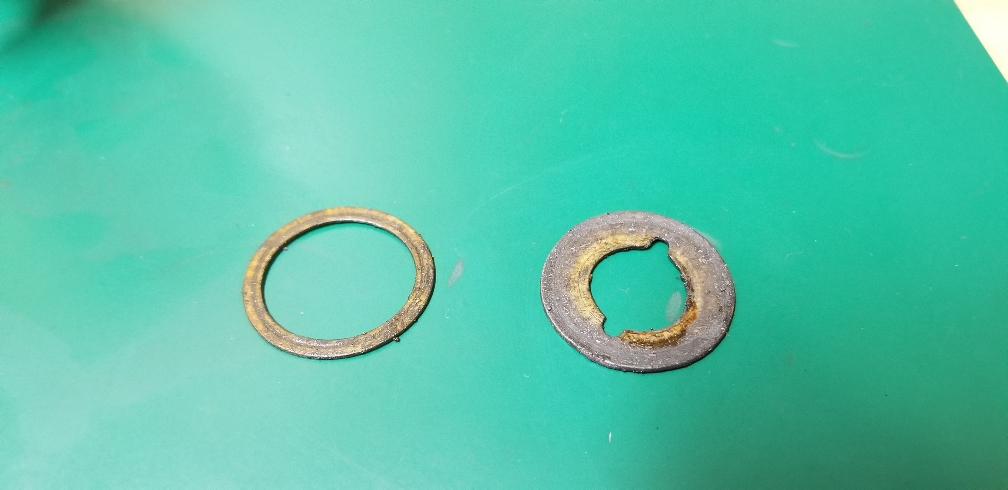
One thing I noticed and a lot of people on YouTube are prying the dust covers off with a screwdriver to disassemble the spindle when replacing the bearings. I don't think this is a good idea for I had to reform the bearing dust covers with my press for my unit came with the bent screwdriver approach. My unit actually had hair in the bearings because of the bent covers!

Simply banging on the spindle with a soft rubber hammer from the change gear side will remove the spindle and bearings. Then you can simply tap the covers out from the inside when the spindle is removed.

Oilers: my original idea was to install drip Oilers in place of the original oil cover/caps. After seeing how the Oilers work it appears that the majority of the applied oil stays between the racers and casting and applying a small portion of oil to the bearings. Actually when I received the headstock one of the Oilers was clogged and no oil was passing to the bearing. I think I will now pack the bearings with NBU-15 grease and not use the oil.

Back soon!!!
Dave
fadad54b76ccc66892ee96480b7ae688.jpg
8f72995e3ca756f2da33c648251b2f9a.jpg
ae25b698de619dcb45d27bb663548f9d.jpg


Sent from my SM-N950U1 using Tapatalk
 
Forward/Reverse Gearbox

Anyone know what the two cardboard like washers are made of inside the gearbox? I'd like to replace mine.

Thanks all!!
Dave
 
This is a photo of the two cardboard like washers I'm trying to make. Hopefully someone can help identify what material they are made from.

71bf23745e036ebdaa40e0a638006646.jpg


Sent from my SM-N950U1 using Tapatalk
 
Thanks... not sure about thrust bearings or at least in the traditional ones. They are labeled as washer in the Atlas manual and are made of some type of material like super strong cardboard however definitely not metal.


Sent from my SM-N950U1 using Tapatalk
 
Bear with me. My point was more along the lines of trying to get you away from the headache of tracking down some wartime era super-cardboard material. We don't know what it is, so is an adequate substitute available, like copper or bronze? I'm assuming these washers came from the QCGB, correct? For as long as humankind has been running machinery with gears on a shaft they have needed some method of controlling thrust and preventing wear. Commonly used materials for that are bronze and maybe copper, dense plastics, celluloid, and apparently cardboard. Perhaps around the shop or the scrap bin there might be a simple solution for you. I don't think an exact match is required this far down the concourse.
 
Ok lol now I understand were you were going.

The washers are measuring..0027 so I'm guessing the original size was .003

They are used in the forward/reverse gearbox and look like they are basically shims to place the gears at the correct meshing spacing.

I'm thinking of stamping them out with .003 brass or steel shims.

Just need to find the correct stamps. I can't turn them for you need a lathe to fix a lathe lol and it would be a waste of material I'm thinking of the top of my head.

Sent from my SM-N950U1 using Tapatalk
 
Back
Top