- Joined
- Oct 13, 2014
- Messages
- 6,559
I completed the final assembly of the bandsaw. Here are some details (click images to expand):
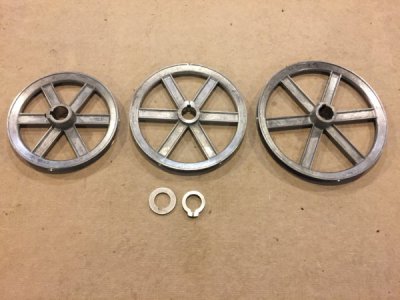
I had to reduce the width of the hub on the middle pulley so it would fit closer to the large pulley and be in line with the grooves on the Pull Gear (drive pulley).
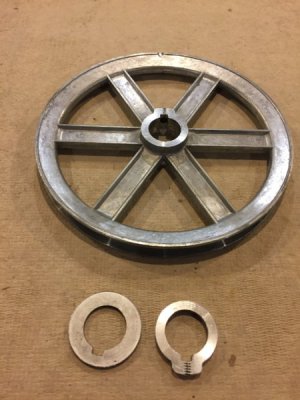
The slice of hub and an additional shim, fabricated from a washer, will be used as spacers between the middle and small pulleys.
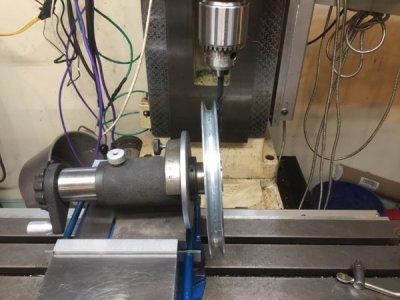
I had to tilt the axis of the hub so I could drill hole for the setscrew that was obliterated when I cut it down.
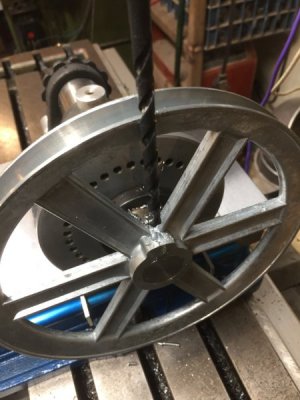
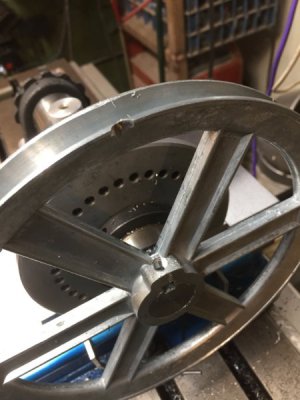
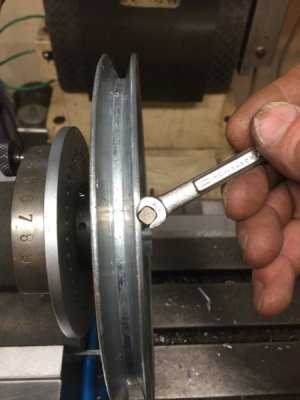
A long tap cost over $35 so, I let the drill cut a shallow notch in the rim aiding alignment of a regular tap, which I was able to turn with an open end wrench.
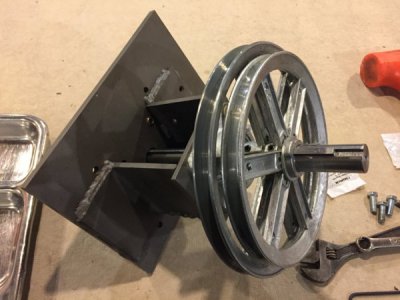
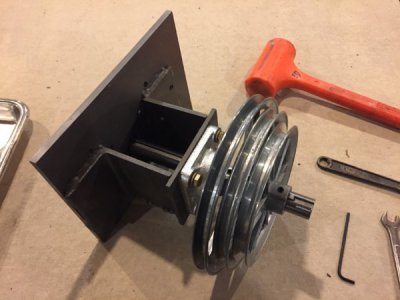
The bearings, shaft & pulleys test mounted on the bearing support
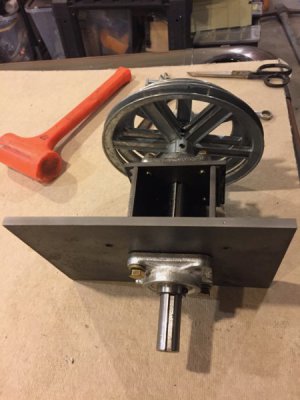
All fit perfectly well.
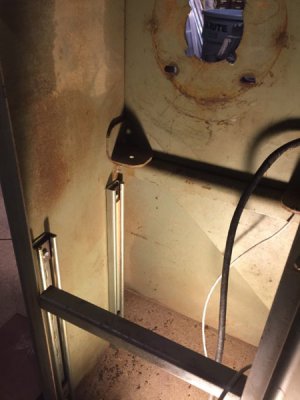
The cabinet interior showing the original motor location and the strut channel for the new motor mount.
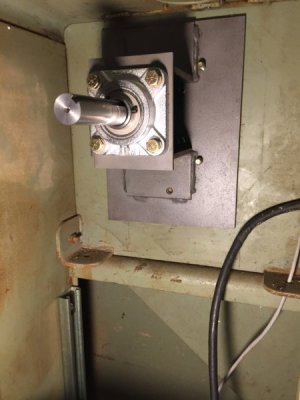
The bearings shaft and support bolted in.
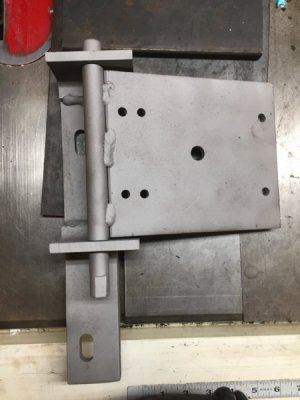
The motor mount, The shaft has shoulders so it has almost no play between the angle supports. I added the flat on the end incase I wanted to eventually mount a lever to aid in changing the belt on the pulleys.
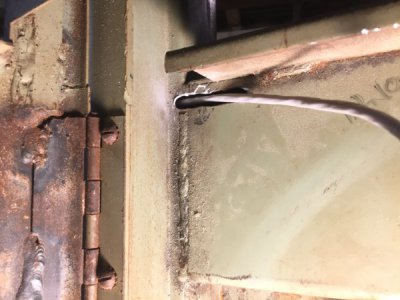
Routing the tachometer and control cables was a chore. The frame of the machine is fabricated welded steel plate, with lots of cross supports. I made this hole with a drill and die grinder.
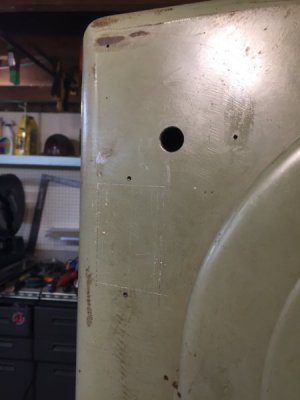
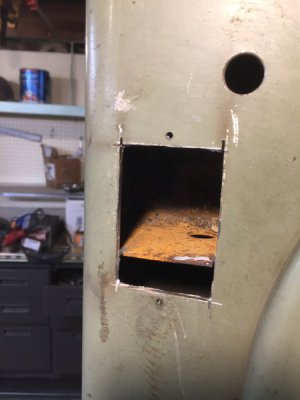
Upon cutting the hole for the control panel I discovered one of the several cross supports in the column. Luckily they had holes bored in them so I was able to snake the cables down to the motor compartment. I was able to cut this one out of the way with the plasma torch.
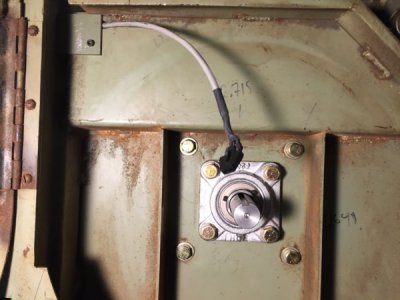
The Tachometer read head, cable guard and the inner bearing.
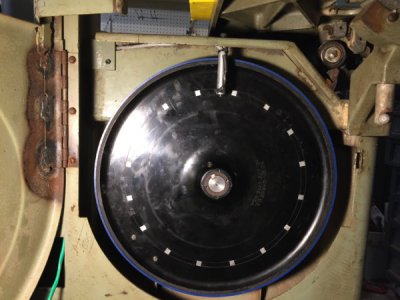
The drive wheel, reflective tape markers and Tachometer read head.
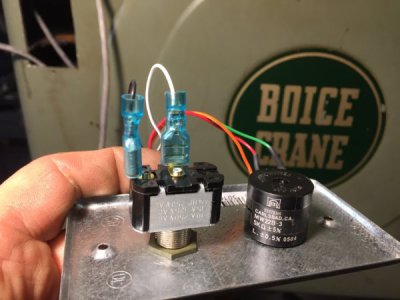
The control panel ready to install. I used a three turn potentiometer for finer speed control.
The Tachometer (MachTach) and control panel installed.
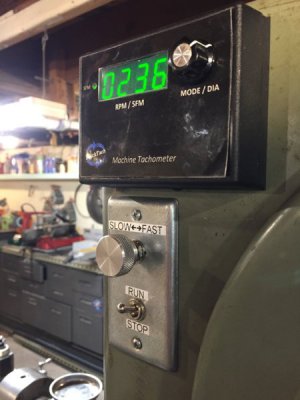
The MachTach and control panel installed. I made a custom knob for speed control.
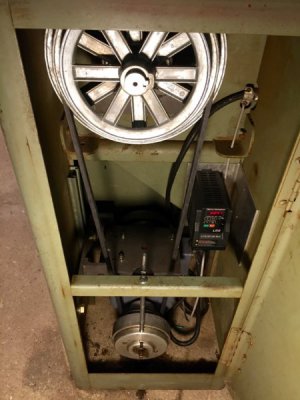
The motor, VFD and pulleys mounted.
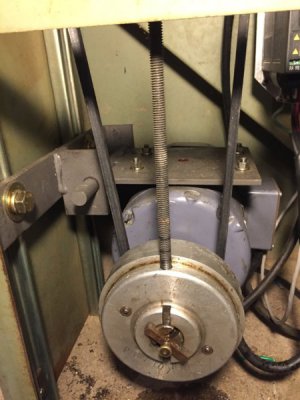
The motor and Pull Gear speed reducer. The threaded rod prevents the outer part of the PG from turning when in speed reduction mode, it is removed and the hub locked to give full speed, no reduction.

The lower switch powers the VFD and MachTach.
The machine cuts very well, with plenty of power in the low speeds and the blade tracks easily. All in, I have about $350 and about 30 hrs. of work invested. I will be doing a couple of refinements and some touch up paint in the future but for now it's ready to work, so I am happy

I had to reduce the width of the hub on the middle pulley so it would fit closer to the large pulley and be in line with the grooves on the Pull Gear (drive pulley).

The slice of hub and an additional shim, fabricated from a washer, will be used as spacers between the middle and small pulleys.

I had to tilt the axis of the hub so I could drill hole for the setscrew that was obliterated when I cut it down.


A long tap cost over $35 so, I let the drill cut a shallow notch in the rim aiding alignment of a regular tap, which I was able to turn with an open end wrench.


The bearings, shaft & pulleys test mounted on the bearing support

All fit perfectly well.

The cabinet interior showing the original motor location and the strut channel for the new motor mount.

The bearings shaft and support bolted in.

The motor mount, The shaft has shoulders so it has almost no play between the angle supports. I added the flat on the end incase I wanted to eventually mount a lever to aid in changing the belt on the pulleys.

Routing the tachometer and control cables was a chore. The frame of the machine is fabricated welded steel plate, with lots of cross supports. I made this hole with a drill and die grinder.


Upon cutting the hole for the control panel I discovered one of the several cross supports in the column. Luckily they had holes bored in them so I was able to snake the cables down to the motor compartment. I was able to cut this one out of the way with the plasma torch.

The Tachometer read head, cable guard and the inner bearing.

The drive wheel, reflective tape markers and Tachometer read head.

The control panel ready to install. I used a three turn potentiometer for finer speed control.
The Tachometer (MachTach) and control panel installed.

The MachTach and control panel installed. I made a custom knob for speed control.

The motor, VFD and pulleys mounted.

The motor and Pull Gear speed reducer. The threaded rod prevents the outer part of the PG from turning when in speed reduction mode, it is removed and the hub locked to give full speed, no reduction.
The lower switch powers the VFD and MachTach.
The machine cuts very well, with plenty of power in the low speeds and the blade tracks easily. All in, I have about $350 and about 30 hrs. of work invested. I will be doing a couple of refinements and some touch up paint in the future but for now it's ready to work, so I am happy
Last edited:

