- Joined
- Mar 26, 2018
- Messages
- 2,724
My wife used to go to the local Y to do some spin classes before COVID hit and has really been missing doing that. We road bike a lot in the summer, however once it got cold we haven't gotten out. I shopped around for spin bikes and just couldn't believe how expensive they are. Turns out my parents had an older model rear wheel trainer that they haven't used in probably a decade, so they gave it to us. While it is pretty nice, there are some issues.
The trainer was designed for bikes with a bolted rear axle and my wife's bike has a quick disconnect axle leaving nothing for the trainer to grab onto on the bike. I contemplated this issue for a while and then headed down into the shop to make a new axle. I didn't get a ton of pictures of this process, but basically I started with a bar of 12L14 which was centerless ground to 5/8". I had to reduce it down to .1875 over a 7.5" length.
I did the Joe Pieczynski method (I'm sure he wasn't the first) of turning down to the final diameter in one pass and incrementally pulling out more stock from the chuck. This part didn't need to be precision, but it worked very well. A super sharp VCGT insert was used.
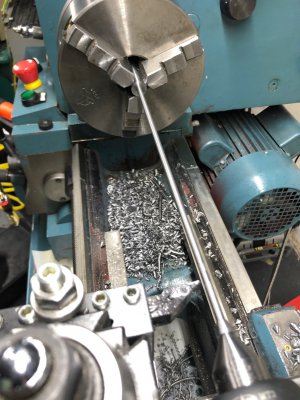
I preserved the center on one end so I could get some tail stock support as I worked. The finish isn't perfect, but still not bad. Dimensionally it varies by less than 10 thou over the length, although I could do better on a second part.
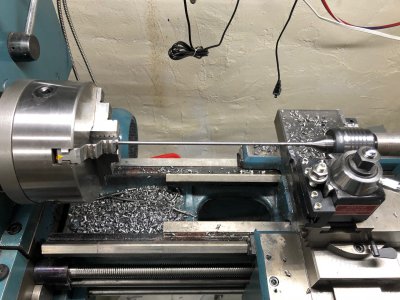
The part was cut to length and a 10-24 thread put on each end with a die. Additionally I made two tapered nuts from the same barstock to fit the conical inner feature of the bike trainer. I hand filed the flats and did no measurement until I was done. One nut was .503" over the flats and the other was .508". Pretty close!
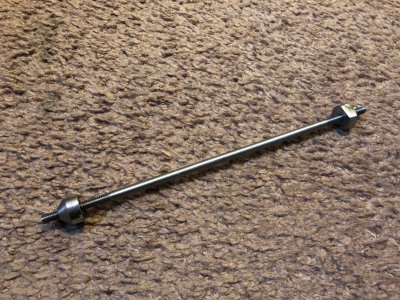
She has been using the bike like this for a while now and really likes it, but I don't think it has the "feel" of real road biking. There isn't the momentum of your body moving forward, so the moment you ease up on the pedals, the wheel slows down. I am hoping that this momentum can be simulated with a heavier flywheel. The one on the bike is a 4.75" diameter, roughly 1/2" thick disc of die cast zinc which mounts to the friction brake on a 10mm shaft. It probably weighs less than 2 lbs.
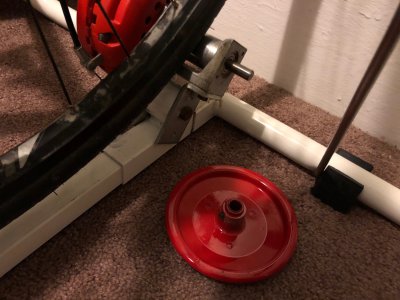
I went on ebay and bought a 5.38" x 2" piece of 4140 for about $30. It came labeled as 4140 HT but it doesn't feel that hard.
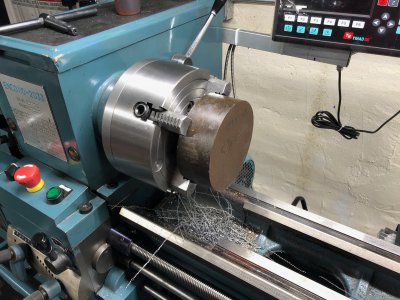
I started to go to work on this with a little CCMT insert tool but it became quickly clear that it wasn't going to cut it. I have an ISCAR CNMG holder with a 3/4" shank which I milled down to 1/2" so it would fit my lathe. Good god can that thing do work. It would take any cut I could throw at it limited only by my lathe's HP. I was taking cuts 0.060 off the diameter with a 0.020"/rev feedrate at 200 rpm. This calculates to something like 2.5HP on my 1.5HP lathe. It was definitely slowing down a bit in the cut but really cut beautifully.
I have sworn to people that a 12x36 was probably too small to use negative rake tools, but now I'm a believer. Interestingly, the finish on the part was garbage until I started cutting harder - then the tool would leave a scalloped but mirror finish.
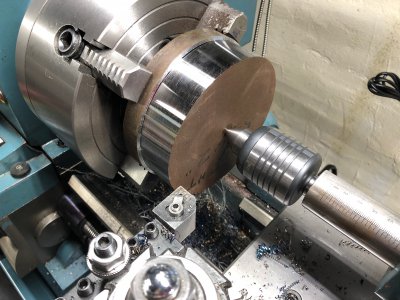
Here is the first side roughed in. The tool I was using could probably take 40HP on a real lathe, so I was having a hard time pushing it enough to break a chip. It would chip break OK on the OD when I was maxing out the lathe, but not on the face. My shop is FULL of deep blue noodles.
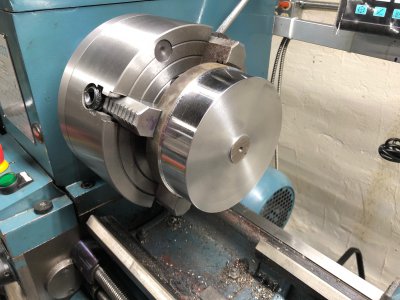
From here I drilled the center to 0.375 and reamed to 10H6 using a super cheap metric reamer I got in a set from 1mm to 13mm for something like $12. They leave a garbage finish, but it was the best was I knew to get a decent 10mm hole in this thing.
Here is where the trouble started. I flipped the part around to finish the back and used jaw pads to not mar the part. The jaw pads are brass sheet with a dense fiber backing. Even with the chuck crushing down on these, the part wanted to chatter like crazy when roughing. I later switched to solid brass pads which worked a lot better. I couldn't believe how much of a difference that little work holding change made.
When the part chattered, it must have moved a bit in the jaws so my attempt at finishing the OD did not line up well. Additionally when I smacked it back in the chuck, I couldn't get it to run true. I learned a few things:
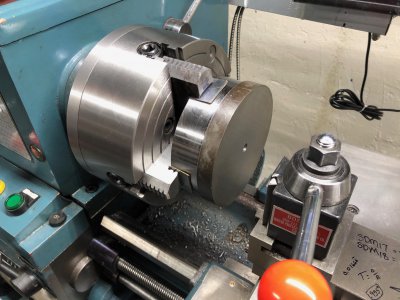
Here is an interesting shot where you can see the effects of surface speed on a carbide tool. near the OD, the surface speed is relatively high and produces a good quality finish. Once the cutter started getting near the part center, the metal began tearing out a bit, giving a much worse finish.
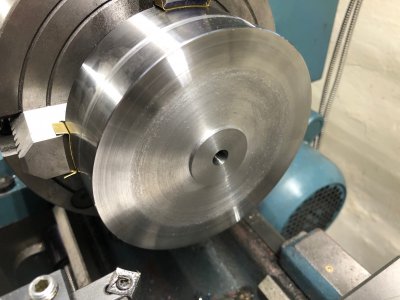
I sat pondering how to correct the alignment errors in my part and decided move the part off of the back of the chuck so it was "floating" in the jaws. I know I need this to run true to the bore, so I decided that every other machined surface was wrong and only the bore could be correct (and the concentricity of the bore to the OD on the first side). I spent 20 minutes going back and forth between indicating the bore and the OD near the first face. When the OD was wrong I corrected by adjusting the chuck jaws, when the bore was wrong I whacked the face with a dead blow to tip the part in the jaws. Each adjustment would affect the other measurement. I kept switching back and forth until I got both reading within 3 tenths. I then machined the OD and face to match this orientation.
This time I opted to use a CCGT aluminum finishing insert to cut the finish passes and man did it leave a nice finish!
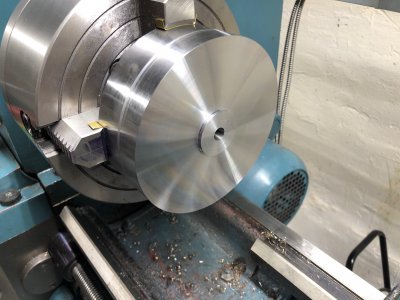
I need to work on this again tonight. I will flip the part back to side 1, indicate it true and finish the OD and face to be true to the bore. Thankfully I don't have any dimensions to hit on this thing and all that matters is the 10mm bore and the rest running very true.
I also need to drill and tap a hole for a set screw to hold it to the shaft. I originally planned to drill this on a steep angle from the face, however I'm questioning that logic now and might drill in from the OD. Should probably do 2 holes 180 degrees apart to maintain balance. Any thoughts?
The trainer was designed for bikes with a bolted rear axle and my wife's bike has a quick disconnect axle leaving nothing for the trainer to grab onto on the bike. I contemplated this issue for a while and then headed down into the shop to make a new axle. I didn't get a ton of pictures of this process, but basically I started with a bar of 12L14 which was centerless ground to 5/8". I had to reduce it down to .1875 over a 7.5" length.
I did the Joe Pieczynski method (I'm sure he wasn't the first) of turning down to the final diameter in one pass and incrementally pulling out more stock from the chuck. This part didn't need to be precision, but it worked very well. A super sharp VCGT insert was used.

I preserved the center on one end so I could get some tail stock support as I worked. The finish isn't perfect, but still not bad. Dimensionally it varies by less than 10 thou over the length, although I could do better on a second part.

The part was cut to length and a 10-24 thread put on each end with a die. Additionally I made two tapered nuts from the same barstock to fit the conical inner feature of the bike trainer. I hand filed the flats and did no measurement until I was done. One nut was .503" over the flats and the other was .508". Pretty close!

She has been using the bike like this for a while now and really likes it, but I don't think it has the "feel" of real road biking. There isn't the momentum of your body moving forward, so the moment you ease up on the pedals, the wheel slows down. I am hoping that this momentum can be simulated with a heavier flywheel. The one on the bike is a 4.75" diameter, roughly 1/2" thick disc of die cast zinc which mounts to the friction brake on a 10mm shaft. It probably weighs less than 2 lbs.

I went on ebay and bought a 5.38" x 2" piece of 4140 for about $30. It came labeled as 4140 HT but it doesn't feel that hard.

I started to go to work on this with a little CCMT insert tool but it became quickly clear that it wasn't going to cut it. I have an ISCAR CNMG holder with a 3/4" shank which I milled down to 1/2" so it would fit my lathe. Good god can that thing do work. It would take any cut I could throw at it limited only by my lathe's HP. I was taking cuts 0.060 off the diameter with a 0.020"/rev feedrate at 200 rpm. This calculates to something like 2.5HP on my 1.5HP lathe. It was definitely slowing down a bit in the cut but really cut beautifully.
I have sworn to people that a 12x36 was probably too small to use negative rake tools, but now I'm a believer. Interestingly, the finish on the part was garbage until I started cutting harder - then the tool would leave a scalloped but mirror finish.

Here is the first side roughed in. The tool I was using could probably take 40HP on a real lathe, so I was having a hard time pushing it enough to break a chip. It would chip break OK on the OD when I was maxing out the lathe, but not on the face. My shop is FULL of deep blue noodles.

From here I drilled the center to 0.375 and reamed to 10H6 using a super cheap metric reamer I got in a set from 1mm to 13mm for something like $12. They leave a garbage finish, but it was the best was I knew to get a decent 10mm hole in this thing.
Here is where the trouble started. I flipped the part around to finish the back and used jaw pads to not mar the part. The jaw pads are brass sheet with a dense fiber backing. Even with the chuck crushing down on these, the part wanted to chatter like crazy when roughing. I later switched to solid brass pads which worked a lot better. I couldn't believe how much of a difference that little work holding change made.
When the part chattered, it must have moved a bit in the jaws so my attempt at finishing the OD did not line up well. Additionally when I smacked it back in the chuck, I couldn't get it to run true. I learned a few things:
- My drilled and reamed hole was a bit crooked and not square to the finished face and OD
- My chuck jaws are not ground square when flipped for OD part holding like they are. They are off by 2.5 thou!

Here is an interesting shot where you can see the effects of surface speed on a carbide tool. near the OD, the surface speed is relatively high and produces a good quality finish. Once the cutter started getting near the part center, the metal began tearing out a bit, giving a much worse finish.

I sat pondering how to correct the alignment errors in my part and decided move the part off of the back of the chuck so it was "floating" in the jaws. I know I need this to run true to the bore, so I decided that every other machined surface was wrong and only the bore could be correct (and the concentricity of the bore to the OD on the first side). I spent 20 minutes going back and forth between indicating the bore and the OD near the first face. When the OD was wrong I corrected by adjusting the chuck jaws, when the bore was wrong I whacked the face with a dead blow to tip the part in the jaws. Each adjustment would affect the other measurement. I kept switching back and forth until I got both reading within 3 tenths. I then machined the OD and face to match this orientation.
This time I opted to use a CCGT aluminum finishing insert to cut the finish passes and man did it leave a nice finish!

I need to work on this again tonight. I will flip the part back to side 1, indicate it true and finish the OD and face to be true to the bore. Thankfully I don't have any dimensions to hit on this thing and all that matters is the 10mm bore and the rest running very true.
I also need to drill and tap a hole for a set screw to hold it to the shaft. I originally planned to drill this on a steep angle from the face, however I'm questioning that logic now and might drill in from the OD. Should probably do 2 holes 180 degrees apart to maintain balance. Any thoughts?

