- Joined
- Aug 3, 2017
- Messages
- 2,437
Thanks to this thread: https://www.hobby-machinist.com/threads/pm-833t-educated-quill-stop.57843/ I know what an 'educated nut' is, and decided I NEED it. The factory quill-stop nut takes forever to move up and down, and the 'clamp on' types aren't accurate enough for me. So this 'educated nut' is the best of both worlds!
I picked mine up on ebay (https://www.ebay.com/itm/301807356107) for about $50 shipped.
HOWEVER, the only install instructions I found are a pretty undetailed "Morton Part #1220S" printout (ALSO found here on HM!) that I didn't find particularly comforting in guiding my install. SO, here is how _I_ would have done it (note some of the pics are out of order because this is how I WOULD have, not how i DID).
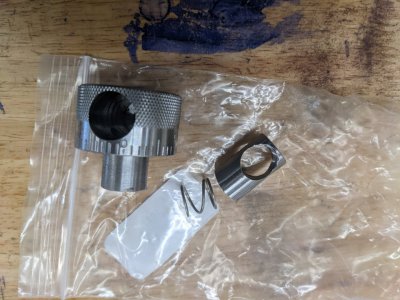
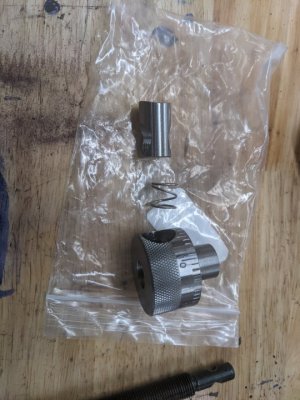
First, here is how the nut comes, in 3 pieces. The main body, the thumb-button, and the spring:
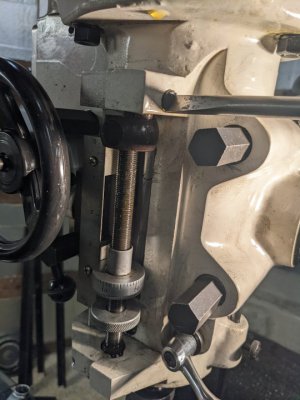
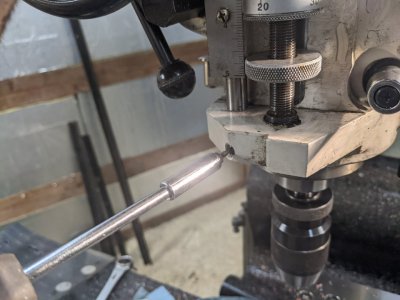
FIRST thing to do is to pull the 'cover' plug on the top-right of the mill. Mine was a flat headed screw. See my screwdriver in place!
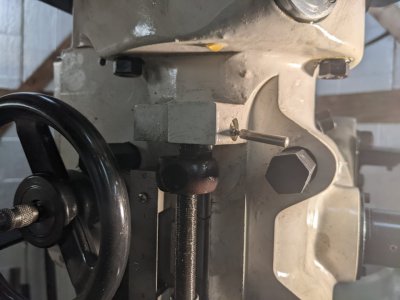
After that, you can see a shallow threaded hole underneath it that moves with the button and the stop-leadscrew. Research shows that SOME are threaded 5-40, mine seems to be M3 (as it is an import). Thread something in there and tug it out. Forgive my 'tool', a quick trip to the lathe and some scrap was required, since I didn't have a screw. Note you might have to wiggle the button and stop-leadscrew to get it to come out.
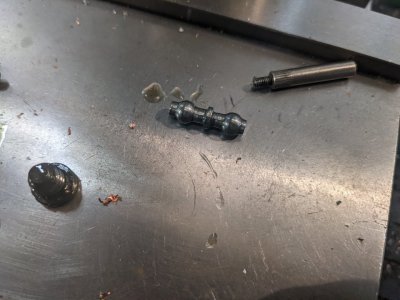
And here is what it looks like (next to my tool):
NEXT, loosen this grub-screw thing. Use your hand to catch the things that come out though. IN my case I only had two pieces fall out, but my look at a diagram implies there might be more parts that'll come out:
Out of THIS slot: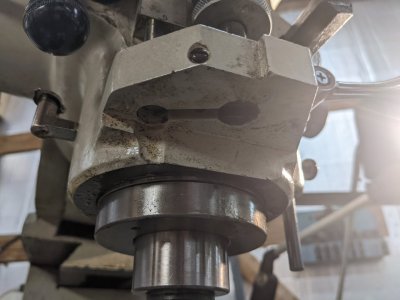
Came THIS thing: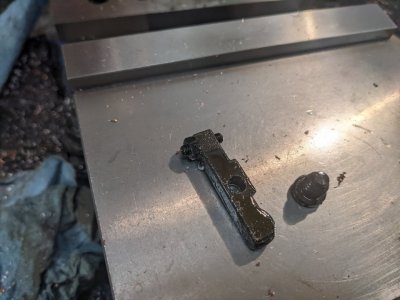
Followed by this thing:
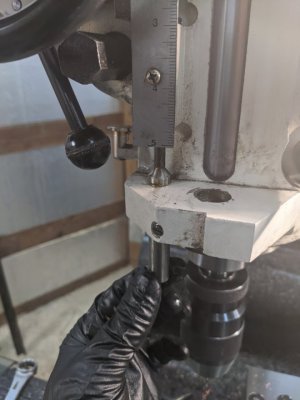
(Note that the last photo is in slightly different order, mine was 'stuck' thanks to oil, but came out as I was messing with the lead-screw).
NEXT: pull the cir-clip at bottom of the leadscrew:
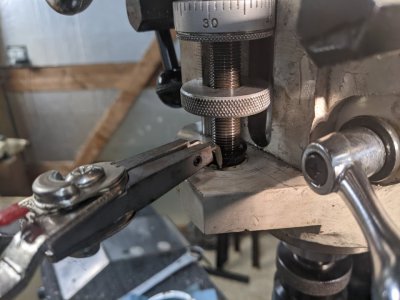
AFTER this is pulled upwards, the lead screw should come out the bottom. I spend about 5 minutes (jk, I used a power drill ) to get the old quill stop and lock nut removed.
HERE are all the parts that came off for me:
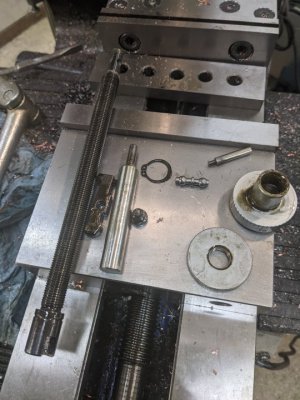
Reassembly is pretty easy, basically just the reverse! The nut goes together in this order, on the leadscrew:
Here is my test fit (which I immediately had to take off, since I had to assemble it in place):
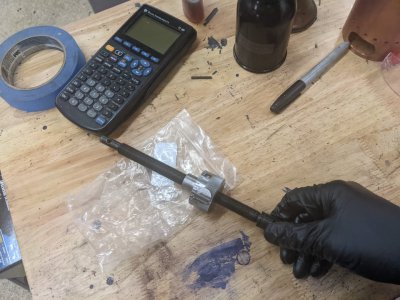
When you start assembling everything, make sure you get the circlip back in place, and the educated nut assembled and above the lead screw AS you are putting the leadscrew back 'up' into the machine. I started after that by setting the leadscrew into place.
NEXT I put the set-of-balls thing back on my threaded tool, and pushed it back into place. Note of course that the screw orientation needs to be correct, as that thing goes both through the little 'button' to the right of the screw, and through the top of the screw itself. I then put the 'cover' screw back on.
For the bottom, assembly was reasonably easy. The only 'gotcha' was the direction of this part:
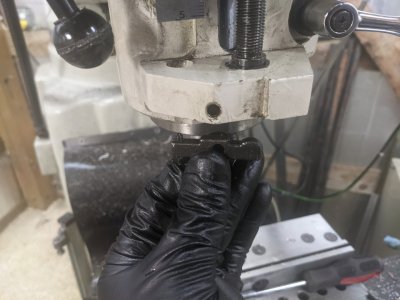
I'm about 95% sure this is the way it goes back together. It won't go in the 'reverse' way as far as I know, and the rounded edge makes sense to go upward.
SO that was it! A great improvement for my stop for $50 and about 30 minutes of reassembly!
I picked mine up on ebay (https://www.ebay.com/itm/301807356107) for about $50 shipped.
HOWEVER, the only install instructions I found are a pretty undetailed "Morton Part #1220S" printout (ALSO found here on HM!) that I didn't find particularly comforting in guiding my install. SO, here is how _I_ would have done it (note some of the pics are out of order because this is how I WOULD have, not how i DID).
First, here is how the nut comes, in 3 pieces. The main body, the thumb-button, and the spring:

FIRST thing to do is to pull the 'cover' plug on the top-right of the mill. Mine was a flat headed screw. See my screwdriver in place!

After that, you can see a shallow threaded hole underneath it that moves with the button and the stop-leadscrew. Research shows that SOME are threaded 5-40, mine seems to be M3 (as it is an import). Thread something in there and tug it out. Forgive my 'tool', a quick trip to the lathe and some scrap was required, since I didn't have a screw. Note you might have to wiggle the button and stop-leadscrew to get it to come out.

And here is what it looks like (next to my tool):

NEXT, loosen this grub-screw thing. Use your hand to catch the things that come out though. IN my case I only had two pieces fall out, but my look at a diagram implies there might be more parts that'll come out:

Out of THIS slot:

Came THIS thing:

Followed by this thing:

(Note that the last photo is in slightly different order, mine was 'stuck' thanks to oil, but came out as I was messing with the lead-screw).
NEXT: pull the cir-clip at bottom of the leadscrew:

AFTER this is pulled upwards, the lead screw should come out the bottom. I spend about 5 minutes (jk, I used a power drill
HERE are all the parts that came off for me:

Reassembly is pretty easy, basically just the reverse! The nut goes together in this order, on the leadscrew:

Here is my test fit (which I immediately had to take off, since I had to assemble it in place):

When you start assembling everything, make sure you get the circlip back in place, and the educated nut assembled and above the lead screw AS you are putting the leadscrew back 'up' into the machine. I started after that by setting the leadscrew into place.
NEXT I put the set-of-balls thing back on my threaded tool, and pushed it back into place. Note of course that the screw orientation needs to be correct, as that thing goes both through the little 'button' to the right of the screw, and through the top of the screw itself. I then put the 'cover' screw back on.
For the bottom, assembly was reasonably easy. The only 'gotcha' was the direction of this part:

I'm about 95% sure this is the way it goes back together. It won't go in the 'reverse' way as far as I know, and the rounded edge makes sense to go upward.
SO that was it! A great improvement for my stop for $50 and about 30 minutes of reassembly!

