- Joined
- Feb 18, 2016
- Messages
- 451
I've just recently been getting quite excited about getting back into machining. In fact, I just bought a bunch of new accessories for my Lathe/Mill. And then the darn thing BROKE!!!! What a bummer!
Before I begin let me first say that I used to own a really nice South Bend lathe, complete with tons of accessories. It had 3-jaw chuck, 4-jaw chuck, full set of 5-C collets with drawbar, Taper Attachment, Tool post Grinder, Center Rest, etc, etc, etc. It was great. Unfortunately when I moved I sold it because I didn't have a place to set it up. I would give anything to have it back today. That was about 40 years ago that I sold it. In the interim, I had an really nice Atlas lathe, again with tons of accessories, and even a full turret tailstock. Again. Sold the thing and would give anything to have it back today.
Now I own an Enco HQ400 Chinese 3-in-1 Lathe/Mill/Drill. It's a piece of junk I know. But it was working up until about an hour ago.
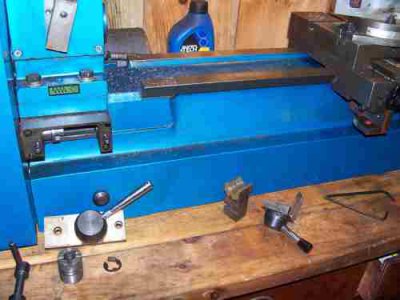
Here's the machine:
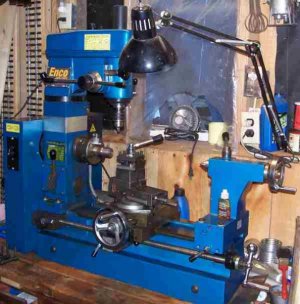
It was pretty nice until it broke. I mean, for being a cheap machine.
Anyway, I just bought a brand new set of 3MT collets for it and I was in the process of making a drawbar for them using an old Sewing machine handwheel. (see photo below)
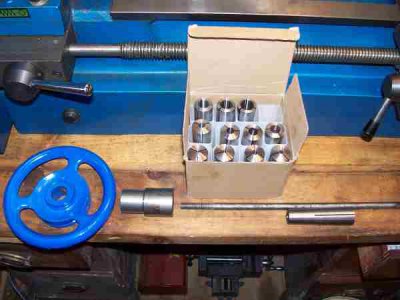
On the right is the handwheel I'm hoping to use. Next is the piece I'm currently working on to mount the handwheel to the threaded drawbar rod. It was while turning down this piece of steel when the lathe half-nut broke.
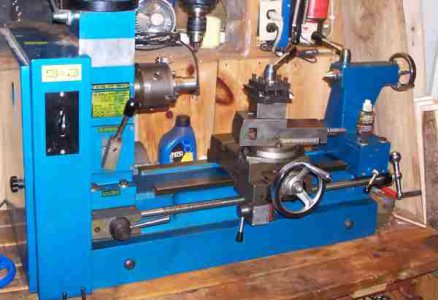
You can see the half-nut lever just to the right of the table handwheel. Note that this half-nut serves for both thread cutting and to drive the table during normal turning feed. I was hogging off about 40 thousands of material when something banged and the lathe quit cutting. I knew something broke but wasn't sure what it was. My first thought was the carbide tool bit broke off. I was using a cheap brazed-on carbide tool at the time. But nope it wasn't the tool. It was the half-nut lever, broke clear off and was laying on the bench beneath the table.
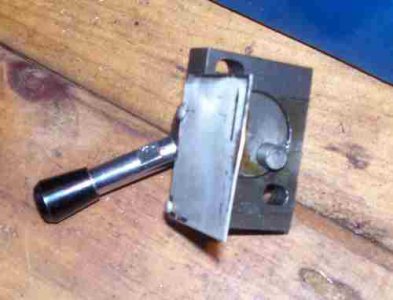
Apparently only 2 small screws hold it on. One screw had apparently been missing entirely for who knows how long. The other screw was most likely working it's way out and simply broke off a piece of the lathe casting with the last couple threads it was hanging on with. I feel guilty for not having realized the lathe was falling apart. Had I not let it get this loose it most likely would have never broken.
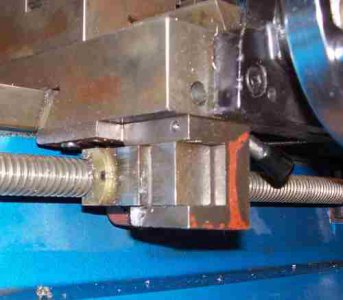
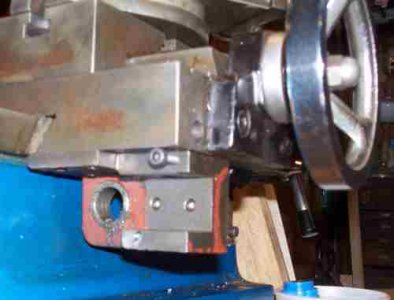
Above is a picture of the half-nut still in the table. If you look close you can see that a very small part of the table casting actually broke off just underneath the half-nut. That was the screw that was still hanging on by a few threads. The screw itself didn't break. And fortunately there appears to be plenty of threads still left in the table part so that I might be able to put this back together again by just getting a longer bolt.
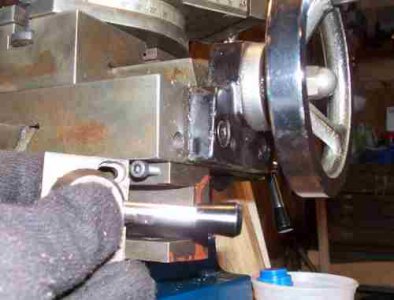
Below is a picture with the half-nut removed. You can better see where the casting was broke off on the bottom screw hole. I'm guessing this was some kind of casting since it broke like cast iron.
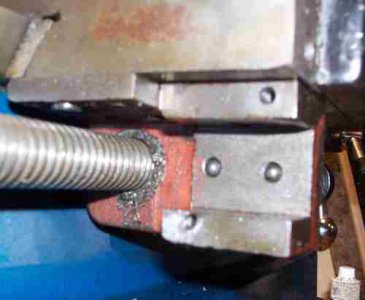
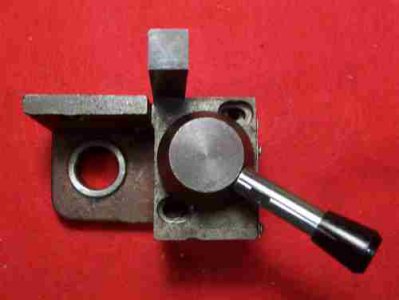
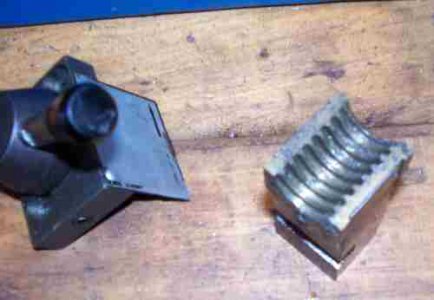
Below you can see the half-nut. The threads appear to be fine. No damage to the actual half-nut itself. I'm a bit surprised though. This truly is just one-half of a nut. It seems to me that both my South Bend lathe and the Atlas actually had two-halves that clamped together to serve as a "half-nut"? I can't be sure about that. But this is truly just 1/2 of a nut. That's all that drives this table.
I'll need to find some metric bolts to see if I can put this back together again. I did notice that in a worse-case scenario the threaded holes could be drilled clear through the piece mounted on the table and this could be put back together using bolts and nuts. There's enough room on the far side to do this if necessary. But for now it looks like it might be repairable by just replacing the screws with some a tad bit longer.
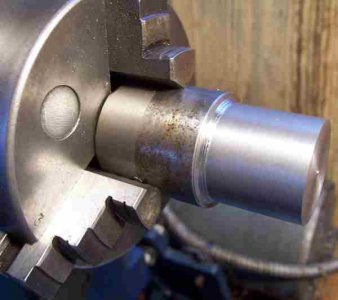
Above is the piece of steel I was turning down when this broke. I think I was hogging off quite a bit of material at the time. But nothing this lathe shouldn't handle. The lathe itself wasn't struggling to cut this. I don't think the half-nut mechanism would have broken at all had both mounting bolts been property seated and tightened.
In any case, I need to fix this now before moving on.
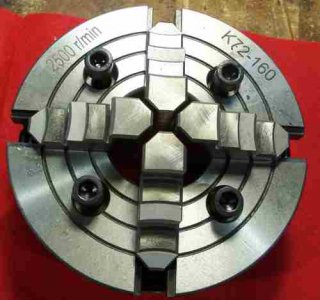
I have a second job to do for this lathe. I just bought a brand new 6" 4-jaw chuck for it. It came with a 4" 3-jaw. The lathe has a 17" swing so I decided to get the 6" 4-jaw just for the larger capacity. Plus I wanted the independent jaws of the 4-jaw too. This lathe should handle this chuck easily as long as I don't put anything too monstrous in it.
Here's the new chuck:
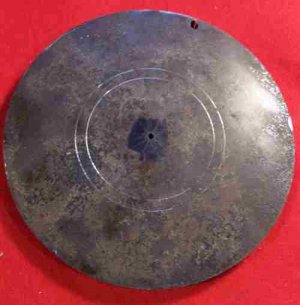
And I bought a blank piece of 1/2" thick by 7" steel plate to make into a backing plate.
Lot's to do, but no half-nut to do it with.
Oh, yeah, one more thing,....
I'm anxious to try cutting threads on this lathe too. I cut the threads shown below on the collet drawbar using a standard thread die by hand. But I need to thread the other side even longer, so I'm hoping to cut those threads on the lathe.
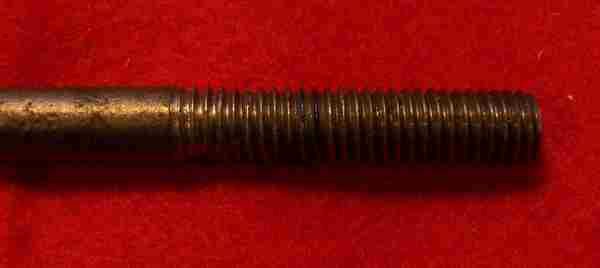
I have lots of work for the mill too. But I can't use that with this broken half-nut either. I use this same table for cutting on the mill.
I suppose I'm supposed to ask a question in this beginner's forum?
Has anyone else experienced a similar breakage on a cheap lathe?
Hopefully I can fix with without any major loss of performance.
Before I begin let me first say that I used to own a really nice South Bend lathe, complete with tons of accessories. It had 3-jaw chuck, 4-jaw chuck, full set of 5-C collets with drawbar, Taper Attachment, Tool post Grinder, Center Rest, etc, etc, etc. It was great. Unfortunately when I moved I sold it because I didn't have a place to set it up. I would give anything to have it back today. That was about 40 years ago that I sold it. In the interim, I had an really nice Atlas lathe, again with tons of accessories, and even a full turret tailstock. Again. Sold the thing and would give anything to have it back today.
Now I own an Enco HQ400 Chinese 3-in-1 Lathe/Mill/Drill. It's a piece of junk I know. But it was working up until about an hour ago.
Here's the machine:

It was pretty nice until it broke. I mean, for being a cheap machine.
Anyway, I just bought a brand new set of 3MT collets for it and I was in the process of making a drawbar for them using an old Sewing machine handwheel. (see photo below)

On the right is the handwheel I'm hoping to use. Next is the piece I'm currently working on to mount the handwheel to the threaded drawbar rod. It was while turning down this piece of steel when the lathe half-nut broke.

You can see the half-nut lever just to the right of the table handwheel. Note that this half-nut serves for both thread cutting and to drive the table during normal turning feed. I was hogging off about 40 thousands of material when something banged and the lathe quit cutting. I knew something broke but wasn't sure what it was. My first thought was the carbide tool bit broke off. I was using a cheap brazed-on carbide tool at the time. But nope it wasn't the tool. It was the half-nut lever, broke clear off and was laying on the bench beneath the table.

Apparently only 2 small screws hold it on. One screw had apparently been missing entirely for who knows how long. The other screw was most likely working it's way out and simply broke off a piece of the lathe casting with the last couple threads it was hanging on with. I feel guilty for not having realized the lathe was falling apart. Had I not let it get this loose it most likely would have never broken.

Above is a picture of the half-nut still in the table. If you look close you can see that a very small part of the table casting actually broke off just underneath the half-nut. That was the screw that was still hanging on by a few threads. The screw itself didn't break. And fortunately there appears to be plenty of threads still left in the table part so that I might be able to put this back together again by just getting a longer bolt.
Below is a picture with the half-nut removed. You can better see where the casting was broke off on the bottom screw hole. I'm guessing this was some kind of casting since it broke like cast iron.

Below you can see the half-nut. The threads appear to be fine. No damage to the actual half-nut itself. I'm a bit surprised though. This truly is just one-half of a nut. It seems to me that both my South Bend lathe and the Atlas actually had two-halves that clamped together to serve as a "half-nut"? I can't be sure about that. But this is truly just 1/2 of a nut. That's all that drives this table.

I'll need to find some metric bolts to see if I can put this back together again. I did notice that in a worse-case scenario the threaded holes could be drilled clear through the piece mounted on the table and this could be put back together using bolts and nuts. There's enough room on the far side to do this if necessary. But for now it looks like it might be repairable by just replacing the screws with some a tad bit longer.

Above is the piece of steel I was turning down when this broke. I think I was hogging off quite a bit of material at the time. But nothing this lathe shouldn't handle. The lathe itself wasn't struggling to cut this. I don't think the half-nut mechanism would have broken at all had both mounting bolts been property seated and tightened.
In any case, I need to fix this now before moving on.
I have a second job to do for this lathe. I just bought a brand new 6" 4-jaw chuck for it. It came with a 4" 3-jaw. The lathe has a 17" swing so I decided to get the 6" 4-jaw just for the larger capacity. Plus I wanted the independent jaws of the 4-jaw too. This lathe should handle this chuck easily as long as I don't put anything too monstrous in it.
Here's the new chuck:

And I bought a blank piece of 1/2" thick by 7" steel plate to make into a backing plate.

Lot's to do, but no half-nut to do it with.
Oh, yeah, one more thing,....
I'm anxious to try cutting threads on this lathe too. I cut the threads shown below on the collet drawbar using a standard thread die by hand. But I need to thread the other side even longer, so I'm hoping to cut those threads on the lathe.

I have lots of work for the mill too. But I can't use that with this broken half-nut either. I use this same table for cutting on the mill.
I suppose I'm supposed to ask a question in this beginner's forum?
Has anyone else experienced a similar breakage on a cheap lathe?
Hopefully I can fix with without any major loss of performance.


