Building an RC Pulse Jet Powed Airplane.

Flyinfool

H-M Supporter - Diamond Member
H-M Lifetime Diamond Member
Joined
Apr 29, 2019
Messages
2,056
I figured I would add in a build thread for a new RC Jet that I am building.
I actually started this a long time ago so I will make a bunch of posts to catch those interested up to date.

Ya I know this ain't machining related. BUT it sure do look like it will be fun.
I just ordered this from Germany, it should be here in about 3 weeks.

Then we get to see just how much trouble I can get myself into.
I know that I am not the only one on this site that messes with RC toys.
This should have a level flight speed of around 400KPH or 250 MPH.
scared.gif
225.gif

A little more coming out of a dive.

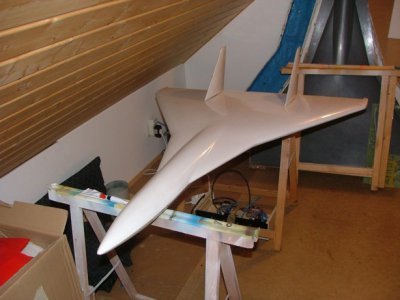
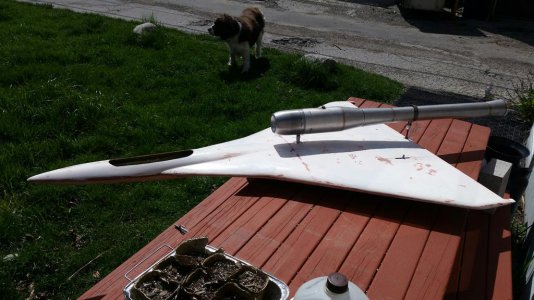
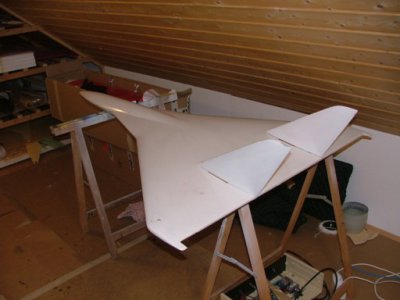
It is called a Super Scout
It has a wingspan of 44 inches and is 61 inches long.
It should have a flying weight of around 14 lbs and the pulse jet engine has about 18 lbs of thrust.
This means it can accelerate even going straight up.

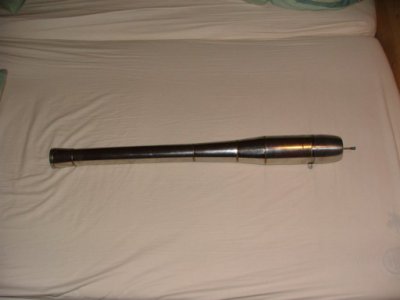
The whole rear half of the engine (the skinny part) will be glowing bright orange while it is running.
It runs on a mixture of 50% gas and 50% diesel, with some 2 stroke oil added to that at a 50:1 mix. Sounds like a nice volatile mixture to me.

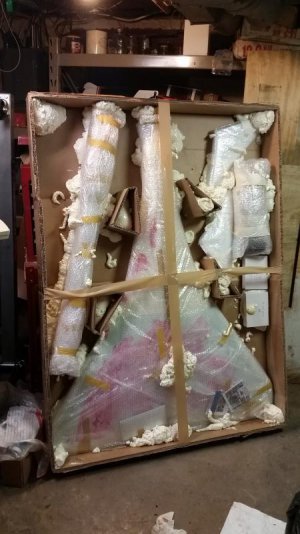
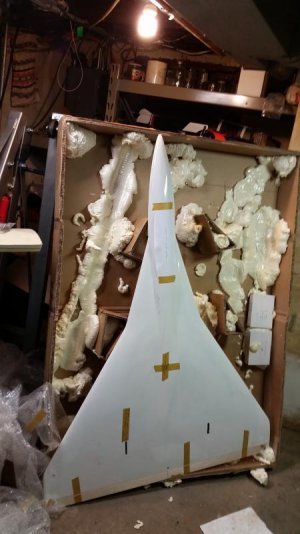
Even though it looks like it is a complete aircraft, that is just a fiberglass shell, there is a lot of work that goes into making it flight ready. It will likely take me a very long time to get it built.

Man I hate waiting for toys to show up in the mail.
SS_2.jpg
Pulso1.jpg
SS_1.jpg
 
WOW!!!

I can't help but to say something, this just has me totally amazed.

Tuesday March 17 at 10:27 am I made an internet purchase from Germany.
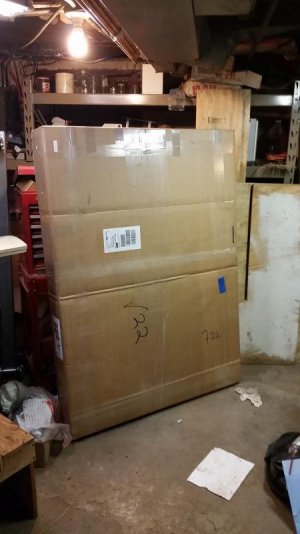
The box to ship this was 4 feet x 5 feet x 8 inches, and weighed about 28 lbs.
It was picked up at the sellers house by DHL International Express on Tuesday at 13:41 on 3-17-15.
It was delivered to me today at 14:27 on 3-19-15.

This just blows my mind that a big package can get from Germany to Wisconsin, with customs thrown in, in just 50 hours, 46 minutes.

I mailed a USPS small flat rate box to travel just 90 miles and it took 5 days to get there.

My hat is off to DHL for whatever they are doing, they are doing it right.

In all fairness I must admit that when the tracking first came up online a few minutes after the package pickup. I laughed that it said the expected delivery was by the end of the day on 3-19-15. I figured no way in he11.

I had this delivered to my work so that it would not be sitting in front of my house looking like a big flat screen TV.

Now I am chomping at the bit to get home to open the big box and check out my new toys.
 
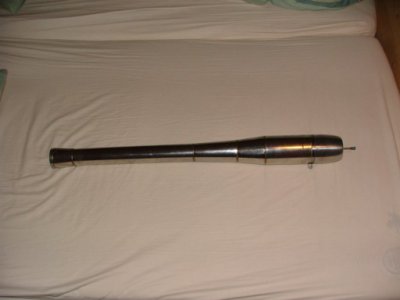
That is not a turbine, (I have other planes with turbines...) It is a Pulse Jet, just like on the V-1.
whistling.gif


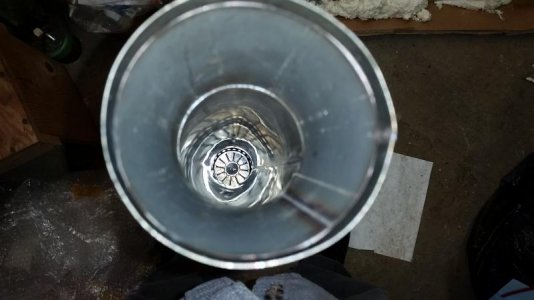
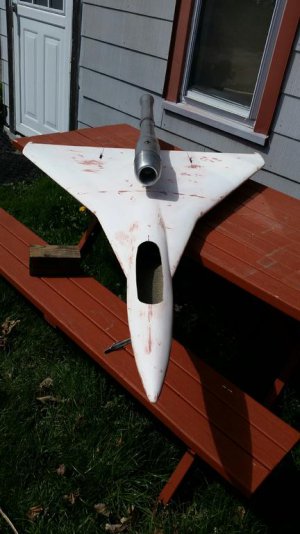
That pic of the end of the jet is looking in the small end of the jet.

Once I do get into this one, it will take a long time to finish. While it looks nearly complete, that is just a fiberglass shell, I have to design and build all of the internal structures, and fuel systems and control systems.

There is really not much to a pulse jet engine, they are very simple devices. Mine has just one moving part and that is a read valve on the intake. There are pulse jets that have NO moving parts.
 
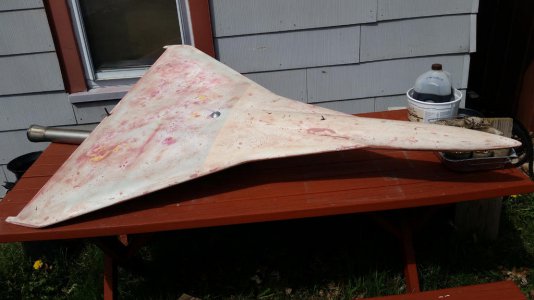
I cut the hole in the top of the fuse for the canopy access, this was the first time I got to see inside the plane. The layup is white gel cote, light glass cloth, then a layer of foam, then a heavy layer of kevlar/carbon fiber. Seems very strong. The particular plane that I bought was a "blem" and I got a significant price reduction so it will need a lot of extra TLC to get ready for paint, There were air bubbles in the gel cote.

I have machined the engine mounts that will be needed out of aluminum and Stainless. I am thinking about remaking them out of Titanium for lighter weight and better heat resistance. Besides I have never made anything out of Titanium before, a new challenge.

Since I have never played with a pulse jet I will be building up a test bench for it to learn how to work it without burning down the plane.

This will still be a slow build. I have never been a fast builder unless I had a specific deadline to meet. I realized that it has been around 15 years since I built an airplane from a kit. Nowadays almost everything comes out of the box ready to fly.


This is the first whole airplane that I am going to paint, just because it is all glass. My preferred finishing methods do not work on glass.
The control surfaces are balsa so I plan to cover them with 3/4 oz glass cloth just so that everything will match for painting.
It has been a LONG tome since I have painted anything and I have never painted anything this big. I spent the whole weekend filling and sanding and filling and sanding and filling and sanding................................
And I am no where near done filling and sanding. And this is just filling the holes I can see. There has got to be an easier way....?
 
I am getting pretty close to finishing the filling and sanding where I can shoot the first coat of primer on. Then I will see all the holes I missed..... I am getting close to that magical point of diminishing returns. You have to remember that this is an aircraft, weight matters and must be kept to a minimum. This means that the paint will have to be put on thin and correct the first time using a paint with good coverage so it only needs one coat of color. For the designs I will mask the areas for each color so that there is only one coat of color everywhere. and then just one coat of 2K clear over the whole thing. I am being a lot more fussy on the top side that you can see. the bottom will only be visible going by at 250 MPH so not many people have good enough eyes to spot a blemish.

I have started to design and cut out some more interior structural parts.

This is one of those projects that you work like crazy, and then step back to admire your work and it looks the same as when you started.

Building the internal structure is kind of like building a ship in a bottle but the bottle is opaque so that you are building by feel. At the end of the day all that work is internal so none of it is visible.
 
Well here are a few pics to wet your appetite.

It sure does not look a lot different from when I started, but there is a lot of time wrapped up in it already, most was filling and sanding and the early parts of paint prep.

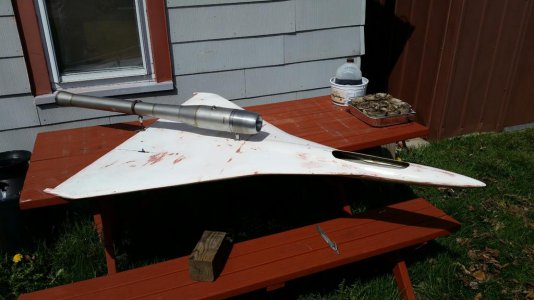
The pulse jet is just temporarily mounted to get a rough idea on where the CG is headed. It looks like everything needs to be as far forward as it can go and I will still need a lot of lead in the nose. This also means that there is no reason to skimp on any structure up front.

PJ1.jpg
PJ2.jpg
PJ4.jpg
PJ5.jpg
 
For now I am working on designing and building all of the ground support equipment that I will need to make it run and to get it in the air.

This aircraft has no landing gear, that would add extra weight and drag so they are not used. That means it will have to get "launched". Launch will be accomplished with 5 strands of bungee cord that each strand will be 1/2" dia and 30' long. This when stretched out will give a pull of around 150 - 170 lbs! this will be connected to a hook on the bottom of the airplane via around a 30 foot heavy fishing line. This means that since the airplane will weigh about 14-15 lbs, there will be about 10 Gs of acceleration to get it up to flying speed.

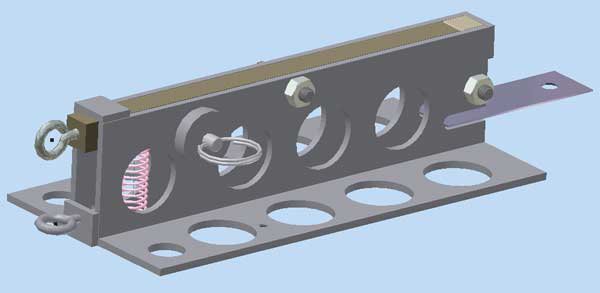
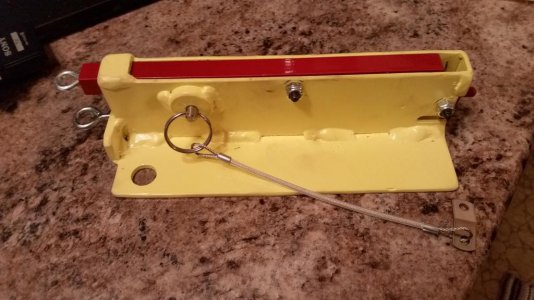
To hold the airplane in position I have designed and am building a release mechanism with a trigger to let it go.

PJ-Release CAD.jpg

This part has had a lot of welding and machining already, it is made of all steel.

Another part that I am working on is the ignition system, I need to be able to fire a spark plug with a continuous spark. To accomplish this I have a small 12V battery, an old fashion ignition coil with built in ballast resistor, a condenser, and a DPDT relay to act as the points. I will wire the coil of the relay in series with the NC contacts of the relay. This way when the coil energizes it will break the connection, and when the connection breaks the coil will let go and the contacts contacts will close again, energizing the coil, and the cycle will continue at around 250 times a second. The other set of contacts will be powering the ignition coil primary side, and there will be a ground wire and a high tension wire going to the spark plug on the engine. This spark is only needed to get the engine started, once running the plug wires are disconnected and the internal heat of the engine will keep it running. Of course there will be proper switches and fuses in there also.

The next part is that to initiate the start I need to blow a fuel air mix into the front of the engine. Air will be supplied by a small portable pancake compressor running off of an inverter. The fuel will be propane from a small 1lb cylinder. I will need to have an adjustable regulator on the propane so that I can dial in the correct fuel air mix for combustion. on the blow gun for the air will be a second trigger valve to also turn on and off the propane. For the propane valve I am using a thermocouple switch from a Mr Heater portable heater and just leaving the thermocouple off. These valves have the button to keep the gas flowing while you are waiting for the thermocouple to heat up so it will make a convenient push button propane valve.

I guess I will be busy all winter, But at some point once I get enough ground support stuff built, I will mount the engine on a test stand and start learning how to make it run. If handled wrong there is a good chance of blowing fire out the tailpipe. I do not want to burn down the airplane before it even gets a chance to fly.
 
Even though I have been flying these fool things for more than a half a century, It is a real possibility that I will also make a big smoking hole in the ground.
This is so new, I have yet to find anyone in the USA that is flying something like this. I have no one to ask questions of. I am inventing everything as I go.

I did come to the realization that it did not need the lightening holes. This is an anchor, weight is not a bad thing. The big holes would look cool but are a lot of extra work to make.

PJ Launcher.jpg
 
Back
Top