- Joined
- May 27, 2016
- Messages
- 3,466
OK - so onward with Graham's Folly. This will likely be somewhat heavy on the pictures
This set continues an approximately chronological series. All is to be as is, warts 'n all, and may include mistakes, maybe stuff to regret later. What was happening did kind of force some project creep. The present configuration was totally re-worked to put the door(s) on the West side, and make them top-half windowed. The big window was moved to the south side, and the small window next to it increased so that we now have two big view windows. The smaller windows, now on the north side, are not the opening kind. If that proves to be a mistake, then I may have to change them someday.
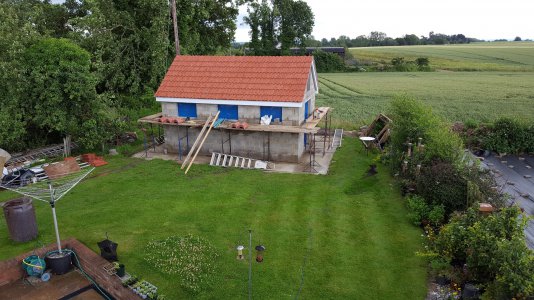
A first imagining of the design desk position and view. I may have to add external sun shade canopy things outside over the the windows. The glass will be insulation (air gaps) glazed UPVC.
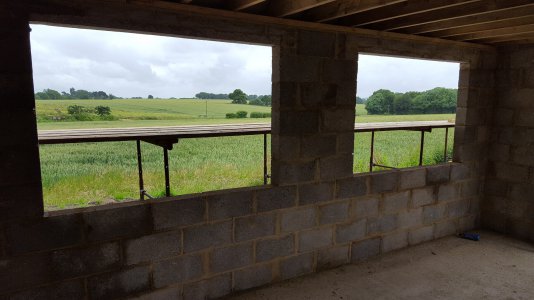
The windows go in (all except one)
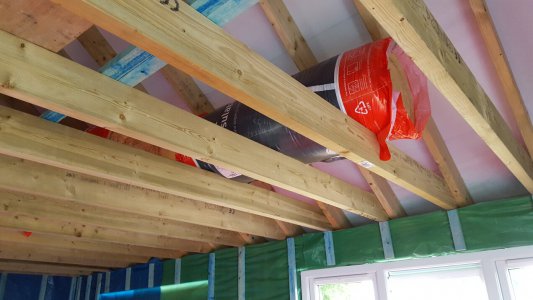
I was persuaded by a French aviator friend to do this. He said it would be a crime to leave the view to three non-opening windows. I will have to wait the lead time for the bigger window. Here we see the moisture barrier before the insulation. Here also, I discover what a red radon gas barrier looks like. No matter, I will probably be carrying my own radioactive junk bits inside anyway.
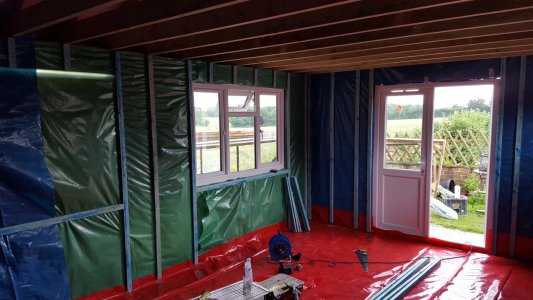
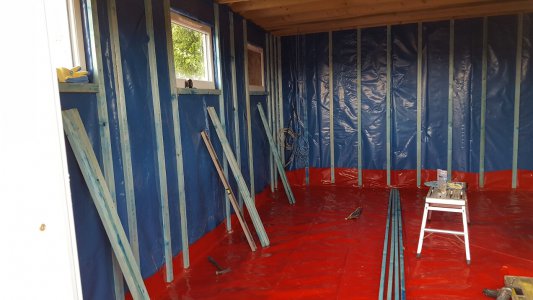
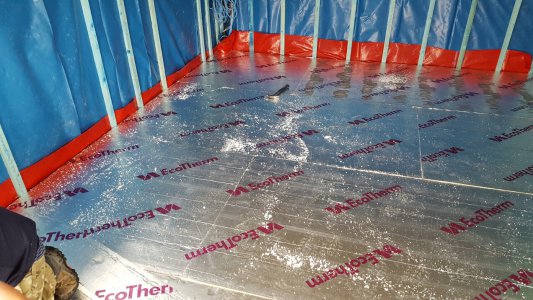
That colour set looks almost Italian. Some real thick insulation to go between the 8 x 2(s) Has anyone noticed that despite the industry ability to produce construction lumber to something better than about +/- 1mm, the two inches is something well short of a real two inches. More like about 1.8 inches. The 8 inches looks more like 7"+3/4". The floor insulation is 50mm of polyurethane with the aluminium foil sides. So anyway, here is insulation.
And then it's the walls - and first fix electrics
Not mentioned so far, but before the floor was poured, I installed a 110mm (4.3 inches) re-purposed plastic soil pipe all the way back to the main house garage. We used the hire digger to make a trench at the same time it was here to dig foundations. I think that amounts to about 4-inch internal diameter. I needed about 70m of polypropylene rope to pull through a 10mm^2 SWA steel armoured power cable + a 25mm diameter blue HDPE water pipe + 3 x GigaBit Network cables, and a couple of 50 ohm coaxials. This way, there is a 35m pull-through rope kept at one end, or the other, just in case of need to pull stuff through, or fix something gone wrong. They can be seen emerging in the East corner.
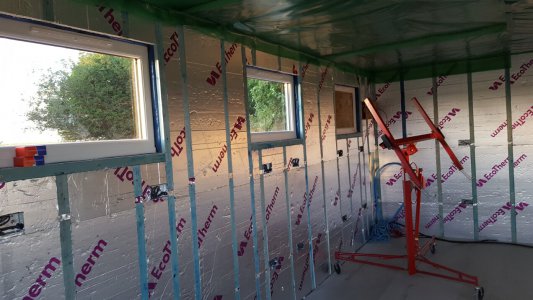
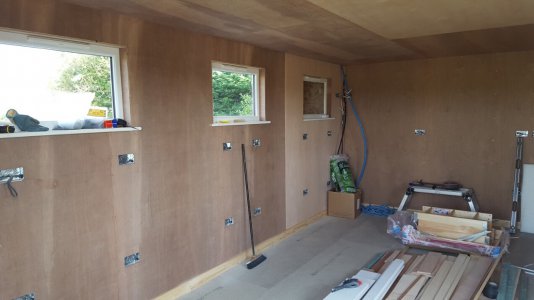
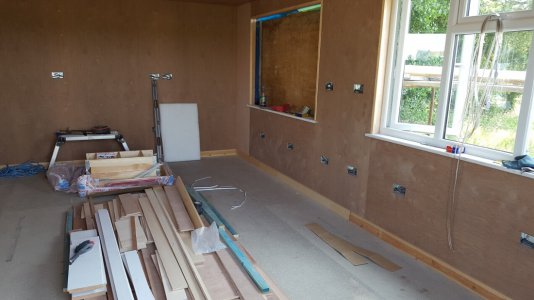
OK - OK ! I get it that nobody needs so many power sockets! It may be that some don't get used much.
The idea here is that whatever bench or machine stuff might end up there, there is a low level run 44cm above the floor, and a high level run at 1.2m, handy to have them above any benchy stuff. There are two separate RCD protected 32A ring mains, arranged North side and South side, and split upper and lower. I plan to use LED strip lightings on the ceiling mixing some 3100K "warm" with 5800K "daylight" to get good colour rendering anything it illuminates. The crazy red gadget helps hold boards up to the ceiling - sort of. It has parts that had to be reinforced between two bits of ply to resist the tendency to buckle
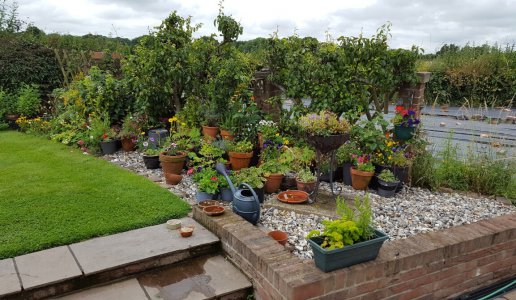
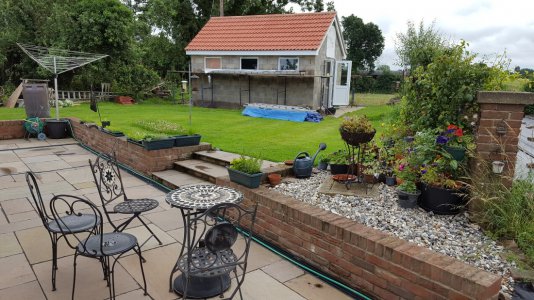
There are flowers!
It's that time of year. Right now, some sort of crazy humid heat wave. I never thought that 51°N latitude could so madly get up past 30C before 10am.
 -
- 
Plywood everywhere.
So we get to more 12mm and 18mm ply. I am overwhelmed by plywood! When the other window arrives, the external render can begin. It will be the stuff that is white all the way through, with a slight glint sparkle here and there. This is to match the stuff on the main house. You never have to paint it
It will be a completely different story for the inside. Matt white ceiling, and some kind of off-white or pastel colour like boring magnolia for the walls. Sure, one can go mad with arty primary colours, but I am not sure I need such excitement!
I plan to use sets of French cleats here and there, but again - not fully thought through! This time, the arrival of the power cable, the first fix to where the power distribution box will be, and the still-to-be-figured-out blue water supply is more obvious. The folding loft hatch ladder is back there, as is the view of missing window frame.
Let's end up with the doors. The good lady takes more of an interest than I thought. The concrete surround is a slightly sloped thing to take patio slabs. Apparently the plain concrete look "lowers the tone of the place". Just to the left of the door will be put my almost first milling project. A stainless steel plaque with my business name and logo carved into it. That is the final touch that makes this whole thing a tax deduction working business facility!
Yeah! Every good shop needs to be built to the sounds of a Makita charger radio (or DeWalt, Bosch, Ryobi, whatever), and the scream of the lumber circular chop-saw, and coffee, and power extension reels to trip over
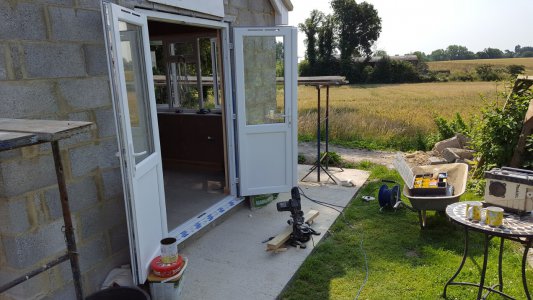
The floor?
Its very solid, but I can put fixings down to substrate if I need to. The need would seem unlikely. Here is where, once again, I fall short on thinking it through. Should it be something like vinyl tiles? I could use some suggestions. Whatever it is, I think it should be possible to wipe up spills without permanent blotch. With many shed shops, the total loss of new oil and escaped coolant eventually sinks downward, giving the whole place a shop patina and aroma. That may have some nostalgia mileage, but I am not sure I want that, and I suspect the good lady may disapprove. Things will begin to look a bit more Hobby Machinist décorer style artistique when a few machiny thingys finally get to settle in there.
That's it so far. I will post again when the next stuff happens.
This set continues an approximately chronological series. All is to be as is, warts 'n all, and may include mistakes, maybe stuff to regret later. What was happening did kind of force some project creep. The present configuration was totally re-worked to put the door(s) on the West side, and make them top-half windowed. The big window was moved to the south side, and the small window next to it increased so that we now have two big view windows. The smaller windows, now on the north side, are not the opening kind. If that proves to be a mistake, then I may have to change them someday.

A first imagining of the design desk position and view. I may have to add external sun shade canopy things outside over the the windows. The glass will be insulation (air gaps) glazed UPVC.

The windows go in (all except one)
I was persuaded by a French aviator friend to do this. He said it would be a crime to leave the view to three non-opening windows. I will have to wait the lead time for the bigger window. Here we see the moisture barrier before the insulation. Here also, I discover what a red radon gas barrier looks like. No matter, I will probably be carrying my own radioactive junk bits inside anyway.


That colour set looks almost Italian. Some real thick insulation to go between the 8 x 2(s) Has anyone noticed that despite the industry ability to produce construction lumber to something better than about +/- 1mm, the two inches is something well short of a real two inches. More like about 1.8 inches. The 8 inches looks more like 7"+3/4". The floor insulation is 50mm of polyurethane with the aluminium foil sides. So anyway, here is insulation.


And then it's the walls - and first fix electrics
Not mentioned so far, but before the floor was poured, I installed a 110mm (4.3 inches) re-purposed plastic soil pipe all the way back to the main house garage. We used the hire digger to make a trench at the same time it was here to dig foundations. I think that amounts to about 4-inch internal diameter. I needed about 70m of polypropylene rope to pull through a 10mm^2 SWA steel armoured power cable + a 25mm diameter blue HDPE water pipe + 3 x GigaBit Network cables, and a couple of 50 ohm coaxials. This way, there is a 35m pull-through rope kept at one end, or the other, just in case of need to pull stuff through, or fix something gone wrong. They can be seen emerging in the East corner.

OK - OK ! I get it that nobody needs so many power sockets! It may be that some don't get used much.
The idea here is that whatever bench or machine stuff might end up there, there is a low level run 44cm above the floor, and a high level run at 1.2m, handy to have them above any benchy stuff. There are two separate RCD protected 32A ring mains, arranged North side and South side, and split upper and lower. I plan to use LED strip lightings on the ceiling mixing some 3100K "warm" with 5800K "daylight" to get good colour rendering anything it illuminates. The crazy red gadget helps hold boards up to the ceiling - sort of. It has parts that had to be reinforced between two bits of ply to resist the tendency to buckle
There are flowers!
It's that time of year. Right now, some sort of crazy humid heat wave. I never thought that 51°N latitude could so madly get up past 30C before 10am.
 -
- 
Plywood everywhere.
So we get to more 12mm and 18mm ply. I am overwhelmed by plywood! When the other window arrives, the external render can begin. It will be the stuff that is white all the way through, with a slight glint sparkle here and there. This is to match the stuff on the main house. You never have to paint it
It will be a completely different story for the inside. Matt white ceiling, and some kind of off-white or pastel colour like boring magnolia for the walls. Sure, one can go mad with arty primary colours, but I am not sure I need such excitement!
I plan to use sets of French cleats here and there, but again - not fully thought through! This time, the arrival of the power cable, the first fix to where the power distribution box will be, and the still-to-be-figured-out blue water supply is more obvious. The folding loft hatch ladder is back there, as is the view of missing window frame.


Let's end up with the doors. The good lady takes more of an interest than I thought. The concrete surround is a slightly sloped thing to take patio slabs. Apparently the plain concrete look "lowers the tone of the place". Just to the left of the door will be put my almost first milling project. A stainless steel plaque with my business name and logo carved into it. That is the final touch that makes this whole thing a tax deduction working business facility!
Yeah! Every good shop needs to be built to the sounds of a Makita charger radio (or DeWalt, Bosch, Ryobi, whatever), and the scream of the lumber circular chop-saw, and coffee, and power extension reels to trip over

The floor?
Its very solid, but I can put fixings down to substrate if I need to. The need would seem unlikely. Here is where, once again, I fall short on thinking it through. Should it be something like vinyl tiles? I could use some suggestions. Whatever it is, I think it should be possible to wipe up spills without permanent blotch. With many shed shops, the total loss of new oil and escaped coolant eventually sinks downward, giving the whole place a shop patina and aroma. That may have some nostalgia mileage, but I am not sure I want that, and I suspect the good lady may disapprove. Things will begin to look a bit more Hobby Machinist décorer style artistique when a few machiny thingys finally get to settle in there.
That's it so far. I will post again when the next stuff happens.
Last edited:

