- Joined
- Oct 30, 2019
- Messages
- 197
I've had an eBay auto-search for BUX magnetic drill bases for a long time, 2-3 years. I've always liked how the casting is shaped, and it seemed like the kind of tool that I might have on hand with no particular project in mind... but it would be invaluable the day that I need it and can reach for it.
One day my autosearch e-mailed me some new results, including one from nearby for $159 including free shipping. It was in need of repairs, but appeared largely intact - including a Rockwell drill/power unit.
I jumped on the opportunity, and upon it being delivered I realized what a bargain I got - indeed a complete unit, and this must have cost $75-100 for them to ship based on weight and bulk.
Here are the pictures that were on the eBay listing:


Dirty, intact -- except for the power cord and the connector from the drill to the base.
Upon receiving it, I took it apart into its major units and gave it the rest of the triage...


Now time to strip it down to the bare casting for cleaning and inspection of all the remaining parts.
The base casting has only a handful of important machined surfaces, all of which appeared to be in decent condition

The slide has a total of 4 bearing surfaces. Two that face forward, and two that face outward. All 4 have copper or brass shims that also act as bearing surfaces. These were pretty greasy and gummy, but not damaged beyond use.
The way the up/down feed mechanism works is similar to a normal drill press -- a pinion gear on a hand-fed spindle; which drives the quill up and down. Except in this case it isn't a quill, it is a sliding motor mount for the drill power unit itself to be moved toward and away from the work.

Did I mention this thing was incredibly grimy and dirty?

Here is the laundry basket of small parts, ready for the ultrasonic cleaner. There are two bronze bushings in here for the pinion shaft, which were completely fouled with grease. I was pretty sure these were oilite, but they were so gummed up that they needed to go in the ultrasonic cleaner to have a chance at being loaded with oil again.

While those were cooking, I took to the casting in the parts washer. About 2 hours spent with picks, scrapers, blue scotch brite pads, etc. It came out very clean:

This is a repair, not a restoration... but I couldn't resist the urge to bring the BUX lettering back to life.
I had a red spraypaint close enough to the original shade, so I sprayed it on some paper and dabbed it onto the raised lettering. This gave a nice "stamped" look where it just touched the high points, instead of me having to decide - with a brush - where to draw the boundary of each letter.

I did spend some time at the vise to straighten out the support peg/stud, so that the original jam nut could be freed and reused. I used some pieces of aluminum and steel off-cuts to brace the part and focus the bending forces in the right areas, which made quick work of it.

One of the last pieces I wanted to tune-up aesthetically was the electromagnet. It was covered in rust, oil, chips, and general grime. I hit it with a wire wheel to knock down the outermost and offensive debris, then took a carbide scraper to the machined flat surface on top


I masked the top off, used the "tap with a hammer" trick to cut the tape to the edge of the machined surface. A quick 2 coats of black paint as well as a clear coat - and that was good enough


Ready for reassembly.
Attachment limit reached -- continues in reply below...
One day my autosearch e-mailed me some new results, including one from nearby for $159 including free shipping. It was in need of repairs, but appeared largely intact - including a Rockwell drill/power unit.
I jumped on the opportunity, and upon it being delivered I realized what a bargain I got - indeed a complete unit, and this must have cost $75-100 for them to ship based on weight and bulk.
Here are the pictures that were on the eBay listing:
Dirty, intact -- except for the power cord and the connector from the drill to the base.
Upon receiving it, I took it apart into its major units and gave it the rest of the triage...
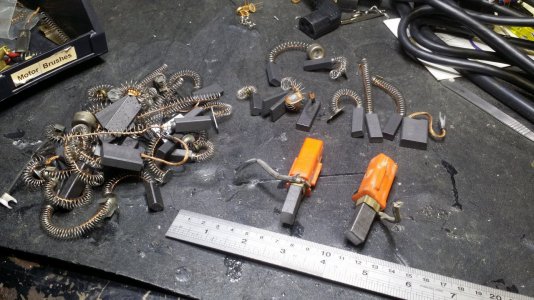
- The wiring was all terrible, scary in fact. The switches were cracked and damaged, the fuse holder was cracked and the wires were barely twisted on instead of any positive affixation, the indicator neon was also cracked with exposed power
- The plug that the drill uses to attach to the base for control was missing its plug. Based on the female portion in the base, it was a non-NEMA layout. This is good, explained below. However, it means I would need to track down the proprietary non-NEMA male plug to match, or replace both portions
- The support peg/stud in the back was bent. It had an extra jam nut on it because the original one was seized on the distorted threadform.
- I applied power to the eletromagnet and rectifier. It appeared to work, and held a piece of scrap cast iron I had nearby. This was probably the single most-important test, since almost everything else could be repaired or a replacement made
- The power inlet cord was completely missing
- The number of wires going to the drill indicated it was designed to be reversible, but the switch that was being used to control the power was only wired to one lead - presumably "forward"
- Extremely dirty, and any parts that were ferrous were rusty (such as the handles)
Now time to strip it down to the bare casting for cleaning and inspection of all the remaining parts.
The base casting has only a handful of important machined surfaces, all of which appeared to be in decent condition
- The bore for the spindle that drives the pinion against the rack on the back of the slide
- The flat sliding surfaces for the slide to bear against
- The bottom, where the electromagnet is fastened on
- Lots of tapped holes (for the slide retainer as well as grub screws on the side that adjust the preload on the bearing shims), all of which appear to be undamaged
The slide has a total of 4 bearing surfaces. Two that face forward, and two that face outward. All 4 have copper or brass shims that also act as bearing surfaces. These were pretty greasy and gummy, but not damaged beyond use.
The way the up/down feed mechanism works is similar to a normal drill press -- a pinion gear on a hand-fed spindle; which drives the quill up and down. Except in this case it isn't a quill, it is a sliding motor mount for the drill power unit itself to be moved toward and away from the work.
Did I mention this thing was incredibly grimy and dirty?
Here is the laundry basket of small parts, ready for the ultrasonic cleaner. There are two bronze bushings in here for the pinion shaft, which were completely fouled with grease. I was pretty sure these were oilite, but they were so gummed up that they needed to go in the ultrasonic cleaner to have a chance at being loaded with oil again.
While those were cooking, I took to the casting in the parts washer. About 2 hours spent with picks, scrapers, blue scotch brite pads, etc. It came out very clean:
This is a repair, not a restoration... but I couldn't resist the urge to bring the BUX lettering back to life.
I had a red spraypaint close enough to the original shade, so I sprayed it on some paper and dabbed it onto the raised lettering. This gave a nice "stamped" look where it just touched the high points, instead of me having to decide - with a brush - where to draw the boundary of each letter.
I did spend some time at the vise to straighten out the support peg/stud, so that the original jam nut could be freed and reused. I used some pieces of aluminum and steel off-cuts to brace the part and focus the bending forces in the right areas, which made quick work of it.
One of the last pieces I wanted to tune-up aesthetically was the electromagnet. It was covered in rust, oil, chips, and general grime. I hit it with a wire wheel to knock down the outermost and offensive debris, then took a carbide scraper to the machined flat surface on top
I masked the top off, used the "tap with a hammer" trick to cut the tape to the edge of the machined surface. A quick 2 coats of black paint as well as a clear coat - and that was good enough
Ready for reassembly.
Attachment limit reached -- continues in reply below...
Last edited: