Carving My Own Tombstone

MrWhoopee

H-M Supporter - Gold Member
H-M Supporter Gold Member
Joined
Jan 20, 2018
Messages
5,622
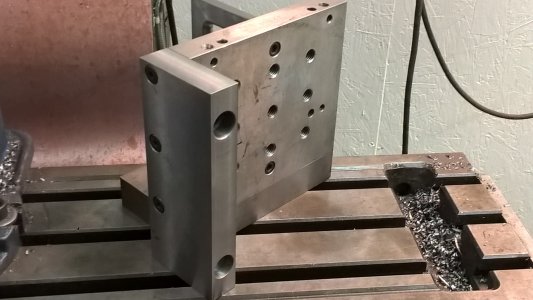
As I posted in another thread, I found a rather large angle bracket in some of the odd stuff I received from Fred when I got my machines. It was apparently part of a special purpose tool which has since lost its purpose. The base is 1.25x4x7 and the upright is .985x6x7, the whole thing weighing in about 20 lbs.
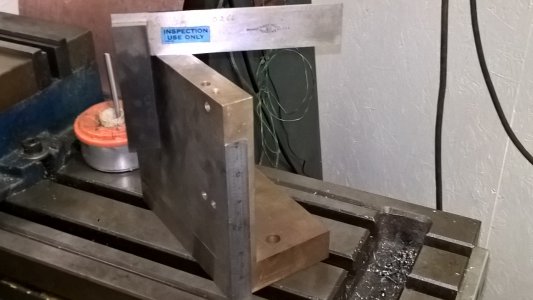
WP_20191224_11_52_19_Pro.jpg
It's bolted construction, not sure if it's doweled. Most surfaces are ground, the edges being milled. Everything is square to everything according to my precision "inspection" square. Fortunately, it's not hardened, so I decided it would make a suitable "tombstone" for my mill. It even has the tie-down bolt holes to clamp to the table.

First, it needed a handle like a real piece of tooling.
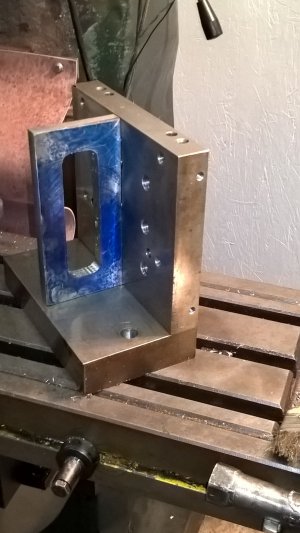
WP_20200101_12_32_55_Pro.jpg
It's awaiting the arrival of a radius cutting tool for completion.

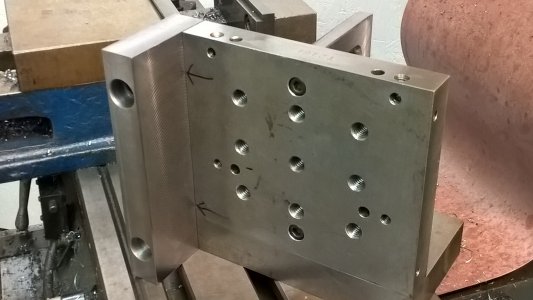
Not willing to risk taking heavy cuts for tee-slots, I opted for a grid of 1/2-13 tapped holes for tie-down bolts
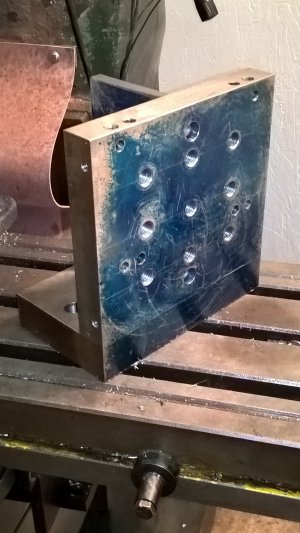
WP_20200101_12_33_27_Pro.jpg
and some 1/4-20 holes for side plates.
I spaced them to fit my 1/8 parallels as side plates.
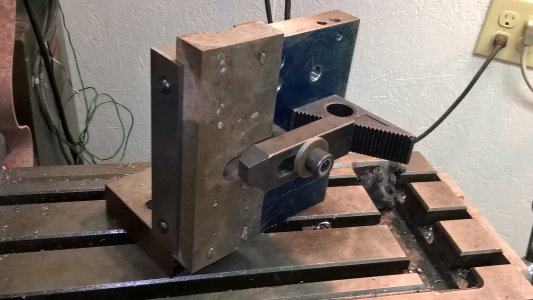
WP_20200101_13_08_13_Pro.jpg

It was about here that I realized I could put a heavy fixed jaw on the edge and fab a removable clamping jaw that bolts to the face like table vice for a mill. Voila! a home-made VertiVise. I'll get back to you.
 
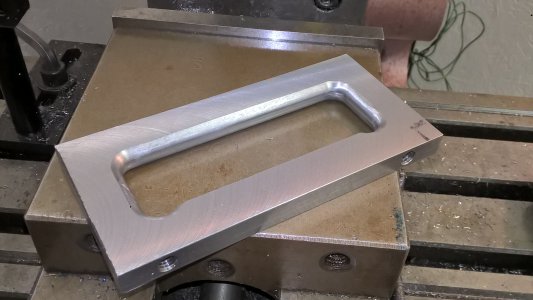
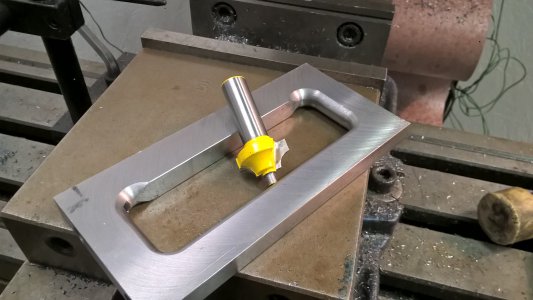
My radius cutter arrived today. I wanted to radius the inside surfaces of the handle to protect my tender pinkies. I considered getting a conventional HSS radius cutter, but I was intrigued by the idea of using a carbide router bit. For less than $12 delivered, I got a Yonico 1/4 radius cutter with 1/2 shank from Precision Bits. The maximum diameter of the cutter was 1.00, so using 2x cutting speed of HSS I ran it at 660 rpm. I was truly stunned by the performance and finish. On the first side I babied it and made the cut in two passes.

On the second side I took it all in one pass.

The finish was really nice.
WP_20200102_15_08_32_Pro.jpg

The bit shows no wear.
WP_20200102_15_10_14_Pro.jpg

I'll be getting more of these bits.
 
That's going to be a handy 'bit' of info to add to the knowledge base.
And the cost makes it very reasonable and budget friendly.
Did you happen to notice whether or not there are signs of cutting on both blades?

*EDIT* Surfing for bits after posting this I started thinking about what-all these could be used on, and came up with (4) unfinished projects that came back to mind.
And then I remembered that I bought a 1/2" plunge router about (8) years ago that I've never used...
When I present my purchasing plan to the Better Half, I'm going to have to justify it by stating that it's MrWhoppee's fault that I have to buy more tools. ;)
 
Last edited:
I can confirm how good the woodworking carbide router bits are as I've used then on and off for a few projects.
I even use the roman ogee type cutters accessing a small part of its shape to get a particular look.
Manily on aluminium but some cuts on steel as well with no problems.
 
Did you happen to notice whether or not there are signs of cutting on both blades?
Each blade appeared "shinier" on the flat face bordering the cutting edge, so yes I would say both blades were cutting. As an added advantage, because there are only two straight flutes, cutter deflection is a non-issue. The transitions in the corners show no irregularities.

When I present my purchasing plan to the Better Half, I'm going to have to justify it by stating that it's MrWhoppee's fault that I have to buy more tools. ;)

You mean she STILL asks for justification? Your explanations must not be sufficiently technical. My wife's eyes just glaze over.
It's easier to beg forgiveness than to ask permission.
 
The zen amongst us are thinking, "Yes, everyone should understand we are all carving our own tombstones." Machinist's are just more precisely done.
jack vines

If you want something done right.....
 
So I decided to make what is essentially a table vise that will attach to the angle plate, creating a vertical vise. It will also be configured so that it can be used as a regular table vise. It's being made from 1 in. thick O-6 tool steel, just because I have a bunch of it,. Not planning to harden it, it's just what I have. I have spent that last week cutting the pieces and milling to size while I figure out the details. I just finished the fixed jaw.

WP_20200106_15_53_49_Pro.jpg

WP_20200106_15_53_59_Pro.jpg
I used shoulder bolts to attach the jaw to the angle plate, functioning as both bolts and dowels. Waiting for the acme threaded rod and coupling nut to arrive for the moving jaw assembly.
 
This project morphed into another.
 
Back
Top