CNC Plasma Cutting When You Have No Space

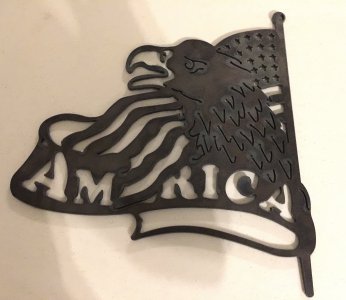
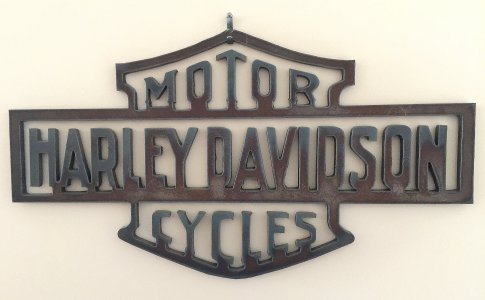
I like how the small size is the solution to torch height control. For me, brackets and tabs and other automotive stuff would be the immediate purpose. Most of that stuff fits fine into a 2'x2' envelope. Hmmm...

My plasma is a Thermal Dynamics Stack Pak with two power packs. I have a 35a torch head and a 70a torch head. I do have a straight torch for automated application, but I need to do some homework on the Thermal Dynamics as to why the rep told me it wouldn't work with CNC. I think it had something to do with latching with the control. Don't know why it wouldn't work with the control boards out there.

I'm also sitting on a box of PMDX boards and Gecko drives... Yep, might have a project in my future.
 
I am going to present this in increments, rather than wait until I pull all the information together before sharing it. The table is as follows:
https://www.rockler.com/rockler-24-x-36-shop-stand under part no. 48089. It is normally priced at $149.95, but is on sale now for $119.99. It is quite sturdy, and is the perfect dimension for the project.

When you have finished assembling the Rockler table, enlarge the three holes in the top of each 24” end to 1/4”.

You will assemble the 33 1/2” x 36” framework shown below from 8020 aluminum extrusions. You can purchase these extrusions off the Internet in 36” lengths or cut to exact length. The 8 hole angle brackets and fasters can be ordered at the same time. Note that there are 4 additional angle brackets underneath each corner, which cannot be seen in this overhead view.

Note that the table as shown here, uses Origa (Parker) FD25 linear rails and roller cassettes. These are quite expensive and difficult to come by if ordered new. I purchased mine off eBay at a reasonable cost - maybe $250 for both rails and cassettes. There are a lot of smaller FD-12 and FD 15 sizes on eBay, and a few FD-20s, which would probably work if the brackets were downsized a bit.

I have ordered the rails and cassettes new from RS Components in the UK several times. They were pretty reasonable, and shipping was unbelievably inexpensive and fast. Here are some links to their site and some part numbers:
https://export.rsdelivers.com/productlist/search?query=parker%20origami%20linear%20rail&tag=&family=8367

https://uk.rs-online.com/web/c/pneumatics-hydraulics-power-transmission/power-transmission-linear-slides-guides-positioning-tables/guide-blocks-guide-carriages/?searchTerm=Parker%20Origa%20Linear%20Guide%20Carriage%20fs-25

RS Stock No. 311-1793
Mfr. Part No. RK-FD 20520

RS Stock No. 311-1951
Mfr. Part No. FD25-0850X0A-000-000

The cheapest approach is to buy the 850mm long FD25 rail and cut it to the two smaller lengths required for the build. You can do this with an abrasive cut-off wheel and touch up the ends with a bench sander.

The last photo shows the different sizes of rails and cassettes. The second one down is the one I used. The third down would work with some modifications to their mounting brackets. The 35, 25, etc. refers to the width of the linear rail in millimeters.

This sounds more complicated than it is. More to come.
 

Attachments

  • Rockler table.jpg
    Rockler table.jpg
    64.4 KB · Views: 67
  • IMG_6680.JPG
    IMG_6680.JPG
    2.9 MB · Views: 66
  • top view.jpg
    top view.jpg
    39.9 KB · Views: 67
  • Linear cassette sizes.jpg
    Linear cassette sizes.jpg
    284 KB · Views: 69
The cassette bolt patterns of each size cassette are shown in the first photo below.

In each of the newly enlarged 1/4” holes, insert a 1/4-20 x 1/2” button head socket cap screws up from the bottom.

Screw a 1/4-20 T-nut partially onto each button head cap screw, leaving about 1/4” gap underneath.

Slide one of the 30 1/2” extrusions onto each of the T-nuts on the end of the table.

Once the two end extrusions are in place, proceed as follows:

Using the 1/4-20 x 1/2” button head cap screws and T-nuts, attach an 8 hole angle bracket to the inside end of each extrusion as shown. Below. The edge of each bracket should be about 1/8” in from the end of the extrusion.

Insert 1/4-20 x 1/2” button head cap screws and T-nuts in each of the 4 remaining 8 hole angle brackets. It is necessary to insert all 8 screws and T-nuts in each bracket to put it all together. Set up each end of the 30 1/2" extrusions as shown, so the 36" extrusions can be slid into place.

The last picture shows the table with all 4 extrusions installed.

More to come!
 

Attachments

  • Cassette dimensions.jpg
    Cassette dimensions.jpg
    39.8 KB · Views: 63
  • t nuts.JPG
    t nuts.JPG
    83.6 KB · Views: 51
  • install 8020.JPG
    install 8020.JPG
    85.2 KB · Views: 49
  • end extrusions installed.JPG
    end extrusions installed.JPG
    164.6 KB · Views: 51
  • right angle bracket.JPG
    right angle bracket.JPG
    81.8 KB · Views: 51
  • 4 brackets installed.JPG
    4 brackets installed.JPG
    137.6 KB · Views: 51
  • insert screws.JPG
    insert screws.JPG
    59.3 KB · Views: 52
  • install side extrusions.JPG
    install side extrusions.JPG
    106.6 KB · Views: 53
  • 4 extrusions in place.JPG
    4 extrusions in place.JPG
    154.6 KB · Views: 81
You may be wondering why I chose to spend the money for Origa linear rails and roller cassettes when I could have just used cam followers riding on steel tubing or the like. Years ago I made a somewhat larger version of this machine and mounted a 60 watt laser on it to see what kind of detail it was capable of mechanically. Sixty watts isn't powerful enough to cut metal, but here is what it did in paper and leather.
 

Attachments

  • laser_med.jpg
    laser_med.jpg
    78.7 KB · Views: 80
  • laser_cuts.JPG
    laser_cuts.JPG
    85.5 KB · Views: 78
Note that the machine with the laser mounted only used the Origa rails on the Y axis. The X axis used cam followers riding on hardened and ground steel flat bar. Because of the weight of the laser and cooler, I used Origa FD35 components.

In the current table, Origa rails are used on both the X and Y axes. The non-driven end of the Y axis rides on, but is not guided by a length of 2" x 1/4" cold roll steel bar.

On the subject of being driven on only one side of the X axis -- with a machine this size, there is no reason to have the cost and complexity of a second X axis motor, circuit board, wiring, etc.

The 2" x 1/4" cold roll bar is attached to the 36" long (2" x 2" 2020 size) 8020 extrusion using button head cap screws approximately 5/8" long with t-nuts as shown in the photo below. I should have mentioned before that the 8020 aluminum extrusions are all 2" x 2" 2020 size.
 

Attachments

  • X and Y axes.jpg
    X and Y axes.jpg
    58.1 KB · Views: 67
Pleas substitute the drawing below for the previous one.
 

Attachments

  • x_y axes.jpg
    x_y axes.jpg
    53 KB · Views: 60
Shown below are photos of the X (longitudinal) and Y (cross) axes. The fabrication of the four brackets than make up these assemblies comprise the bulk of the work in the project.
 

Attachments

  • Drive components.jpg
    Drive components.jpg
    30.2 KB · Views: 59
  • x axis drive.jpg
    x axis drive.jpg
    150.6 KB · Views: 55
  • Y axis drive.JPG
    Y axis drive.JPG
    1.5 MB · Views: 57
You will make two brackets using 4" lengths of 7" x 2" x 3/8" thick angle iron. You will need to cut the 2" leg of the angle iron down from a longer leg. Study the diagram of how the parts all go together to understand the logic of the chamfered holes, studs, etc.

Note that on the x axis bracket the two 3/8" holes shown along the center line are to accommodate your rack and pinion torch holder. They should be drilled as a final step and located to suit your torch holder. I located mine near the top.
 

Attachments

  • axes.jpg
    axes.jpg
    102.4 KB · Views: 40
  • y axis bracket.jpg
    y axis bracket.jpg
    55.5 KB · Views: 38
  • angle iron brackets2.JPG
    angle iron brackets2.JPG
    112.2 KB · Views: 33
  • x axis bracket.jpg
    x axis bracket.jpg
    38.4 KB · Views: 36
As a break from all these details, here are some more shapes cut out with the little machine.
 

Attachments

  • IMG_8807.JPG
    IMG_8807.JPG
    815 KB · Views: 32
  • IMG_8808.JPG
    IMG_8808.JPG
    1.5 MB · Views: 32
  • IMG_8809.JPG
    IMG_8809.JPG
    757.5 KB · Views: 27
  • IMG_8810.JPG
    IMG_8810.JPG
    853.1 KB · Views: 29
  • IMG_8813.JPG
    IMG_8813.JPG
    868.5 KB · Views: 28
  • IMG_8814.JPG
    IMG_8814.JPG
    1.1 MB · Views: 27
  • IMG_8815.JPG
    IMG_8815.JPG
    1.2 MB · Views: 24
  • IMG_8816.JPG
    IMG_8816.JPG
    651 KB · Views: 24
  • IMG_8817.JPG
    IMG_8817.JPG
    863.8 KB · Views: 24
  • IMG_8818.JPG
    IMG_8818.JPG
    626 KB · Views: 25
  • IMG_8819.JPG
    IMG_8819.JPG
    1.6 MB · Views: 25
  • IMG_8820.JPG
    IMG_8820.JPG
    1.4 MB · Views: 32
Two identical motor mount brackets will be fabricated. If you had the use of the little CNC machine, they could be produced in less than 2 minutes. As it is, you will have to do it with a cut-off saw, and a mill. You could hand cut them with a plasma cutter and grind them smooth. I made two machines, so the brackets you see here were cut with the first machine.

The first shot shows the bracket after being cut. Incidentally, you do have to tap off a slight dross after cutting -- nothing like a hand cut piece, though. The last shot shows the same bracket after a flanged 1 3/8" long drill bushing has been welded in place. The drill bushing has a 3/4" OD and a 1/2" ID. The beauty of using the flanged bushing is that when clamped against the plate, you are assured that it is perfectly perpendicular. A couple of good tack welds are all that is necessary. When it has cooled down, press a flanged 1/2" OD x 5/16 ID x 3/8" long oil impregnated bushing into both ends of the drill bushing. The oil impregnated bushing MSC part number is 06454466 (currently $8.05 for a package of 5). The drill bushings can be found on eBay. If you can't find them 1 3/8" long, as I did, 1" or 1 1/4" long can be substituted. Motor mount brackets are 3/16" cold roll steel. I bought a length of 3/16" x 4" cold roll bar from On-Line Metals to make the first machine. I used the first machine to cut the brackets for the second machine from 3/16" hot roll plate. Both the X and Y axis motor mount brackets are identical.

Incidentally, I forgot to provide the measurements for the threaded holes/studs on the short leg of the angle iron pieces. They are included here.
 

Attachments

  • motor mount1.jpg
    motor mount1.jpg
    378.4 KB · Views: 27
  • IMG_8824.JPG
    IMG_8824.JPG
    313 KB · Views: 27
  • IMG_8829.JPG
    IMG_8829.JPG
    372.6 KB · Views: 29
  • motor mount 2.jpg
    motor mount 2.jpg
    175.9 KB · Views: 27
  • motor mount dimensions.jpg
    motor mount dimensions.jpg
    53.9 KB · Views: 31
  • stud spacing.jpg
    stud spacing.jpg
    49.1 KB · Views: 33
Last edited:
Back
Top