- Joined
- Feb 2, 2013
- Messages
- 3,622
Although i'm less than a proficient woodworker,
i made stride today to remove some of the fear and distrust of cellulose based materials !
I was graciously gifted some beautiful slabs of rough sawn curly maple from member and friend @ACHiPo !(Thanks again!!!)
the slabs vary in size ,but, all are over 6' long by about 20" or better in width.
they are truly 2" thick and have been waiting to have their inner beauty exposed
they came like this... live edges on 2 sides
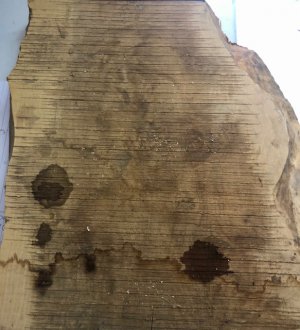
i chose a section on one plank that was smaller in width ,to about 14"
i cut the section out with a 7-1/4" skillsaw
the underused commodity in my arsenal, the joiner , was utilized to plane one side to 95% flat-
this flat will ultimately be a mounting surface
the wood is rough cut, i took the manly way and broke out a scrub plane- to get a lesson in humility
after making very shallow cuts, i was able to switch to a block plane to get a bit closer
ultimately, this led to the use of a 3x21 belt sander with 80 and 120 grit papers to smooth the form
i quickly hit the upper and lower surfaces with 220 grit on a palm sander
here is the progress, the blank as semi-finished
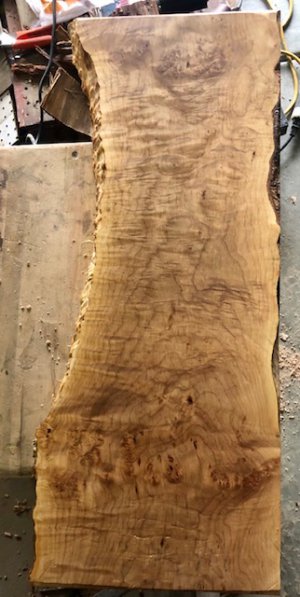
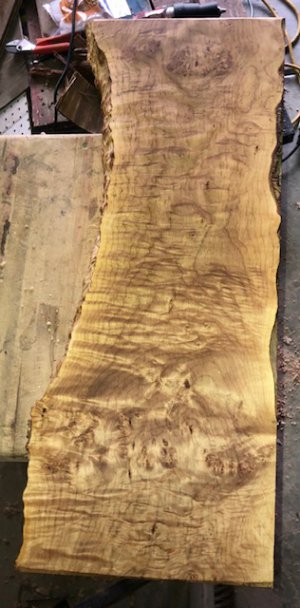
i decided a radical approach to mounting, no mounting hardware will be seen- not to the wall or to the shelf
i chose 3/8" Rebar as the dowel material, to attach the shelf to a wall furring
i laid out the dimensions using the metric system on both the furring strip of 2x3 Fir, as well as the shelf
i made a simple guide block to ensure 90° holes and punched the laid out the holes in the furring strip
i prepared for deep drilling in the maple to accept most of the spike- the drilling went well and the spikes were right on the mark
i finished the shelf with a coat of olive oil
then, rubbed the crap out of it with cedar shavings until it glowed !
installation:
i screwed the leveled furring strip to 3 studs with 3" #10 construction screws
to my surprise it installed without event
everything lined up!!!!
a few moderate taps with a mallet set the shelf against the furring strip
due to the friction, i didn't deem anything else was necessary to retain the unsupported shelf unit (although a pocket screw could easily be added)
i'll inspect the shelf for irregularities as time passes, but i think it's quite solid
without further delay here is the finished and operational shelf for the lavatory
top view:
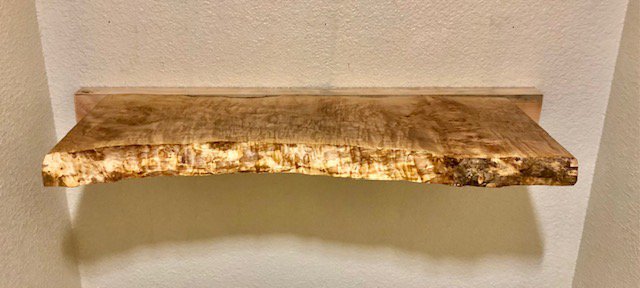
bottom view:
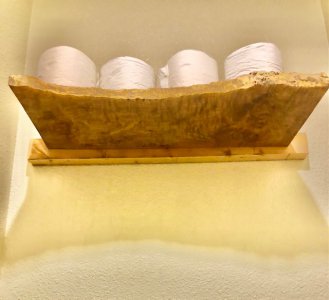
the pictures didn't really do this piece justice, it looks waaaay better without the camera lens
the maple dimensions are 29" long x 13+/-" wide x 1-7/8" thick
as always thanks for looking!
i made stride today to remove some of the fear and distrust of cellulose based materials !
I was graciously gifted some beautiful slabs of rough sawn curly maple from member and friend @ACHiPo !(Thanks again!!!)
the slabs vary in size ,but, all are over 6' long by about 20" or better in width.
they are truly 2" thick and have been waiting to have their inner beauty exposed
they came like this... live edges on 2 sides

i chose a section on one plank that was smaller in width ,to about 14"
i cut the section out with a 7-1/4" skillsaw
the underused commodity in my arsenal, the joiner , was utilized to plane one side to 95% flat-
this flat will ultimately be a mounting surface
the wood is rough cut, i took the manly way and broke out a scrub plane- to get a lesson in humility
after making very shallow cuts, i was able to switch to a block plane to get a bit closer
ultimately, this led to the use of a 3x21 belt sander with 80 and 120 grit papers to smooth the form
i quickly hit the upper and lower surfaces with 220 grit on a palm sander
here is the progress, the blank as semi-finished


i decided a radical approach to mounting, no mounting hardware will be seen- not to the wall or to the shelf
i chose 3/8" Rebar as the dowel material, to attach the shelf to a wall furring
i laid out the dimensions using the metric system on both the furring strip of 2x3 Fir, as well as the shelf
i made a simple guide block to ensure 90° holes and punched the laid out the holes in the furring strip
i prepared for deep drilling in the maple to accept most of the spike- the drilling went well and the spikes were right on the mark
i finished the shelf with a coat of olive oil
then, rubbed the crap out of it with cedar shavings until it glowed !
installation:
i screwed the leveled furring strip to 3 studs with 3" #10 construction screws
to my surprise it installed without event
everything lined up!!!!
a few moderate taps with a mallet set the shelf against the furring strip
due to the friction, i didn't deem anything else was necessary to retain the unsupported shelf unit (although a pocket screw could easily be added)
i'll inspect the shelf for irregularities as time passes, but i think it's quite solid
without further delay here is the finished and operational shelf for the lavatory
top view:

bottom view:

the pictures didn't really do this piece justice, it looks waaaay better without the camera lens
the maple dimensions are 29" long x 13+/-" wide x 1-7/8" thick
as always thanks for looking!

