Cut50P plasma cutter: intial setup and "fixes"

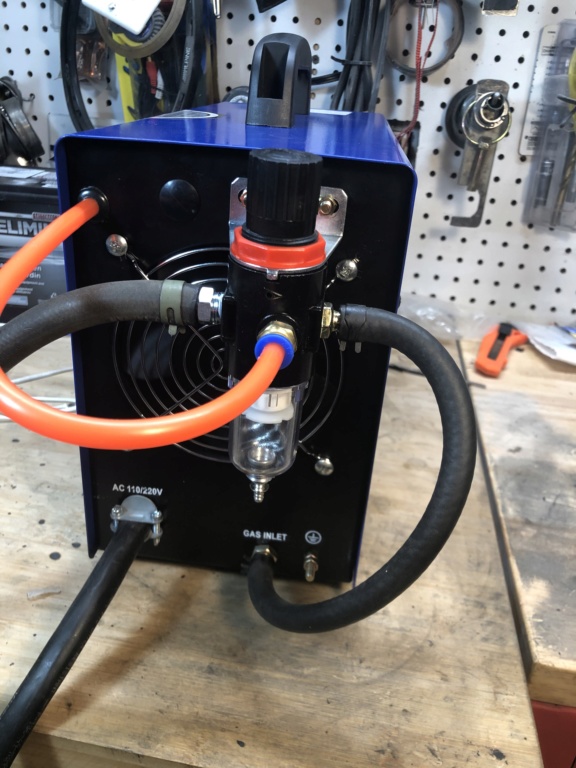
Yours looks very close/same as my ATCP54 I bought off eBay for about $160. String is below on mine. Yours likely takes the same consumables as mine. That string also has a chart for Amps/psi for different thicknesses of steel. The chart I found recommended just 60 A/ 60 psi for 7/8" stock, so haven't hit my hose with 90 psi and checked for an aneurysm.

Bruce


the hose pic was actually taken with 70 psi, not 90.

I assume that chart is for mild steel?
 
Well, decided to do a little more work on it:


Pulled the cover off and tapped out the small dent. Easy peasy. I’ll hit it with the rotary buffer and take the scratches out of the paint. Its just a single stage enamel, so it will buff out just fine.

Inside, I rerouted some wiring, bundled it where it made sense and tied it all down so it’s not flopping around loose in the case.

The gauge line was also poorly routed and pushed wiring into the mosfet heat sink when the case is on, so I rerouted the line. That put it at a bad angle to feed the regulator through the original hole in the back panel. So I grabbed a step drill and put the hose in a spot where it (mostly) comes straight out. It also put the line in a better position to curve around into the regulator. The original hole I just filled with a plastic push clip.

The super soft hose from the reg to the feed valve was tossed. I could squeeze it closed with just two fingers and almost no effort. Not surprising 70-80 psi puffed it up like a ballon. I subbed in a nice thick fuel line. Double thick and fibre reinforced. Doesn’t even twitch under air pressure. Its still on barbed fittings, but I tossed the gear clamps and popped on some spring fuel line clamps. I e even pressure all the way around the hose instead of the gear clamp “D” shape they get when tightened down.

Then the supply line. I didn’t particularly like the air fitting right on the reg. When you hook up the air line, it hangs on the reg. Essentially, side loading the connection. Not good, at least from a “strain relief” perspective. So I clipped the end off an old, ruptured air line and slipped it on to a barbed fitting. Another fuel line clamp secures it all. The other end gets a standard air line fitting for conveniences sake.

Hook up the air to the plasma and check all the connections with leak check. No bubbles under 90 psi, so alls good!

I also ordered another set of consumables. 30 bucks for an 80 pack. I also ordered up a circle cutter so I can do the bead locks for the Argo when I’m ready.

Coming along nicely.

:)
 
Back together and time for another test cut.

40amps, 80 psi, 1/8” mild steel:


Thats freehand, so its a little wobbly. My travel speed is better, but still a little uneven as you can tell by the end cut pattern.

But it went through it like it wasn’t even there. I dare say with a straight edge guide it will cut almost as clean as the chop saw. Just without the noise, fumes and grit flying everywhere.

You still get sparks, but now they shoot straight down at the floor instead of all over the garage. I plan to make up a plasma cutter table with a funnel bottom, something along these lines:


so the sparks won’t be an issue once thats done.

Turning out to be a good purchase so far.

:)
 
the hose pic was actually taken with 70 psi, not 90.

I assume that chart is for mild steel?
The chart didn't say so I'd be assuming it's for steel. It'll work on anything that melts and conducts electricity. Don't know if you'd have to adjust the current down for Aluminum (for example). I TIG weld aluminum or steel based on the thickness of the metal, not the composition. I was taught to start with "1000 x thickness in inches" or 125 A for 1/8" material, 250 A for 1/4". But take any advice from me on welding with a grain of salt, still need lots more experience and practice.

Bruce
 
Last edited:
The chart didn't say so I'd be assuming it's for steel. It'll work on anything that melts and conducts electricity. Don't know if you'd have to adjust the current down for Aluminum (for example). I TIG weld aluminum or steel based on the thickness of the metal, not the composition. I was taught to start with "100 x thickness in inches" or 125 A for 1/8" material, 250 A for 1/4". But take any advice from me on welding with a grain of salt, still need lots more experience and practice.

Bruce
Actually, TIG on AL is a bit different than TIG on steel.

Generally, its 1 amp per thou to TIG mild steel.

And while you can weld steel on AC, it’s generally easier/better if its done on DC.

Aluminum is pretty much AC or nothing. It can be done on DC, but not very effectively/efficiently with TIG. MIG with a spool gun works fine though, you just don’t have the control or abilities you have with TIG. TIG on DC is almost always done with helium and thats why TIG used to be mostly called “heli-arc welding”. Good for really thick pieces, but it’s pretty much an “out of reach“ process for small home shops. The advent inexpensive inverter AC TIG machines makes heli-arc pretty much a pointless expense for some guy sticking stuff together in his home garage.

So that 1A/thou “rule of thumb” would mean about 125 amps for aluminum. But, in my experience, 1/8” 6061 needs around 140-150 amps to TIG weld. At least it does to weld “efficiently”. You can do it at less amps, but you’re making your life soooooo much more difficult.

Aluminum pulls the heat away faster but it also needs a high initial amperage to break through the aluminum oxide layer. The oxide layer requires around 3 times the heat to punch through as opposed to the base aluminum. Even wire brushing right before running the bead requires punching through a layer of oxide. Aluminum, mild steel etc “flash corrodes” immediately when exposed to air, so theres no way to avoid it.

The oxide layer is also why you pretty much need an AC machine as the reversing AC current “pushes” (when it switches from EN to EP) the oxide to the outer edges of the puddle, keeping the weld free of impurities. Thats whats referred to as “cleaning action” and is controlled by your balance adjustment. I could go on, but this is already getting quite long. Lots to learn and know about TIG-ing AL.

So, back to the amperage discussion, you have to hit aluminum on full amperage for the thickness to get the puddle started and then you can back off (pedal) to start traveling. You have to back off the amperage as you go because as the aluminum pulls in more and more heat, it takes less and less amperage to keep the puddle formed. This is why you need a GOOD foot pedal for TIG on aluminum. You CAN do it with a torch trigger switch and pre/post/ramp/freq/balance settings, but you’re making your life sooooo much harder if you don’t have a GOOD foot pedal.

if you hit say 1/8” 6061 with a full 150 amps and don’t back it down as you travel, the piece will either “trench” the further you go or it will just go molten and then you’re looking at a silver “Hershey’s kiss” sitting on the table/floor where your weld used to be. Sometimes you can compensate for the heat build up by feeding rod faster (each time you “dip” the rod, it cools the puddle a bit), but you end up just ramming rod into the puddle to keep up if its a longer bead and eventually you will loose that race, with the result being just a big mess.

If you don’t hit it hard (amperage) on the start, you can end up with inadequate penetration or, if you linger too long trying to form a puddle, you end up with too much heat in the base aluminum and when you the break through the oxide layer you end up with a “blow out” as the aluminum goes instantly molten and runs off the work piece.

You see similar things in the plasma cutter charts I’ve googled. Steel is different from aluminum, which is different from stainless. Thickness is another variable that effects the settings. But, with the plasma cutter charts, you usually see a “full power” setting for almost all materials and thicknesses and the travel speeds change. For example:

386D89FA-B3A3-4C87-84FF-08EDE1E879C3.png
 
Last edited:
Looks very similar to my Eastwood Versa cut 60 which I am completely satisfied with. One of those rolling standoffs w/ circle attachment made it very much better and easier on tips. cuts 1/4" like butter and aluminum but not quite as nice a cut edge. I love to use it every chance I get!
Aaron
 
Back
Top