- Joined
- Mar 9, 2018
- Messages
- 465
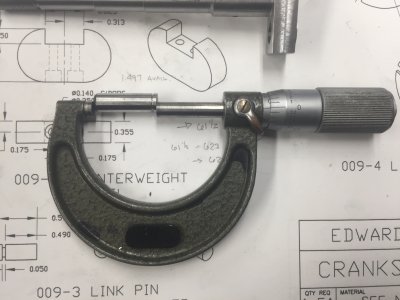
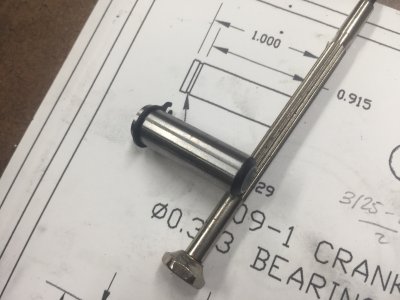
The crankshaft for my Edwards Radial 5 requires a snap ring groove to be machined into a hardened dowel pin. Such machine work is ideally sorted out by grinding, of course. Though it could potentially be ‘hard turned’ if you had the right tooling? Not sure.
Anyway, I decided to grind it.
I don’t have a tool post grinder, so I figured I’d make my own makeshift version using a Dremel. Designs of such an attachment are peppered all over the internet, but I figured I’d toss my design out there as well.
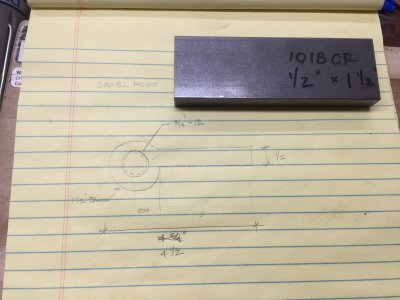
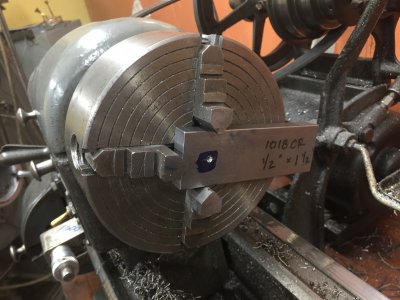
The sketchiest part was chucking up the plate in my ‘3 jaw chuck’ to cut the 3/4-12 thread to match the nose of my Dremel. I just made sure I took light enough passes and didn’t spin the part too fast.
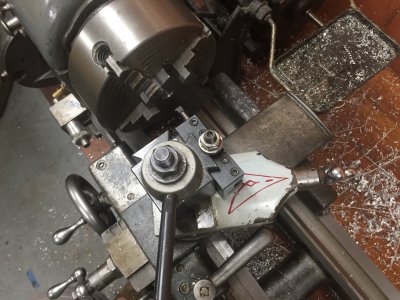
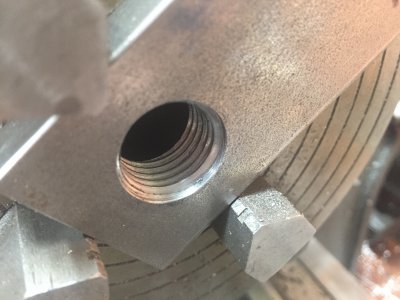
There was one small hiccup with cutting the internal thread on the lathe: I have two carbide insert boring bars for internal threading. The smaller is a 3/8” boring bar and uses “11 IR A60” inserts, and the larger is a 3/4” boring bar and uses “16 IR AG60” inserts. The “A60” style insert can cut threads no coarser than 16TPI, which wasn’t coarse enough for the thread I needed to cut. The “AG60” style insert can cut coarse enough threads, but the boring bar it was mounted to was too large for the thread I was cutting.
I’m unaware of any ‘in between’ options using those inserts that would have worked, so I went and picked up this Micro 100 IT-320750 internal threading tool off eBay for about half the retail price. It was (1) small enough to get into the bore I needed, and (2) could cut coarse enough threads. Annoying that I had to buy it, but I figure I’ll use it again in the future at some point. (Yeah, yeah. I suppose I could have ground one from HSS.)
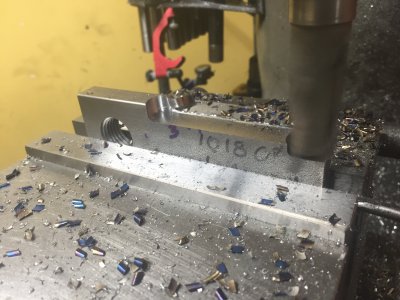
Once threaded, I took it over to the mill to machine in the part that clamps in the QCTP holder. I took 0.200" cuts using an end mill with a corner radius of about 1/16" at about 3 in./min. The version I made is about 1/2” tall and fits in my AXA knock-off.
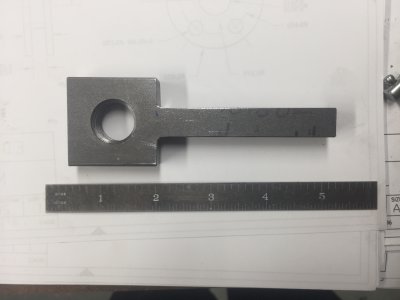
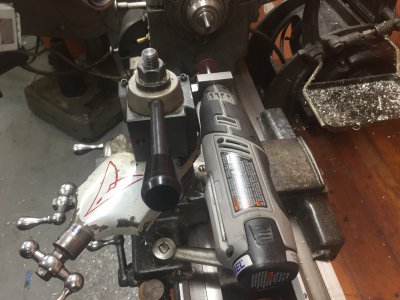
One thing I wish I had done before removing the Dremel mount from the chuck, is check where the Dremel ‘clocks in’ when it’s screwed into the mount. I got as unlucky as one can get with mine. The on/off switch is completely obscured by the QCTP, so in order for me to turn the Dremel on for use, I need to unscrew it a quarter turn, flip it on, then screw it back in tight. It’s annoying and screws with repeatability. I probably won’t do anything about it though, as I can’t imagine using this tool more than about once a year. Who knows.
(Reversing the setup, or simply machining down the thickness won't work because there's a short shoulder on the nose of the Dremel. Doing either of those would make it so the shoulder no longer has any place to fit. So the solution would be to both (1) machine down the thickness and (2) increase the depth of the recess for the shoulder.)
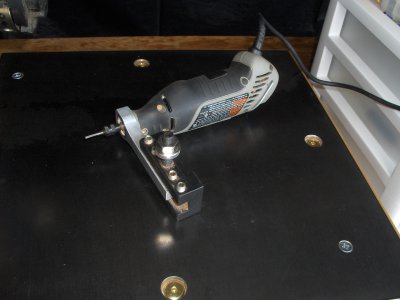
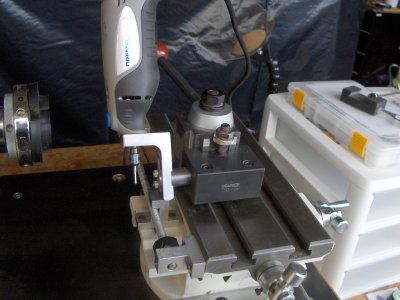
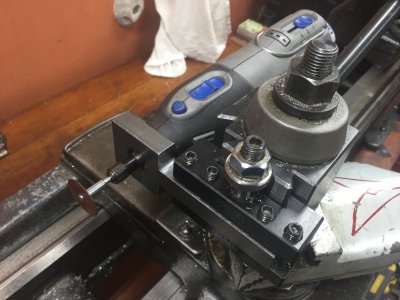
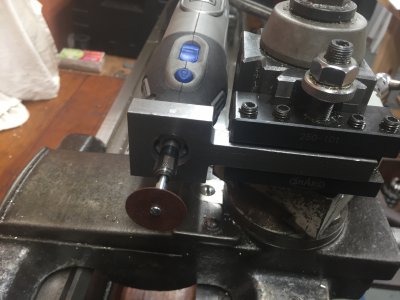
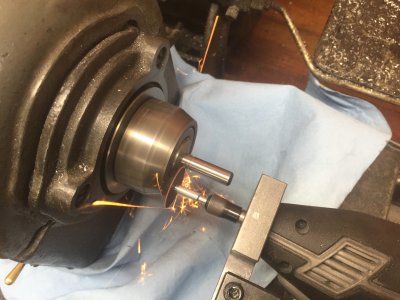
Anyway, here are some photos of the completed design. The Dremel is not all the way screwed down in the few photos with the on/off button facing up. Once I had the right threading tool, it was a quick and easy job.
Anyway, I decided to grind it.
I don’t have a tool post grinder, so I figured I’d make my own makeshift version using a Dremel. Designs of such an attachment are peppered all over the internet, but I figured I’d toss my design out there as well.

The sketchiest part was chucking up the plate in my ‘3 jaw chuck’

There was one small hiccup with cutting the internal thread on the lathe: I have two carbide insert boring bars for internal threading. The smaller is a 3/8” boring bar and uses “11 IR A60” inserts, and the larger is a 3/4” boring bar and uses “16 IR AG60” inserts. The “A60” style insert can cut threads no coarser than 16TPI, which wasn’t coarse enough for the thread I needed to cut. The “AG60” style insert can cut coarse enough threads, but the boring bar it was mounted to was too large for the thread I was cutting.
I’m unaware of any ‘in between’ options using those inserts that would have worked, so I went and picked up this Micro 100 IT-320750 internal threading tool off eBay for about half the retail price. It was (1) small enough to get into the bore I needed, and (2) could cut coarse enough threads. Annoying that I had to buy it, but I figure I’ll use it again in the future at some point. (Yeah, yeah. I suppose I could have ground one from HSS.)


Once threaded, I took it over to the mill to machine in the part that clamps in the QCTP holder. I took 0.200" cuts using an end mill with a corner radius of about 1/16" at about 3 in./min. The version I made is about 1/2” tall and fits in my AXA knock-off.


One thing I wish I had done before removing the Dremel mount from the chuck, is check where the Dremel ‘clocks in’ when it’s screwed into the mount. I got as unlucky as one can get with mine. The on/off switch is completely obscured by the QCTP, so in order for me to turn the Dremel on for use, I need to unscrew it a quarter turn, flip it on, then screw it back in tight. It’s annoying and screws with repeatability. I probably won’t do anything about it though, as I can’t imagine using this tool more than about once a year. Who knows.
(Reversing the setup, or simply machining down the thickness won't work because there's a short shoulder on the nose of the Dremel. Doing either of those would make it so the shoulder no longer has any place to fit. So the solution would be to both (1) machine down the thickness and (2) increase the depth of the recess for the shoulder.)
Anyway, here are some photos of the completed design. The Dremel is not all the way screwed down in the few photos with the on/off button facing up. Once I had the right threading tool, it was a quick and easy job.


