DRO PROS Touch Probe Calibration

Rick H

Registered
Registered
Joined
Feb 2, 2014
Messages
41
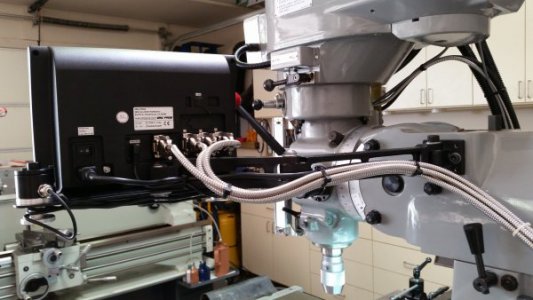
Several years ago I added a DRO PROS EL 700 to my small Grizzly knee mill. When I bought the DRO package I also purchased the DRO PROS touch probe because it was sold at a reduced price with the DRO. I have used the touch probe a couple of times and sure enough, on an early attempt at usage I broke the ruby tipped ceramic probe. Lesson learned. I replaced it with an all metal probe and thought I did a pretty decent job of dialing in the new stylus to run on center with the spindle. I then put the touch probe away and haven't used it for quite a while. I recently brought the touch probe out of hibernation and wanted to check it for true center line and it is off by about .006". I tried to adjust it to true center and it took what seemed like a very long time to get it true. Can someone give me any ideas on how you calibrate, or go through a process of getting the touch probe to run true with the spindle center line? Do you loosen the 3 contact retainer ring screws before adjusting the 3 stylus grub screws? I remember hearing something about "loosen the lows and tighten the highs" when doing this process, but I am not sure I know what that exactly means. I also noticed that when I was finished with the probe calibration and removed and reinstalled the unit in my spindle it wasn't true anymore. Is that because the probe shaft wasn't in the same orientation in the spindle?

Thanks for any help in this matter.
Rick H.
 
Don't know if this will help, but here is the manual that came with my Wildhorse probe.
 

Attachments

  • EPHookup-Alignment-new-v1.pdf
    483.3 KB · Views: 14
I have the same setup, and did play around with the touch probe. It is OK, but not as accurate as my mechanical Haimer. The DRO touch probe is identical to that sold by Tormach, other than the plug which can easily be changed to the jack used on the EL700 DRO. It is also 1/3rd the price of DRO Pros.

The Stylus I am using is a Renishaw A-5000-6352 (M4 5mm ruby ball, SS stem, L 30mm, EWL 26mm) it was $59.50 shipped, they also come up on eBay somteimes for less. The ball is slightly larger and was a bit more accurate then the DRO Pros and also 1/2 the price. It is a SS shaft so no mistakes.

As far as alignment, first you need a 0.0001" test indicator, a 0.005 is not accurate enough. You also need to use a collet system with a low TIR, I use a high accuracy ER32 chuck with a Technicks 10 mm collet. I lightly loosen the retaining screws and then dial out the TIR with the grub screws, this takes time. I then mount a 123 block in my vise and touch off the tip at 90 degree intervals to verify the readings are close. You should be around 0.0004" repeatability.

You then can use 123 block to measure the width, you will find that the measurement is slightly off, so next you need to adjust the stylus ball diameter parameter until you get the most accurate measurements. The entered diameter will be slightly smaller than the actual ball diameter, this accounts for the deflection in the stylus and possibly stylus length which effects the trigger point of the contacts. The best I could do with this probe was a length measurement accuracy of around 0.001" (touch off on either side) , and 0.0006" in edge measurement (touch off on one side). There is some inherent error in this type of mechanical contact probe. The mechanical Haimer is typically 0.0004" on either.

I also made a mount to hold the EL700 touch probe when not in use, there is a hole that the probe slide into and two knobs to wrap the connecting cable.
290263
 

Attachments

  • Tormach TD10088 Passive Touch Probe Install_0515A.pdf
    1.4 MB · Views: 13
  • Touch Probe.pdf
    151.1 KB · Views: 15
I too had to fiddle with the ball diameter (I use a steel stylus) to get it 'dialed in'. I use mine almost daily and it repeats to 3-4 tenths or less which is good enough for what I do. :)
 
Thanks for the replies gentlemen. So would all concur that the retainer ring screws must be loosened up first before adjusting the stylus positioning screws? It may sound let's say "uneducated", but how much would one loosen up the retainer ring screws? 1turn, 2 turns? The last time I tried this procedure I used my Interapid indicator which goes to .0005". Is this acceptable device acceptable for this job? I mounted the touch probe body in a 10mm Hardinge collect so I would think that is a pretty accurate way of doing this. I then placed the ball end of the indicator against and as close to 90 degrees as I could against the probe tip, does this sound okay? Some say to only use a flat tip against a ball for doing this work, but I don't have a flat surface ground tip on a .0005 capable indicator. Perhaps I am getting feeble minded, but I would think this could be done ball tip to ball end as long as positioning remains the same at the contact point. The contact point should remain the same as the probe is rotated even if not at the true equator line.

Again, thank you very much for the advice on this matter. The one thing that still has me at a loss is why the change in indicator readings when I remove and reinstall the touch probe unit in the spindle and re-check it on the Interapid. I have even thought about buying a Haimer 3D unit, but would like to see if I can nail down the touch probe before spending $500.00 on a Haimer.

Rick H.
 
Last edited:
You only slightly loosen the retaining screws, if loose then everything will move all over the place. Has been years since I aligned mine, but I am thinking something like a 1/4-1/2 turn loosing the retaining screws. All the adjustments are very small, more like very slight tightening of the grub screw and then tightening the retaining screws. The indicator is fine against the ball, it is the only way to do it, and also done the same for other types of touch probes. I adjust the height of the indicator relative to the tip ball by peaking the the reading. You should be under 0.001" with the DRO Pros probe. Do not know why they charge so much, there are other mechanical probes of this type that run under $200. Also this type of mechanical contact probes have what is known as lobing because there are 3 contacts at 120 degree spacing, so the angle that the tip is deflected relative to the contacts slightly change the contact opening point/accuracy.

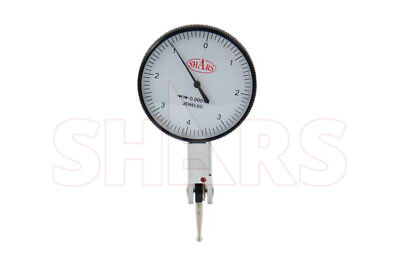
I do not feel a 0.005 indicator is accurate enough, based on my own experience. You can purchase a inexpensive 0.0001" test indicator from Shar's or off eBay, worth having in the tool box.

The process for aligning the Haimer is similar far as the test indicator except they use four grub screws that move the shaft. There are also very small screws around the face for zeroing the meter. There is also another mechanical dial indicator that is popular these days with better US support than the Haimer.
 
Thank you mksj for the help. I really appreciate it! Can I ask what the name of the other "popular" indicator is? Here is my update for today. I went downstairs and spent the better part of my day there. Disassembled the DRO PROS probe and cleaned everything up and reassembled it. I left the retainer ring screws 1 turn loose as well as the grub screws. Put the probe in the mill and spent more time than I want to admit getting it to less than .001". In fact the needle didn't budge but a bit when I said enough. My eyes were going batty. Anyway surprisingly it took a combination of adjusting the ring and grub screws to get it to the point I called good. So I was happy at that point.

Then came the moment of truth as they say. I marked the spindle, the drive belt pulley, and the probe so I could put the probe back in the same relative position as much as possible. Removed the probe and immediately reinstalled it and bummer.....006" runout. So now I had to stop and think for a bit with a cup of coffee. Before I did ANYTHING to the probe, I removed and reinstalled it 4 more times checking runout after each install. The first check was the worst with .006", then .002", then .004" and last I was back to where the needle didn't hardly move at all, not even worth mentioning. So now I am hashing this over in my brain. I really don't have any idea how to "fix" this little problem and what I initially thought was an issue with the probe internally doesn't appear so. I may as well ask this, but could this be an issue with the Grizzly mill spindle and associated parts? I have had the mill for over 4 years, but actual running time is probably 25 to 40 hours. I haven't kept track of that fact, perhaps I should. One certainly shouldn't have to recalibrate the probe each and every time you want to use it right?

Thanks to All...
Rick H.
 
You should be able to check the TIR of the mill with some ground stock or an indicator against the shaft of an endmill.

Did you adjust the ball diameter, if that is not done then the readings will be significantly off in the 4 quadrants. It is a bit trial and error of making small diameter change and then checking the 4 axis. If you want me to check setup/checkout the your DRO Pros edge finder and you can mail it to me and I can test it on my EL700, you can PM me for details.

The other dial edge finder many people are using is the TSCHORN 3D-Tester, there are various versions.
 
Thank you for the offer mksj. I may just take you up on it so I can see if I did it correct or not. I took the probe out of the machine last nite and reinstalled it tonite. I checked it and it showed just about one half thou off. Not too bad all things considered with this mill. I don't have anything other than the DRO PROS stem on the probe to check runout on my 10mm collet and spindle. I think the last time I really tried to check the spindle runout it seems to me that it was close to .001" or a bit less but I will have to check it again as best as I can. I will send you a PM re the probe.

Rick H.
 
Thanks for the replies gentlemen. So would all concur that the retainer ring screws must be loosened up first before adjusting the stylus positioning screws? It may sound let's say "uneducated", but how much would one loosen up the retainer ring screws? 1turn, 2 turns? The last time I tried this procedure I used my Interapid indicator which goes to .0005". Is this acceptable device acceptable for this job? I mounted the touch probe body in a 10mm Hardinge collect so I would think that is a pretty accurate way of doing this. I then placed the ball end of the indicator against and as close to 90 degrees as I could against the probe tip, does this sound okay? Some say to only use a flat tip against a ball for doing this work, but I don't have a flat surface ground tip on a .0005 capable indicator. Perhaps I am getting feeble minded, but I would think this could be done ball tip to ball end as long as positioning remains the same at the contact point. The contact point should remain the same as the probe is rotated even if not at the true equator line.

Again, thank you very much for the advice on this matter. The one thing that still has me at a loss is why the change in indicator readings when I remove and reinstall the touch probe unit in the spindle and re-check it on the Interapid. I have even thought about buying a Haimer 3D unit, but would like to see if I can nail down the touch probe before spending $500.00 on a Haimer.

Rick H.


I don't mean to discourage you Rick but I spent weeks trying to get better accuracy/repeatability out of the DRO Touch Probe. After much teeth gnashing and use of unprintable language I called DRO Pros and talked to the owner. What I was told is that it was already functioning at it's expected level (about the same as yours) and not to expect any improvement. While that is fine and all for a lot work, I am a bit OCD about precision. I gave up on the probe and purchased a Haimer. Couldn't be happier with the Haimer.

Best of luck to you,

-Ron
 
Back
Top