Edwards Radial 5 build thread --- PHOTOS!

Good input @francist, thanks. You're right with your eyeballed estimate: the remaining gap would only be about 0.045".

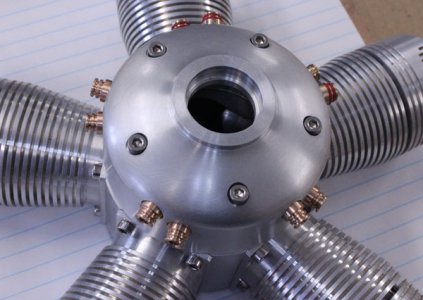
I think what I plan on doing is to make the tappets about 1/8" or so longer than is called for/modeled. That way they can accommodate a bronze tappet guide if I choose to go that route before everything is finalized.

The thing I dread most in adding tappet guides is that I've already reamed out all the holes in the cam housing. So it'd be quite the bit of effort to set the cam housing up on my Bridgeport to be running true, but also to clock it correctly in my dividing head. Doable, sure, but it'd be quite finicky to get it all dialed in right.
 
Episode 22 || Spacers and ‘Bottom End’ Assembly

I took a little break from the valve train to finalize the ‘bottom end’ of the motor on the valve train side. The only remaining bits before I could get it all put together were a few spacers.
1645417283598.png

1645417303130.png


The spacers were easy lathe parts. I finished them off to the correct thickness by hand with some sand paper on a cast iron surface plate (whose only purpose is to act as a sanding flat).
1645417321024.jpeg 1645417333798.jpeg


Here’s the full stack-up of bearings, spacers, and the cam ring assembly that fits on the crankshaft. And then fully assembled.
1645417353420.jpeg 1645417363683.jpeg

1645417376345.jpeg 1645417385505.jpeg

1645417397055.jpeg 1645417407152.jpeg


Not much to it.


TIME ON SPACERS AND BOTTOM END ASSEMBLY: 4.0 hours
CUMULATIVE TIME: 385 hours
 
Episode 23 || Tappets

A few posts ago, I mentioned that I was considering adding bronze tappet guides into the cam housing. Well, I decided not to do it, but I did increase the tappet stem lengths by 0.150” to accommodate such guides if I decide to install them in the future.
1645935718911.png 1645935734902.png

The tappets are hardened hammer-head components that ride on the cam ring; they’re pushed outward by the cams on the ring, and in turn push the push-rods and activate the valves. There’s no difference on the intake vs. exhaust side, so it’s just 10 identical parts. At the lathe with some 3/8” O1 steel, I first turned the 0.124” sliding diameter and a larger diameter out of which I’d eventually obtain the hammer-head portion.
1645935753135.jpeg 1645935769317.jpeg


Then I used a 5/64” ball end mill to make the pocket for the push rod. I tend to use a hacksaw to part off components that are smaller than about 1/4” in diameter or so.
1645935805446.jpeg 1645935820590.jpeg


Back in the lathe to trim the hammer-head ends to the same length, and they’re all ready for hardening / tempering.
1645935841725.jpeg


I hardened them one at a time, with a mixture of boric acid and denatured alcohol glooped on the top to help prevent scaling. It was messy, but it worked great. I wasn’t able to get enough heat into the parts using the wire basket method I tried in my Episode 21. Some boiling water easily dissolves the glassy boric acid residue when everything is said and done. I tempered them in the oven set to 425F for a few minutes.
1645935862430.jpeg 1645935879053.jpeg


Then over on my Kuhlmann D-bit grinder, there were basically two things to grind. I started by grinding the 0.325” flat radius on the front that rides along the cam ring. It takes quite a bit of setup on the grinder to get things right, but it’s really straightforward once you’ve done it once.
1645935900356.jpeg 1645935916298.jpeg


The last grinding step was to grind the four sides --- two sides at 0.125” to be flush with the shank diameter, and the other two sides to result in a non-critical 0.25” overall width.
1645935692219.jpeg 1645935665857.jpeg


I put a light chamfer on all edges and corners with the help of a diamond file/lap thingy, and used a Bergeon watchmaker’s loupe so that I could see what I was doing. The tappets are really too small to hold by hand while chamfering, so I held them in a Starrett 240C pin vise. It’s not perfect, but I’m not trying to make a watch here, just breaking the edges.
1645935958630.jpeg 1645935978001.jpeg


Push rods will be next. Then I’ll finally be done with everything in the valve train.


TIME ON TAPPETS: 8.0 hours
CUMULATIVE TIME: 394 hours
 
Last edited:
Nice work. Coincidentally I'm at a similar stage on my Ohrndorf radial. But I have pushrod tubes which seal both on the bronze tappet guide via O-rings & also the rocker box floor, all at funky 3D angles. I completely redesigned the original drawings. Luckily I found some thin walled 7mm x 0.045 wt aluminum tubing (K&S). Ugh. Anyways, be thankful for exposed pushrods & rocker. Easier to make & more interesting to watch LOL.

I like those Edwards cam follower 'shoes'. Those will yield a 'line' contact on the cam plates vs. mine are a bullet shape end so essentially a tangent contact point. I guess they will self spin & wear somewhat equally but I'm a little concerned by perpetual wear compensation adjustment. But that's how all his engines are. So do yours retain their axial alignment because the faces are always parallel & slight gap, therefore constrained on the faces & the cylindrical section in their sliding holes?

Turns out I'm re-making my tappets. I followed the plan dimensions but now that its mocked up, I don't like that they go somewhat deep into the tappet guide during no-lift period for no logical reason I can think of. Therefore my pushrod is quite close to rubbing the tappet guide at an angle on the front cam plate guides. My cam plates are hardened & my current tappets are too, but a few points softer. But now I'm actually thinking of making slightly longer ones & just running as-is (annealed state, unhardened) O1 tool steel. They are much easier to make & replace than the cam plates I figure. Any thoughts on that?

If I do another radial I will make threaded tappet guides so they can simply be removed & replaced if required. Mine are glued in with Loctite. Theoretically I could remove them with heat but my nose case is a bit thin & fragile. It has some machining hours in it if things go sideways.

I tried my best to accommodate your slotted/adjustable ring gear which is a great idea, but its just too skinny on this engine. Next one! Saving all these good ideas.
 

Attachments

  • IMG_4478_edited-1.jpg
    IMG_4478_edited-1.jpg
    82.3 KB · Views: 21
Last edited:
Lots of good thoughts, as always @petertha. Much appreciated.

But I have pushrod tubes which seal both on the bronze tappet guide
I'm envious of how yours is looking. I love those brass tappet guides.

So do yours retain their axial alignment because the faces are always parallel & slight gap, therefore constrained on the faces & the cylindrical section in their sliding holes?
The 'cheeks' of my tappets ride inside slots cut on the inside of my cam housing. Here's a photo, still needs some cleanup but you get the picture.
1646020846846.jpeg

Turns out I'm re-making my tappets. I followed the plan dimensions but now that its mocked up, I don't like that they go somewhat deep into the tappet guide during no-lift period for no logical reason I can think of. Therefore my pushrod is quite close to rubbing the tappet guide at an angle on the front cam plate guides. My cam plates are hardened & my current tappets are too, but a few points softer. But now I'm actually thinking of making slightly longer ones & just running as-is (annealed state, unhardened) O1 tool steel. They are much easier to make & replace than the cam plates I figure. Any thoughts on that?
I made my tappets longer too, in part because they just seemed too darn short on mine as well. I lengthened them by 0.150".

Good thought re: relative hardness of the cam ring and tappets. I admit I hadn't given it much thought. But now that you bring it up, I may fully anneal my tappets for the reason you outline. That said, there are a number of features of the Edwards that, shall I say, aren't necessarily designed with longevity or machinability at top of mind. I've made a few changes along the way, but my version of this motor likely won't see all that many hours, so I'm not all that concerned with wear.

If I do another radial I will make threaded tappet guides so they can simply be removed & replaced if required. Mine are glued in with Loctite. Theoretically I could remove them with heat but my nose case is a bit thin & fragile. It has some machining hours in it if things go sideways.

I tried my best to accommodate your slotted/adjustable ring gear which is a great idea, but its just too skinny on this engine. Next one! Saving all these good ideas.
There'll be a whole host of design changes I'd make if I were designing a motor from scratch, particularly if I intended it to be a high-hour rig. This is by far the most complex project I've ever tackled in my shop, so I'm quite happy to go with the flow just to get something functional.
 
Episode 24 || Push Rods

Finally!! The last post about the valve train!!

The push rods are just lengths of 3/32”-diameter O1 with 0.075” balls ground into the ends. The length isn’t critical because the lash adjustment screws can make up the difference. I first cut them roughly to length with a hacksaw, then I ground them to final length (plus about 15 thou for final grind) over at my D-bit grinder. I considered hardening them, and I might still do it, but I just left them soft for now.
1646021308539.jpeg 1646021322936.jpeg


Then, after a little bit of setup in the D-bit grinder to get the radius right, I ground a ‘ball’ in the end. The shape / wear of the wheel resulted in a less-than-visually-appealing-but-completely-functional ball. Not all that pretty, but it’ll work fine.
1646021339801.jpeg 1646021351652.jpeg


And there we have it! I’ve got a bunch of filing / cleanup / assembly work to do on the remaining cylinders, but this should give a good idea of where things are headed.

And the valve train operates super smoothly when spinning the crankshaft, so I’m pleased as punch this evening!
1646021368148.jpeg


I think I’ll make a quick stand for it next. It’s getting a bit unwieldly to handle.

TIME ON PUSH RODS: 3.5 hours
CUMULATIVE TIME: 397 hours
 
Last edited:
This beast is truly beautiful.

I sure hope it runs at least half as good as it looks.

If I thought I could pull off a build like this I would build a special airplane to show it off. But then I am a Flyin fool.....
 
That sure is a beauty, thanks for sharing photos of all of your hard work.
 
Now it's really coming together!

And I definitely need to make a stand. I'm not good at (nor do I enjoy) 'fabrication,' so it'll just be a cobbled-together mess of whatever I've got lying around. For now at least.

I'm also really eager to make the prop nut, so maybe I end up doing that first. We shall see.

1646107373645.jpeg

1646107394236.jpeg
 
Back
Top