- Joined
- Sep 11, 2019
- Messages
- 22
It's been interesting to say the least after receiving my machine on Sep 23 last week.
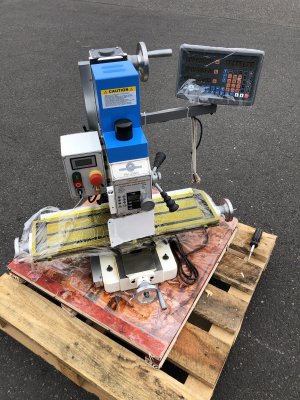
Having very limited access to my basement shop I opted to pickup the machine at the truck depot.
This saved a bit of money not having the lift gate service, and gave me the option to deal with weather as I needed to disassemble it.
I would not have been a happy camper with a crate outside my place in a torrential Portland downpour.

Disassembly was mostly straight forward, not much actual information out there on it really, specifics I mean.
Several of you provided some helpful info in other threads so thanks again for that!
The main issue I encountered is partly being so new to "real" milling machines, a general lack of working knowledge.
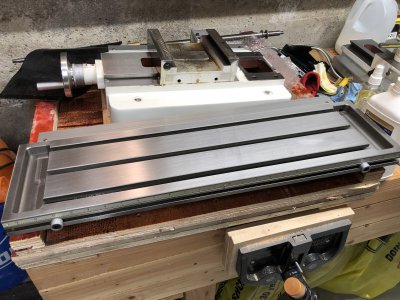
Separating the X table from the base just wasn't happening. Turns out all that was needed is for the gib to be slid out and it comes right off.
I had been in the depot for well over an hour and it was getting dark, so I humped the base and the X table in one piece into the car.
Cleaning and proper dismantling in the shop was a lot of fun, really getting to know the machine. Quite a lot of elegant simplicity really.

I can see that I want a one-shot oiler mod soon, some of those little valves are tucked away!
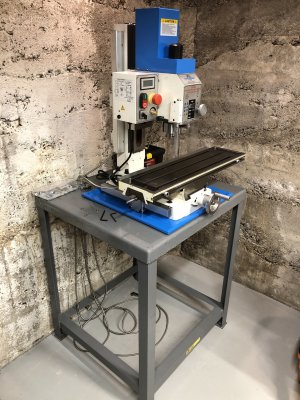
As luck would have it I scored a really solid machine table on Craigslist to mount it on, very happy with the setup, no compromises.
Nice 1/4" welded steel, it took some care to hand drill the holes in it with my pedestrian drill.

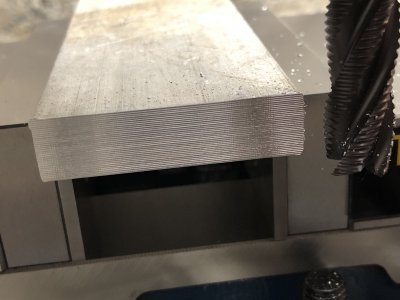
So last night I finished getting it setup to the point of making the first chips. Got a bit too excited and forgot to put the chip guards over the lead screws...
Cleaning that up carefully is the plan for tonight as well as removing that pain in the ass front chip guard.

One thing I noticed that is rather annoying is the slop in the X table hand wheels. It seems like it is the play between the wheel and it's key in the shaft?
I'm considering ways to reduce that, curious if anyone else has noticed or cares about the 'knocking' noise it makes.
I'm currently planning on replacing all of the gib lock levers, simply annoying and low on ergonomics.
Too easy to leave them in a collision path, several times already actually.
Likely just 8mm bolts with knobs that I machine.
Power feed is also high on my list, especially after performing the first few operations. Good to have the feel of things for a while, until it aches more than you learn right?
Might do a DIY version to give myself a high value project to complete quickly.
I did record my first chips for posterity and laughs, some basic editing and it is almost watchable!
Happy to be a part of the community, hope to learn from others here and help where I can!
Support from PM has been nothing but stellar, even when my questions are noobtastic
Having very limited access to my basement shop I opted to pickup the machine at the truck depot.
This saved a bit of money not having the lift gate service, and gave me the option to deal with weather as I needed to disassemble it.
I would not have been a happy camper with a crate outside my place in a torrential Portland downpour.

Disassembly was mostly straight forward, not much actual information out there on it really, specifics I mean.
Several of you provided some helpful info in other threads so thanks again for that!
The main issue I encountered is partly being so new to "real" milling machines, a general lack of working knowledge.
Separating the X table from the base just wasn't happening. Turns out all that was needed is for the gib to be slid out and it comes right off.
I had been in the depot for well over an hour and it was getting dark, so I humped the base and the X table in one piece into the car.
Cleaning and proper dismantling in the shop was a lot of fun, really getting to know the machine. Quite a lot of elegant simplicity really.

I can see that I want a one-shot oiler mod soon, some of those little valves are tucked away!
As luck would have it I scored a really solid machine table on Craigslist to mount it on, very happy with the setup, no compromises.
Nice 1/4" welded steel, it took some care to hand drill the holes in it with my pedestrian drill.

So last night I finished getting it setup to the point of making the first chips. Got a bit too excited and forgot to put the chip guards over the lead screws...
Cleaning that up carefully is the plan for tonight as well as removing that pain in the ass front chip guard.

One thing I noticed that is rather annoying is the slop in the X table hand wheels. It seems like it is the play between the wheel and it's key in the shaft?
I'm considering ways to reduce that, curious if anyone else has noticed or cares about the 'knocking' noise it makes.
I'm currently planning on replacing all of the gib lock levers, simply annoying and low on ergonomics.
Too easy to leave them in a collision path, several times already actually.
Likely just 8mm bolts with knobs that I machine.
Power feed is also high on my list, especially after performing the first few operations. Good to have the feel of things for a while, until it aches more than you learn right?
Might do a DIY version to give myself a high value project to complete quickly.
I did record my first chips for posterity and laughs, some basic editing and it is almost watchable!
Happy to be a part of the community, hope to learn from others here and help where I can!
Support from PM has been nothing but stellar, even when my questions are noobtastic


