- Joined
- Aug 6, 2015
- Messages
- 3,871
Well, since you guys did not let me buy an inexpensive metal lathe to play with  (link to that thread)... decided to convert my G0704 to a CNC machine. Will document my journey with this project here.
Bought the machine back in 2015 (link to thread)
A few threads and videos I looked at on this. Simple google search... found a few threads on another forum, not sure if it is okay to link to those from this site...so will leave the external links out of the thread for now. Again, simple google search on "g0704 cnc kit" :
Follow up update he made with some additional changes made:
Sent an email to this gentleman to see if he is still making the adapters (I do not have the skills at this point to try to make them myself) :
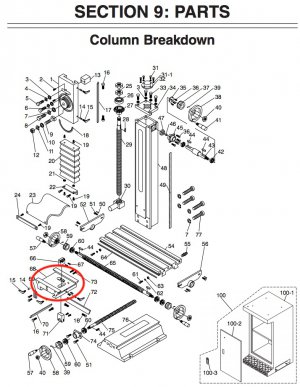
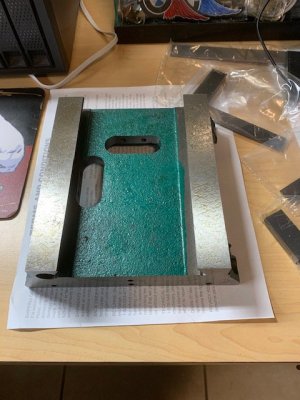
Ordered a new Y-axis block (saddle - part 68 on the diagram, part number P0704068) to modify before I disassemble my machine... I did not wanted to use a grinder (like in the video from Practical Renaissance) for the modification. Figured I would use my milling machine to make the modifications to the spare saddle before taking my machine apart and then, just swap the modified part.

I will continue to buy the needed parts as finances allow... hope to have this modification completed in the next few months.
Cheers!
Bought the machine back in 2015 (link to thread)
A few threads and videos I looked at on this. Simple google search... found a few threads on another forum, not sure if it is okay to link to those from this site...so will leave the external links out of the thread for now. Again, simple google search on "g0704 cnc kit" :
Follow up update he made with some additional changes made:
Sent an email to this gentleman to see if he is still making the adapters (I do not have the skills at this point to try to make them myself) :
Ordered a new Y-axis block (saddle - part 68 on the diagram, part number P0704068) to modify before I disassemble my machine... I did not wanted to use a grinder (like in the video from Practical Renaissance) for the modification. Figured I would use my milling machine to make the modifications to the spare saddle before taking my machine apart and then, just swap the modified part.

I will continue to buy the needed parts as finances allow... hope to have this modification completed in the next few months.
Cheers!
Last edited:


