I hated the piston-style QCTP that came with the G0709, so I bought a wedge-style QCTP from Precision Matthews, along with a pile of tool holders.
The QCTP bolt that came with the original didn't fit the new one, so I had to come up with a new solution. I had a 1/2" x 2" piece of CRS stock, and milling slots along the top made it a perfect slide fit in the compound. Drilled it to 37/64" in the center, tapped it 5/8-18, and it was much better than the original.
But I hate wrenching the 1" nut on the top. Eventually I decided to make a wrench-optional nut. I had the drill and tap already, so why not?
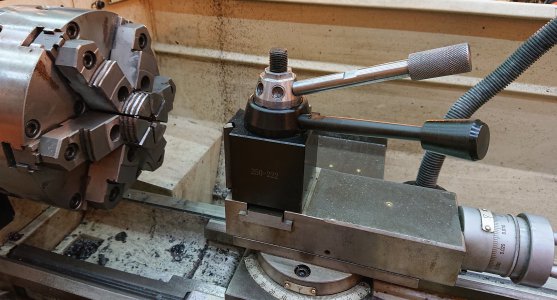
I made a part 1.6" at the bottom, with a 20⁰ taper for the handle to keep it out of the way of the locking handle, and flats for a 7/8" wrench (same as I use to attach vise and dividing head to the mill next to it) at the top in case I get too enthusiastic tightening it down. Made six threaded sockets for the handle to make sure I can always find a convenient location; it wasn't much more work to do six than one anyway because I already had it in the dividing head for cutting the wrench flats. The dividing head was a convenient way to hold it at 20⁰ and turning the dividing head a few times is easy enough. The wrench flats on the nut are a bit imperfect because of a collet-not-tight incident, but the wrench worked and I don't feel like starting over.

Nut and handle are both CRS. The only stock I had big enough for the nut was 2.5" and I was too impatient to wait, so I spent a while making pretty colored chips taking it down to size. The handle is 7/8" stock turned down to 1/2" shaft, 10mm flats to match the drawbar on the PM-30, M10x1.5 thread on the end of the handle. I polished the handle down to 1200 grit before discovering that I really wanted some grip, so I knurled it, then used emory paper to knock down the sharp heads of the knurls until it was comfortable.
I know that making a ball turner and turning a ball is considered de rigour for the handle, but I like this better.
I'm very satisfied and I think it will make the lathe more usable.
I know basically nothing about conventions for making prints, so the attached PDF won't look like anything you've ever seen before, but it probably conveys the idea well enough.
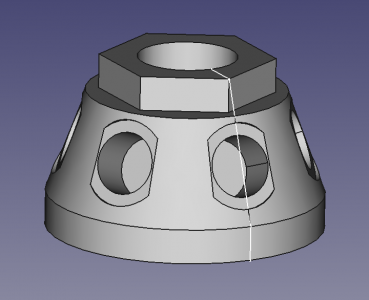
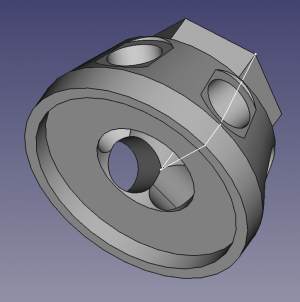
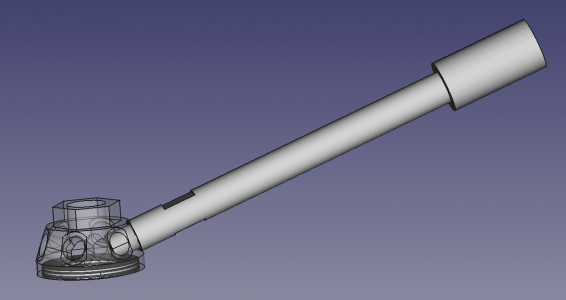
Here's a model visualization (without threads):

The QCTP bolt that came with the original didn't fit the new one, so I had to come up with a new solution. I had a 1/2" x 2" piece of CRS stock, and milling slots along the top made it a perfect slide fit in the compound. Drilled it to 37/64" in the center, tapped it 5/8-18, and it was much better than the original.
But I hate wrenching the 1" nut on the top. Eventually I decided to make a wrench-optional nut. I had the drill and tap already, so why not?
I made a part 1.6" at the bottom, with a 20⁰ taper for the handle to keep it out of the way of the locking handle, and flats for a 7/8" wrench (same as I use to attach vise and dividing head to the mill next to it) at the top in case I get too enthusiastic tightening it down. Made six threaded sockets for the handle to make sure I can always find a convenient location; it wasn't much more work to do six than one anyway because I already had it in the dividing head for cutting the wrench flats. The dividing head was a convenient way to hold it at 20⁰ and turning the dividing head a few times is easy enough. The wrench flats on the nut are a bit imperfect because of a collet-not-tight incident, but the wrench worked and I don't feel like starting over.

Nut and handle are both CRS. The only stock I had big enough for the nut was 2.5" and I was too impatient to wait, so I spent a while making pretty colored chips taking it down to size. The handle is 7/8" stock turned down to 1/2" shaft, 10mm flats to match the drawbar on the PM-30, M10x1.5 thread on the end of the handle. I polished the handle down to 1200 grit before discovering that I really wanted some grip, so I knurled it, then used emory paper to knock down the sharp heads of the knurls until it was comfortable.
I know that making a ball turner and turning a ball is considered de rigour for the handle, but I like this better.
I'm very satisfied and I think it will make the lathe more usable.
I know basically nothing about conventions for making prints, so the attached PDF won't look like anything you've ever seen before, but it probably conveys the idea well enough.
Here's a model visualization (without threads):

Attachments
Last edited:


