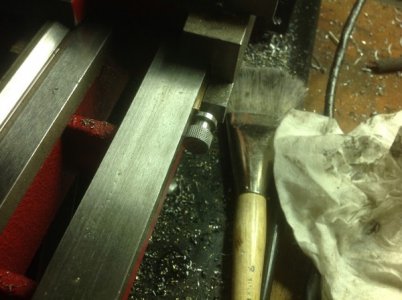
Getting started with tapered gib conversion on mini-lathe.

David Kirtley

Active User
Registered
Joined
Dec 17, 2012
Messages
630
Well, I decided a while back to start with putting tapered gibs on my lathe. The stock gibs are a pain to adjust and if I don't have them tight, they back out when I am making heavy cuts.

I started out with some mystery meat steel I picked up and some brass for the gibs. Well, this steel sucked. It was like machining very hard bubble gum.
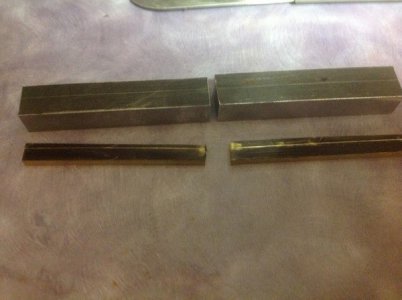
13+-+1.jpg

Back to the drawing board. I got out some new stock from my stash and it was much nicer.
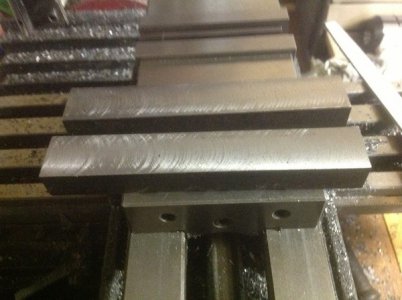
13+-+1.jpg

I laid out the features after pulling off one of the gib strips from the lathe and marking out the hole locations.
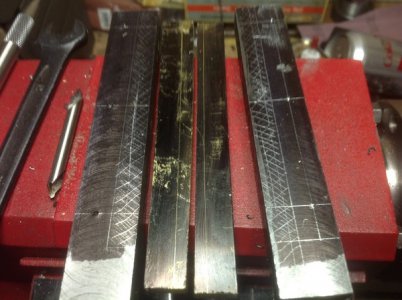
13+-+1.jpg

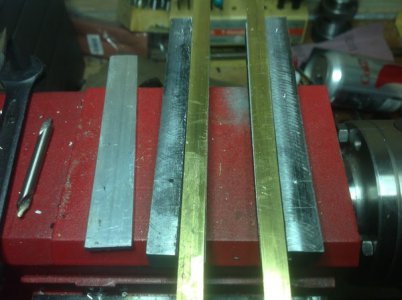
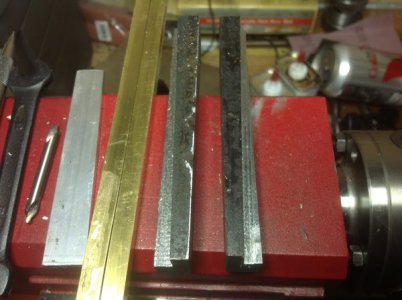
Next up was a taper. I was going to use my digital protractor but the batteries were dead. Well, it is not a critical angle and it doesn't really matter as long as they all match. Then I cut the tapers in the gib holders.
13+-+2.jpg

Next I cut the gib strips to width.
13+-+1.jpg

No, those gib strips didn't magically get longer, I made some new ones. The originals I realized were not long enough to leave some meat for the adjusters.

Next up, I need to stop by the store and pick up some superglue to temporarily fix the gib strips to the holders to mill the taper in them. Then all I have left to do is to drill the mounting holes, put on the adjusters and cut to length. Well, that and cut the clearance for the gear on the apron. I will try to get that done this next week as time permits.
 
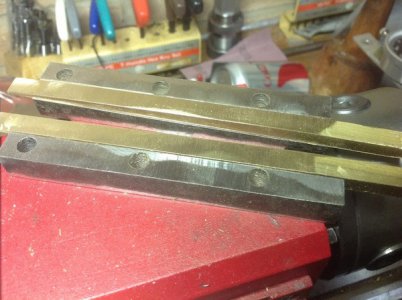
Gibs tapered. Just a little file work and then add the adjusters and the clearance for the apron gear. I have them about 3/4 in long. I am trying to decide whether to leave it or not. Having it long will put the adjusters out easier to access. The downside is that they will be out easier to hit things with. I might have to drill the hole for the adjuster on the lathe. Not much room on the mill with them on end. I will probably just stick them in a tool holder and chuck up a drill bit.

13+-+1.jpg
 
For those that are on the fence about doing a tapered gib conversion, do not hesitate. I have one side (the back side) fitted and my lathe is more rigid and the carriage moves better than it ever has. I don't even have an adjuster screw on it yet. Just put in hand tight it outperforms the stock configuration. I need to slim down the taper a bit. I didn't really know how far it would set in place and I had to just guess. I was a bit too conservative. I may wait a bit before I make the adjuster screw as it will likely wear in a bit and I want to have it with the most travel so I can go longer before I need to replace the gibs. Of course I am just guessing as I have no idea how long they will wear.


Drilling and tapping with the holder in a tool holder on the tool post went really well. I did finally use my hand crank for the spindle. Made tapping really easy. Probably would have been a bit nicer had I swapped out the collet holder for the 3 jaw but it held the tap "well enough".

UPDATE:

Well, I went ahead and got the front one on as well. Works really well. I still need to get an adjuster put on. Might make it. As it is, with them free in the holders, it is better than it was. I can hardly wait to see what it is like with them adjusted closely. I don't know if I will get new pics up. There really isn't anything to see. It looks like it did before except with a piece of brass sticking out the back. Once they get worn in a bit, I will cut the gibs to length and notch them for an adjuster screw.
 
Last edited:
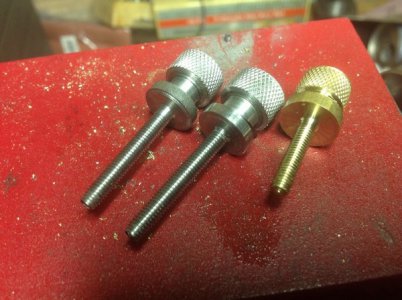
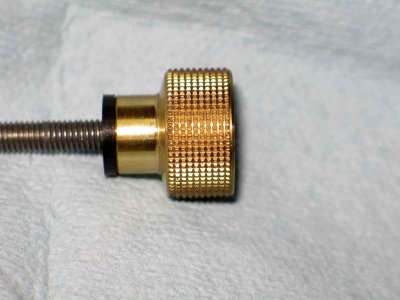
Well, I lied. I guess there is more stuff to see. Spent the evening making the adjusters for the gib strips. Did some tests in brass and then turned them for real in 1018 steel. The hardest part was the M4-.70 screw thread. Not the threading it, I just used a die. The problem was getting it a consistent diameter. Having a piece that thin and that long, it would flex too much. I just went ahead and turned it shorter so there was not as much to flex. I turned about 0.5 in to diameter, then moved in and did another half inch and so forth until I got to final length.

I didn't make a slot in the end for a screwdriver to turn them. I might put one later but I don't think I will need it. The knurled end should be enough to turn them by hand. They don't have to be that tight. There is a lot of leverage putting in the taper of the gib with the fine thread of the adjuster. I can put the gibs in tight enough that the carriage can't move by pressing in with my finger.

All that is left is cutting the gibs to length and notching them for the adjuster. Maybe tomorrow.

13+-+1.jpg
 
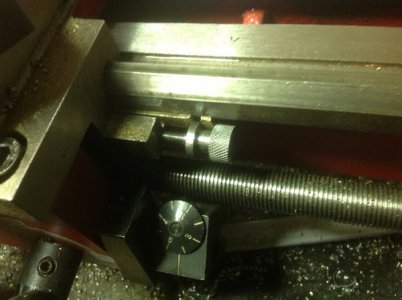
Last installment. I have them all installed. I am going to have to tear down and get everything cleaned and adjusted now. So far it feels pretty good except a bit of play since I took things out and put them back in to fit the adjusters. I think it will wear in ok though. I tightened them too much and my gib on the lead nut jumped loose. I got it taken down and looked it over but it is too late tonight to get stuff adjusted again. I had things adjusted really nicely but I had to get them loose (leadscrew and apron) to get the gibs in and out.

13+-+1.jpg
13+-+2.jpg
 
Looks like that knurler is coming in real handy there, Dave! Nice job!
 
Thanks Mikey. Actually I am getting the urge to make some more of them. I have extra knurls in two other sizes that came with the set and I really don't see a point in dealing with snap rings and stuff to swap them out. This whole project has had me really thankful that I had picked up some extra tooling that has made it much easier. The only thing I really want now is to get some decent tap handles. The ones I have are awful.
 
Speaking of extra knurls, do you have a straight knurl? If so, then you can make "square" knurls like this:

square-knurl.jpg

Basically, you take a straight knurl and measure the distance from crest to crest. Then use a sharp 60 degree cutter to space circumferential cuts that exact same distance apart along the knurl. It produces a nice square pattern. The idea is from George Thomas and it works rather well. My knurl is too fine and I need to buy a coarser pattern but this will give you the idea. I sort of like it myself.

Mikey

square-knurl.jpg
 
David,
What plans did you use for the gibs? Please update this thread once in a while as you wear them in.

Nice build thread.

Chuck
 
David,
What plans did you use for the gibs? Please update this thread once in a while as you wear them in.

Nice build thread.

Chuck

I guess you could kind of say I followed Rick Kruger's plans but I really didn't follow them (or his instructions) except in spirit. I kind of ramble when I was writing the posts so here is my version to compare with his. It is much simpler than it sounds. The only critical dimensions are the size of the holders, the position of the mounting holes, and the width of the gib strips:


  1. Get some material for the holders, 3/4" x 1/2". I started 4" long or so.
  2. Take one original saddle retainer and transfer the holes for the clamping screws.
  3. Mark off 0.3" wide for the tapered part opposite the holes (remember they are mirror images).
  4. Use an angled parallel (I made one a couple of degrees or so) and mill the taper section in the bracket to about 0.25" at the deep end (because I was using 0.25" x 0.30" brass). Make the second one with the taper the opposite way (mirror image).
  5. Superglue the brass flat into the tapered section leaving a couple inches hanging off both ends and mill off the top of the brass flat level with the top of the holders in level in the vise (It makes the complimentary angle). I touched up on my belt sander.
  6. Knock the gibs loose (well, I didn't have any solvent for glue handy.)
  7. Straighten out the gibs from any warping or damage from whacking.
  8. Drill and tap for adjusters and make adjuster screws to fit.
  9. Trim gib strips by measuring where they fit in position leaving room for adjustment and notch for adjuster.
  10. Notch the front gib bracket 0.25 or so deep and 0.75 or so wide for clearing the gear on the apron.

Now, since I was just guessing on some of it, I actually should have left the gibs a little thinner. No big deal. I can make new gib strips later. All the angles and such are already set by the holders. The gibs are consumables anyway. I should have just used delrin or UHMW-PE. The gibs only hold the saddle down to the bed. It is still metal against metal for the saddle. The back side doesn't have much force on it. It just has to counter the force of the cutter lifting the back of the saddle and it is far enough away for the leverage to be in your favor. The motor is only 350 watts. I could probably hold it down with my hand if I had to.

Other than the fun of making the tapers, it would be just as good and a lot faster and easier to just mill the slot level with no taper and put flat gibs and drill for several set screws to push the gib into the bottom of the bed. I have an extra bed and spindle and will go that way when I build that one up.
 
Back
Top