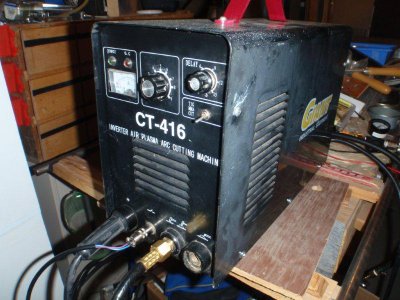
Giant CT-416 TIG/MMA/ Plasma Cutter

Aw, c'mon, NX. You don't hate to ask. We are talking pictures, after all. :lmao:

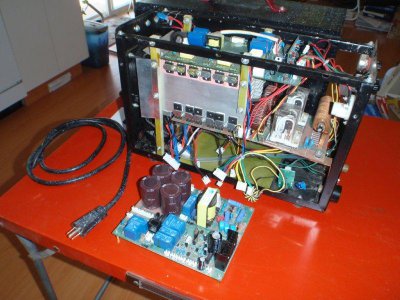
I took the lower board out last night and traced out a few functions. Turns out the solenoid is 240 VAC, so I think it will work fine. I just have to figure out what's wrong in the control circuit for it ... if I ever get off this computer. As I said, I'm working on it, so you'll have to visualize the thing put back together.

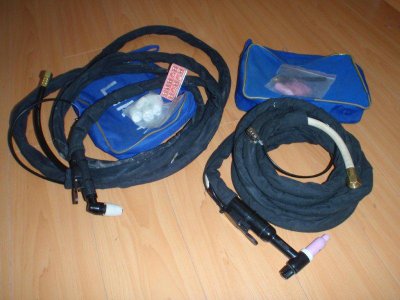
The two torches literally look like they've never been used. If they have, they replaced the consumables already. I suspect it may have been used exclusively for stick welding so far. There are spare ceramic nozzles for both, as well as collets for the tungstens and brass nozzles for the plasma torch. The switch connector had been ripped off the TIG torch cable, but was in the pouch, so it was easy to fix.

Man, I miss being able to post pics in-line. No more big projects until that comes back, unless I do it through multiple posts.
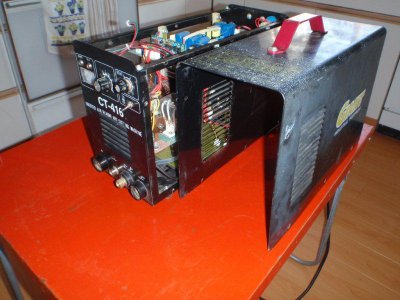
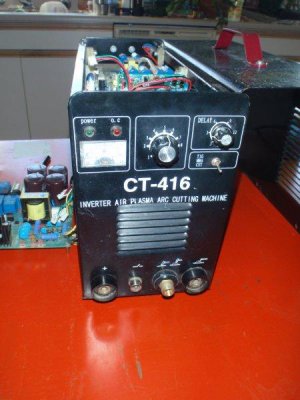
P9090629a.jpg P9090630a.jpg P9090632a.jpg P9090633a.jpg
 
Okay. I'm officially hooked. I got the gas valve figured out - replaced one transistor and bored out the unknown, possibly organic material in the front panel fitting.

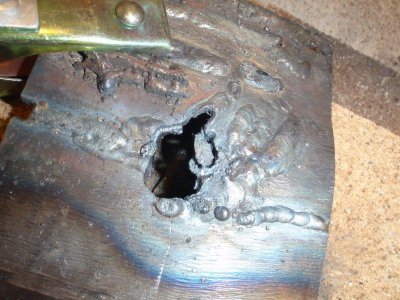
I used some guessed-at settings for power and post-flow and struck up an arc. My helmet rarely darkened and when it did, I couldn't see. I'll probably use the 'Grind' setting on the helmet for plasma after this. The captive loop on the right side of the hole in the photo is the first cut. I turned down the air pressure after that, but I think I had it right the first time. The steel plate is the piece of 3/32" I used for my first MIG attempts several years ago. There are some pretty ugly 'beads' on it. The open tail at the top of the hole was already there - the result of too much power on the MIG. Cutting it up seemed appropriate.

I'm pretty stoked. I thought plasma cutting would always be just out of budgetary reach. Always worth watching those ads.

P9090635a.jpg P9090636a.jpg
 
AH, Don't you just love it when a plan comes together!!! Thanks for the pictures!

Does that TIG Torch have a snap start on it or some sort of potentiometer???
 
Both TIG and plasma use HF to start. It shuts off after the arc is initiated. There is a pot on the front panel to adjust power level. It is a 1k pot, so I'm planning to add a jack to plug in the foot pedal I had previously made for my TIG experiments with a Century Inverter.

Before I try TIG, I'll probably modify my MIG cart to hold the combo unit and plumb in a manifold to select air or argon for the combo without a wrench. I already have a selector valve to send argon to either the MIG or the existing, smaller TIG unit.
 
Hawk,
Your cuts will look and be much better if you move the torche a bit faster and raise the tip just off the surface of what youre cutting. I try to move as fast as I can without the slag blowing back up from the cut, If the slag is straight down you moving too slowly and making the kerf rough and hard to work with later. I know it seems counter intuitive, but faster is better with a plasma wrench, trust me.
Bob
 
NX, Unfortunately, it's DC only. I'd love to be able to do aluminum with it, too, but with 160 amps available for steel, I'd better start using it more than the MIG so that I can get confident with it.

Bob, last night I milled a piece of angle iron to make a straightedge to guide the torch and hold it above the work. I tried it out on a scrap of 1/4" steel. The ripples through the plate came out reasonably vertical, but with a fair ridge of slag on the bottom. It came off very easily with a pair of pliers.


I recently got one of these units, I'm wondering if you could help me, the 2 little blue ceramic capicitors bolted to the "positive" connector in your side pic, bottom right hand corner, could you tell me the numbers on them, mine burnt up and I can't read them now...
 
Guys, we got this all straightened out through the chat facility. Parts are identified and available.
 
Yup, parts are ordered.

Thanks to Hawkeye for his help!!
 
Back
Top