Grizzly G0678 8x30: Repair, Scraping and Alignment

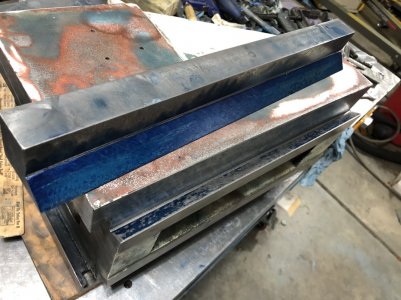
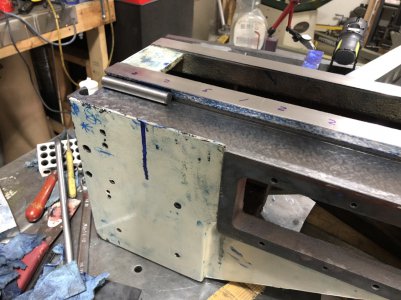
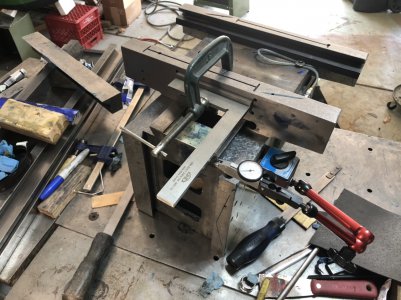
Made some progress rough scraping in the dovetails. Started with between 15-20 thousands of twist over 8", down to about 0.002.

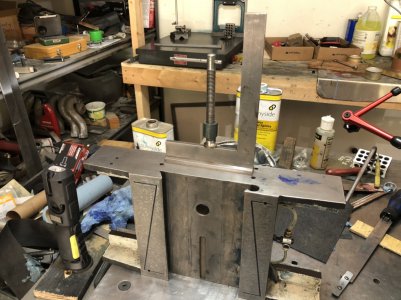
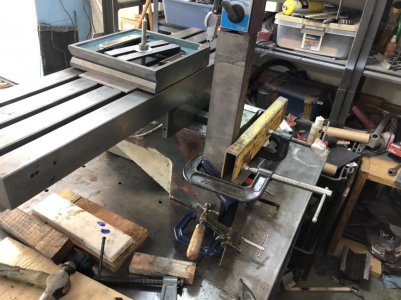
Technique I used was the dovetail alignment jig, sliding on the column dovetails. Did this because I don't have a way to rotate the column horizontally, have to do it in the vertical direction, and needed to tap the gib in to make sure the guild dovetail is firmly seated against the column dovetail.

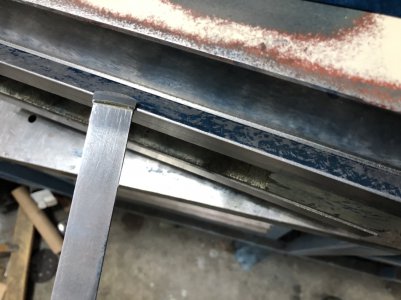
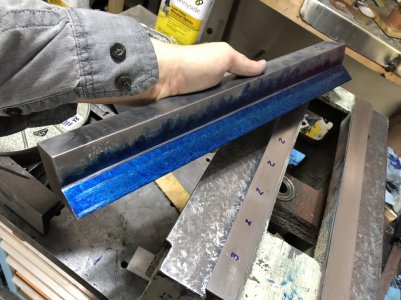
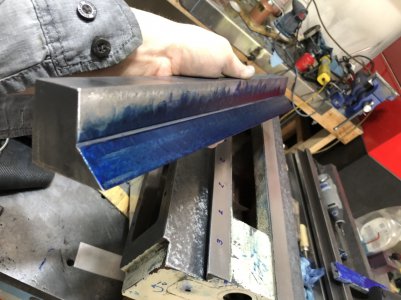
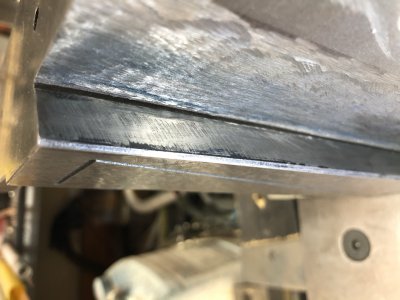
The gib also obviously needed A LOT material removing, roughed it in with the belt sander.

Yes, I fully realize there is some possible cosine error indicating on the column, that's why I'm only using this to rough it in. I needed to know how much space I'll need to fill, to order the right shim stock to build up the gib. When I get the gib fitted, I'll ink up the column, fix the indicator to the column, and use the vertical screw to move the knee up and down to get a reading to do the final scraping.

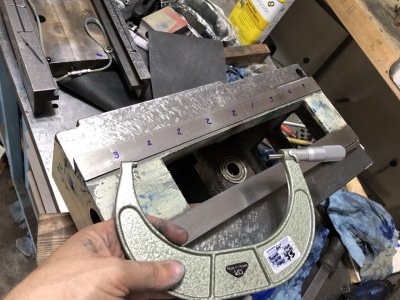
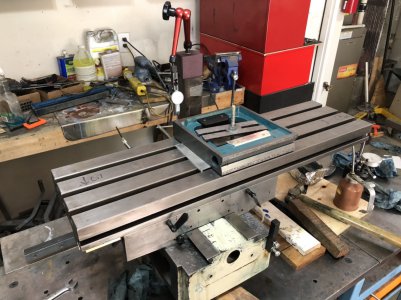
The knee is now very very perpendicular to the column, measured in 5 different spots, and it's a 2-3 tenths out of perpendicular.

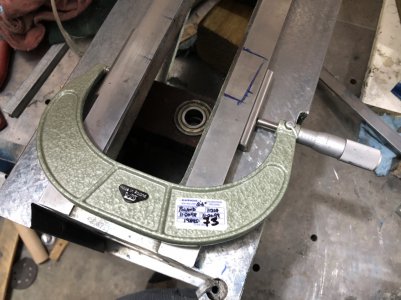
Verified the parallelism of the top flats that I scraped, and they are dead flat and co-planar to within about a tenth.

 
Started scraping in the knee dovetails.

when I started, they were out of parallel by 0.004, now down to a few tenths.

next step is scrape the pocket for the gib and guide way on the saddle to match the knee dovetails, at least that’s what I think Connelly said, and makes sense.
 

Attachments

  • F33B1C9E-6162-4153-B810-14419EFDA323.jpeg
    F33B1C9E-6162-4153-B810-14419EFDA323.jpeg
    316.9 KB · Views: 25
  • EA15A76C-692B-4421-8DCF-09B4A00BBD65.jpeg
    EA15A76C-692B-4421-8DCF-09B4A00BBD65.jpeg
    280.3 KB · Views: 20
  • 544A8597-B1D0-4A73-88E6-4A6C4D914792.jpeg
    544A8597-B1D0-4A73-88E6-4A6C4D914792.jpeg
    343.7 KB · Views: 25
Finishing up scraping the knee dovetails. These were a real pain because it’s really awkward to balance my straight edge on it. My strait edge is a 45° and dovetails are 60°.

I’m pretty sure I didn’t get the angles on the left and right exactly the same, hope that doesn’t ruin it.

These numbers here are in ten thousands. Still not entirely happy with the pattern, for a few more passes to go, but getting there.
 

Attachments

  • 52E61B0C-E40F-4656-8398-B5699FF39486.jpeg
    52E61B0C-E40F-4656-8398-B5699FF39486.jpeg
    429.9 KB · Views: 15
  • 9767AD94-60F9-4A66-BF9F-79F3AF40C786.jpeg
    9767AD94-60F9-4A66-BF9F-79F3AF40C786.jpeg
    335.8 KB · Views: 15
  • 7E13116A-3B21-40C7-BC46-187E6A0558D5.jpeg
    7E13116A-3B21-40C7-BC46-187E6A0558D5.jpeg
    441.1 KB · Views: 14
  • 78FA145E-9660-43E0-93E9-6586873D4065.jpeg
    78FA145E-9660-43E0-93E9-6586873D4065.jpeg
    299.8 KB · Views: 16
Roughing in the guiding way here on the bottom side of the saddle, ensuring it’s square to the top table ways. I’ve tested this square and it’s close, about 0.0004 out of square, I’ll switch to my precision box level for the final scrape. But got about 0.020 to scrape before that ha ha.

The guide way on both sides of the table were a disaster to start with. They were made with an angle grinder and have about 0.020 deep wallows in them.

I verified that the ground surface on the front and back of the saddle are pretty flat, and I scraped the guide way parallel to this surface.

I already scraped the dovetails on the knee straight and parallel to about 0.0001, and the guide way on the table is parallel to the face by about 0.0002.

This is finally the last guide way to scrape.
 

Attachments

  • 497EB687-86B1-4149-9469-305A2C341648.jpeg
    497EB687-86B1-4149-9469-305A2C341648.jpeg
    356.4 KB · Views: 12
  • C8F304B2-E267-4C16-8369-614C7A5CF5F0.jpeg
    C8F304B2-E267-4C16-8369-614C7A5CF5F0.jpeg
    378.9 KB · Views: 12
  • 3DF8DBFA-BD14-46B6-817C-45FB6D430C0A.jpeg
    3DF8DBFA-BD14-46B6-817C-45FB6D430C0A.jpeg
    296.2 KB · Views: 11
The gib locking screws on these low-end mills are a really poor design, just to cut costs. Main problem is only the corner of the screw touched the back of the gib and that wedged it in, and also applied a torque that pulled the gib in a direction.

So I did a slight improvement where I milled slots on the back of the gib using my friends drill press and dog-pointed the screws so the screw pushes straight in on the gib. I had to do this because I faced the back of the gibs with brass to have enough thickness.

Yeah, it’s not as good as a Bridgeport design, but it’s what I could accomplish with a drill press.

Was sketchy AF making the slots with a drill press (because of course I don’t have access to another mill or any other machine tools). So went over to my friend’s house and used his drill press with a 1/8” end mill to cut these slots.

Made a little jig to secure the gibs as good as possible in the vise.

Then basically lightly clamped the table on the column and rotated it around by hand. Did this all with a whole bunch of plunge cuts to ensure all the load was in the axial direction so the drill Chuck wouldn’t come out.

Massively inaccurate, but hey it worked. And it ain’t wrong if it works.8684DEE2-CD51-4AA0-888F-B7A4FD386673.jpeg
1F7C3A9E-8370-479C-966C-21EF372645FA.jpeg610C52B3-1B42-4CBE-8DD5-309875BEFBF4.jpeg5D77B25E-35F9-4D31-A942-B5193B741E07.jpeg8C78FDCA-8AF3-44D1-B540-6CB0766AF1F4.jpeg6ABE54C1-0EA5-41CC-91BC-9160D47085FF.jpeg873910EE-FFD5-42AC-8787-95A52F766842.jpeg
 
Andy,
I think it is a credit to you for coming up with ways to make things work with what you have. You've done some impressive work figuring out how to rebuilding that mill.
 
Andy,
I think it is a credit to you for coming up with ways to make things work with what you have. You've done some impressive work figuring out how to rebuilding that mill.
Thanks man!

It’s definitely a challenge when you have to make do with what you have, and don’t have access to fancy luxury tools.
 
Here’s the method I cam up with to align both of the ways on the saddle, to ensure they are square with each other — to ensure the saddle is perpendicular with itself.

One of the challenges here is that the back ground face of the saddle isn’t exactly flat, but I’m trying to use this as a reference surface. It’s concave with about a 0.001 dip in the middle, but luckily it’s uniformly convex, so I can just indicate off the outer edges.

First I scraped the table dovetail as close to parallel with this surface. Basically I placed the test indicator on the bench and used the mill table as a master, and indicated on the saddle.

I verified this by placing the saddle on the surface plate, and using the dovetail alignment tool to check distance to the surface plate. This was within about 3 tenths over 15”.

Now the real challenge was how to check squareness of the knee way.

I first tried to clamp a square to the back reference surface, but this proved wildly inaccurate.

I then realize I could place the saddle on the surface plate, and use my square to indicate perpendicular to the back reference surface.

So I made another straight edge, and clamped it to the top of the saddle. The I can indicate on this plane. The straight edge must by definition be parallel to the knee guiding way, and perpendicular to the reference surface, which is parallel to the table guide way.

I also use the dovetail alignment tool to verify this measurement.

Yeah metrology in the HOME SHOP. BCF0A80C-C558-4DB0-A069-5A45A9DC2A5E.jpeg436F97D0-14F0-4B16-A197-262C8E9C1377.jpegB7D6E33D-C6AB-4156-88F1-290086461C58.jpegE75B545C-70F2-4CA7-8F14-6F2985070D5B.jpeg
DD8925DD-6908-4C42-A8B0-B8F61929AA23.jpeg5304910F-1061-4D23-8588-73FAB31C1458.jpeg044CFC5D-EB53-4132-B83A-DA2550536CB2.jpeg5FF4B5F9-F58E-4228-9797-D78A3BAB258B.jpeg
 
Last edited:
After scraping in the saddle dovetails, and the tapered gibs (which were a massive pain), I’m verifying the final alignment here by clamping the precision square to the table and sliding and locking the X and Y axis respectively.

Its SQUARE!

Verified that it’s within 0.0002 over 8”. Repeated the measure by rotating the square four times to ensure the measurements are correct and properly averages all errors.

653E2EEA-3AED-487E-9B85-B6C502F5F2FC.jpeg

634174BC-7EF7-4389-8E13-04308C9194C8.jpeg
 

Attachments

  • CCB41773-7F3D-43C5-9E7E-E2665448E1C1.jpeg
    CCB41773-7F3D-43C5-9E7E-E2665448E1C1.jpeg
    428.2 KB · Views: 5
  • 78AAA515-7B74-4AD9-B75C-229915EE7C33.jpeg
    78AAA515-7B74-4AD9-B75C-229915EE7C33.jpeg
    368.7 KB · Views: 5
Argh!!! The stupidity of this mill never ceases to amaze me.

Starting to put it back together, and realize it only had 1/2 of a one-shot oiler. There is no pressure feed to the bottom ways.

So I’m going to have to re-engineer this somehow.

 
Back
Top