

-
Welcome back Guest! Did you know you can mentor other members here at H-M? If not, please check out our Relaunch of Hobby Machinist Mentoring Program!
You are using an out of date browser. It may not display this or other websites correctly.
You should upgrade or use an alternative browser.
You should upgrade or use an alternative browser.
Hardening oven saga
- Thread starter Ferrous Turner
- Start date
- Joined
- Apr 4, 2018
- Messages
- 53
I'll try not to, but I'm not using the casting method for this build. I'll be using steel tubes with insulation instead.
- Joined
- Apr 4, 2018
- Messages
- 53
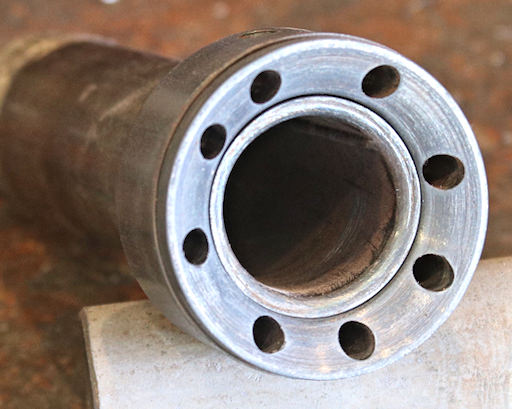
I put this ribbon burner together a little differently than most of the ones which are built for a forge. I used steel tubes to extend into the heating area which were 3/8" OD and 1/4" ID
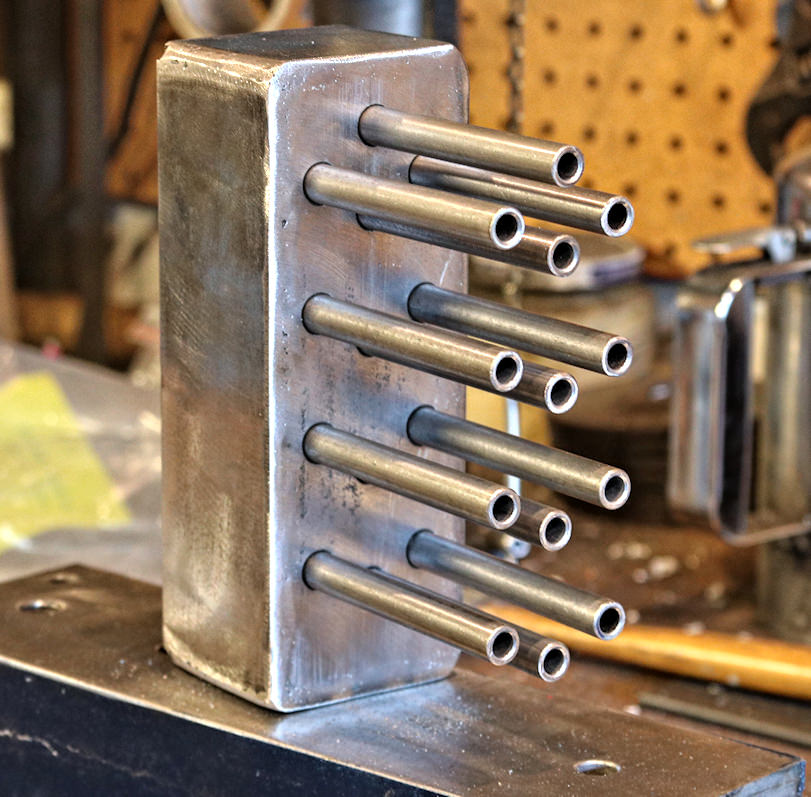
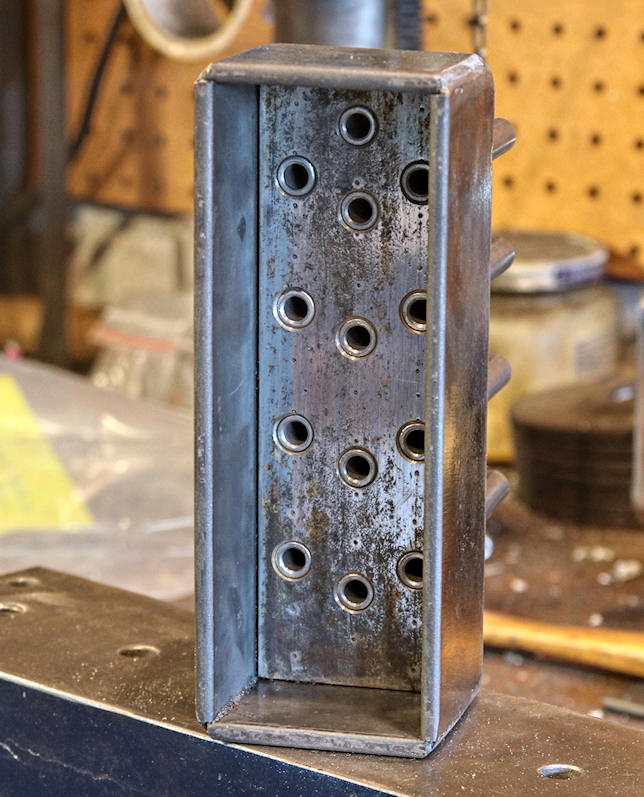
The plenum was built using a piece of 5/8" x 2" x 6.5" as a base. I sealed the tubes in using high temperature gasket adhesive. The enclosure was made from some 2" flat stock.
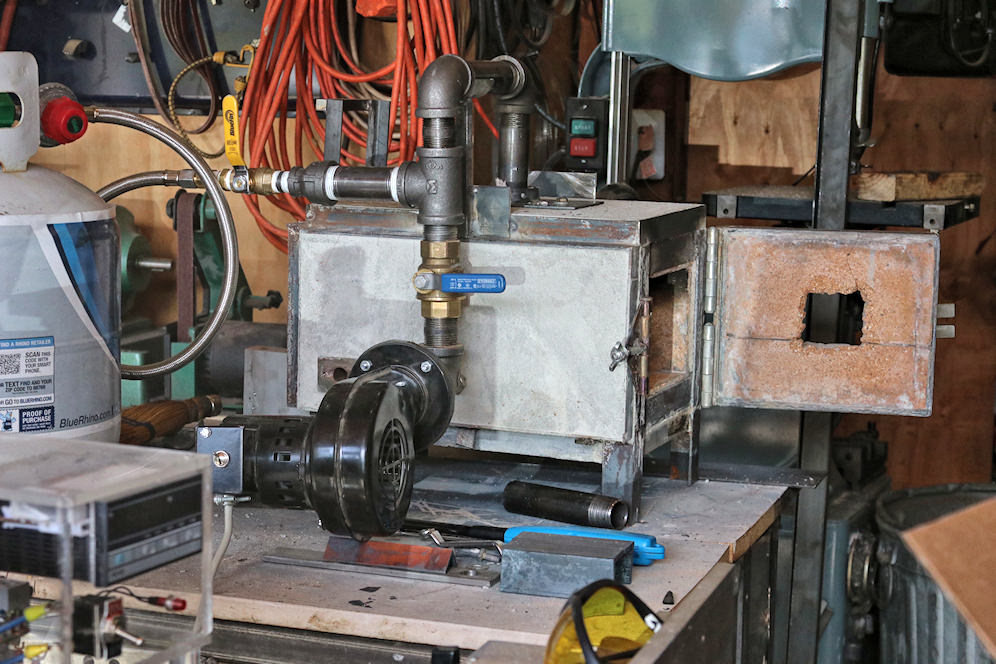
I switched the plumbing from 3/4" to 1" for more air. I wanted to go bigger, but 1" was the biggest size I could find locally. It works fine.
This was the configuration I wound up with:
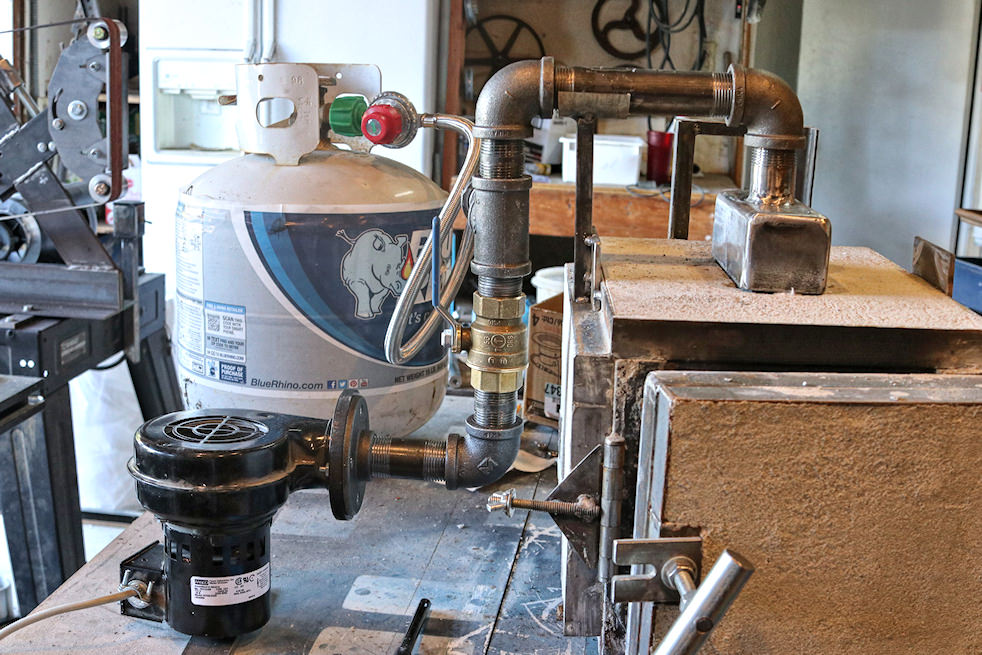
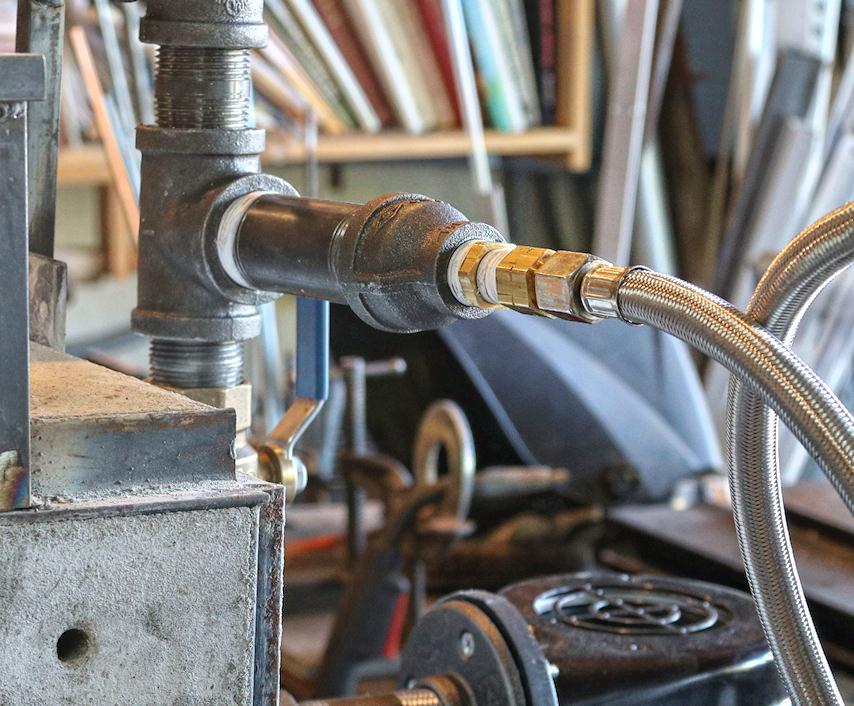
I got a new adjustable regulator which is really nice. It can completely turn the gas off so I didn't need a gas valve. I ran the gas straight from the regulator into the pipe.
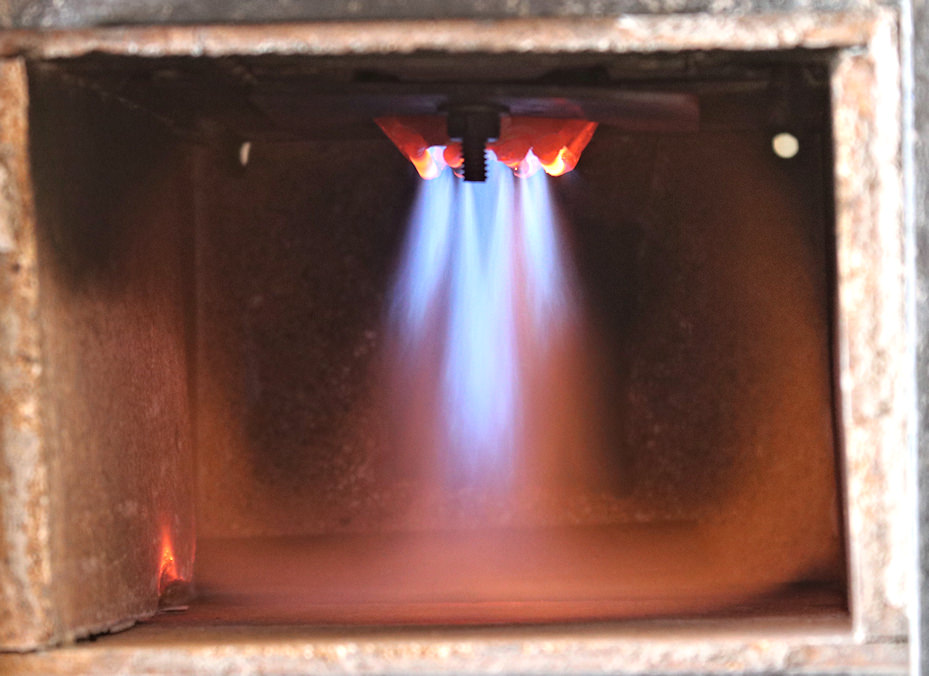
When I first fired it up it worked, but the flame was burning a couple of inches from the pipes. It would also go out, and I kept having to relight it. If I backed the air off the flame would get orange.
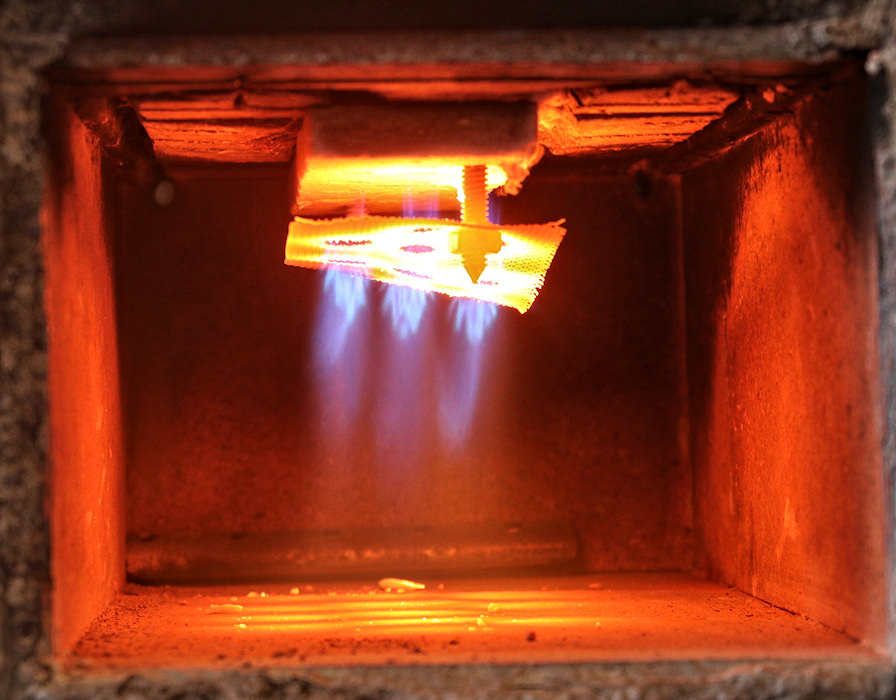
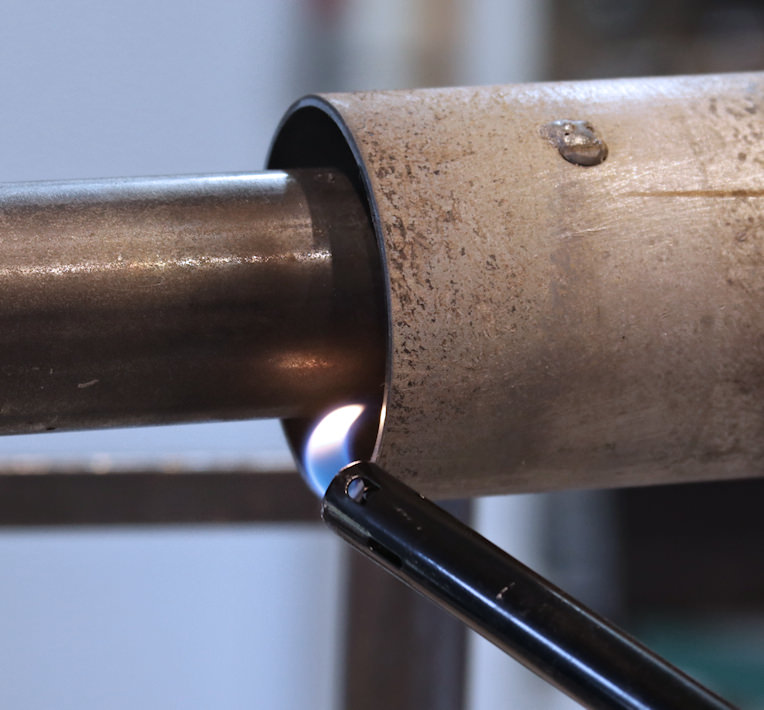
Nevertheless, I did notice the flame burning close to one of the tubes. A piece of insulation was hanging in front of the tube and the turbulence was keeping the flame close. So I tried sticking some stainless steel screen under the tubes and the flames jumped right up to it. I then took the whole burner assembly out and modified it for a screen.
It works a whole lot better now.
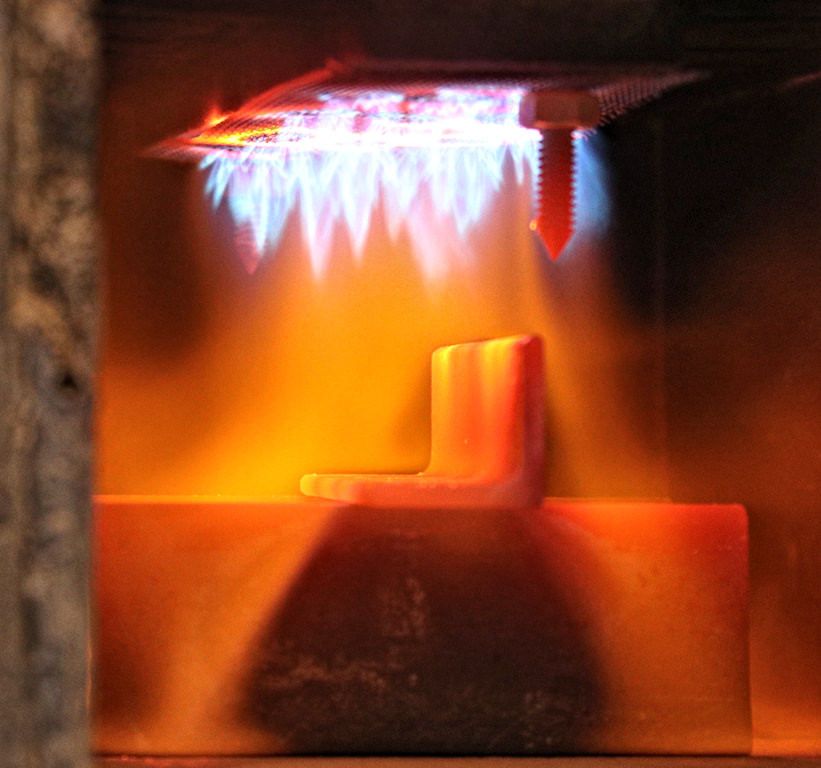
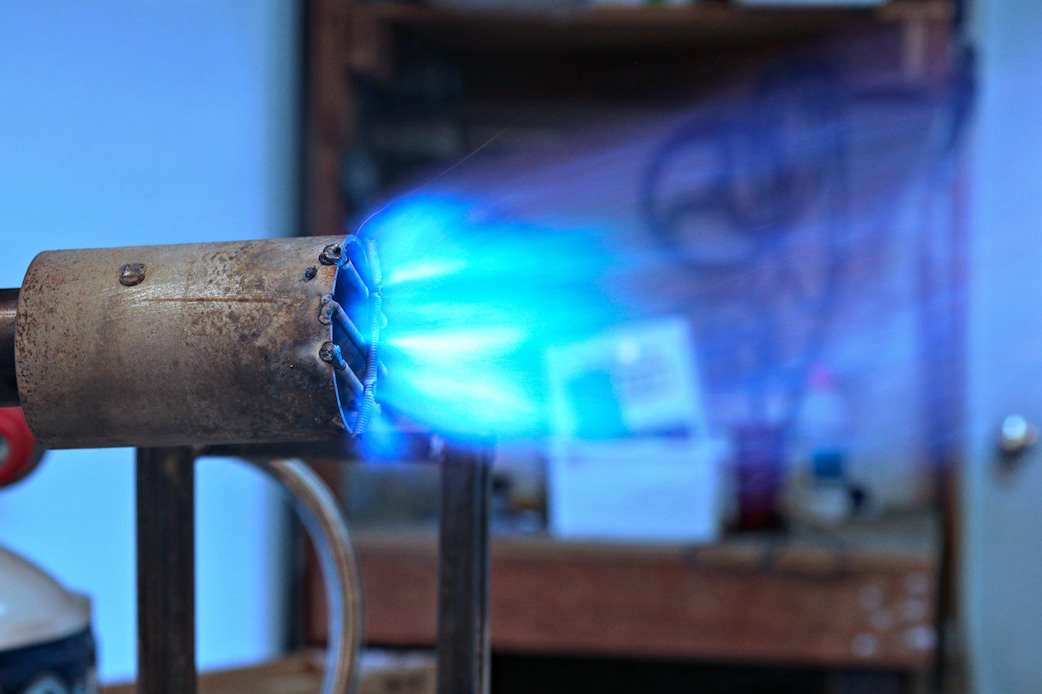
You can see how the flames are sticking up to the roof of the enclosure now. I have the gas barely cracked and the air on full open. It gets hot quick! That picture was taken after about 2 minutes of operation.
The screen is mounted on a couple of 1/4-20 threaded rods. I'll try moving the screen down a bit to see how that works.
All in All I think I have as much heat as I need for that little forge. It's a little more work, but I like this ribbon burner.
BTW, I jammed insulation all in between the tubes. I also put a 1/2" ceramic board at the end of the tubes so the plenum is nice and insulated.
Ted
The plenum was built using a piece of 5/8" x 2" x 6.5" as a base. I sealed the tubes in using high temperature gasket adhesive. The enclosure was made from some 2" flat stock.
I switched the plumbing from 3/4" to 1" for more air. I wanted to go bigger, but 1" was the biggest size I could find locally. It works fine.
This was the configuration I wound up with:
I got a new adjustable regulator which is really nice. It can completely turn the gas off so I didn't need a gas valve. I ran the gas straight from the regulator into the pipe.
When I first fired it up it worked, but the flame was burning a couple of inches from the pipes. It would also go out, and I kept having to relight it. If I backed the air off the flame would get orange.
Nevertheless, I did notice the flame burning close to one of the tubes. A piece of insulation was hanging in front of the tube and the turbulence was keeping the flame close. So I tried sticking some stainless steel screen under the tubes and the flames jumped right up to it. I then took the whole burner assembly out and modified it for a screen.
It works a whole lot better now.
You can see how the flames are sticking up to the roof of the enclosure now. I have the gas barely cracked and the air on full open. It gets hot quick! That picture was taken after about 2 minutes of operation.
The screen is mounted on a couple of 1/4-20 threaded rods. I'll try moving the screen down a bit to see how that works.
All in All I think I have as much heat as I need for that little forge. It's a little more work, but I like this ribbon burner.
BTW, I jammed insulation all in between the tubes. I also put a 1/2" ceramic board at the end of the tubes so the plenum is nice and insulated.
Ted
- Joined
- Apr 4, 2018
- Messages
- 53
I tried lowering the screen a bit, but I don't like it as much. The screen didn't like it much either.
I'm working on a new burner. It's a flare type and I put it together today.
Not my prettiest work, but I just want to see what happens.
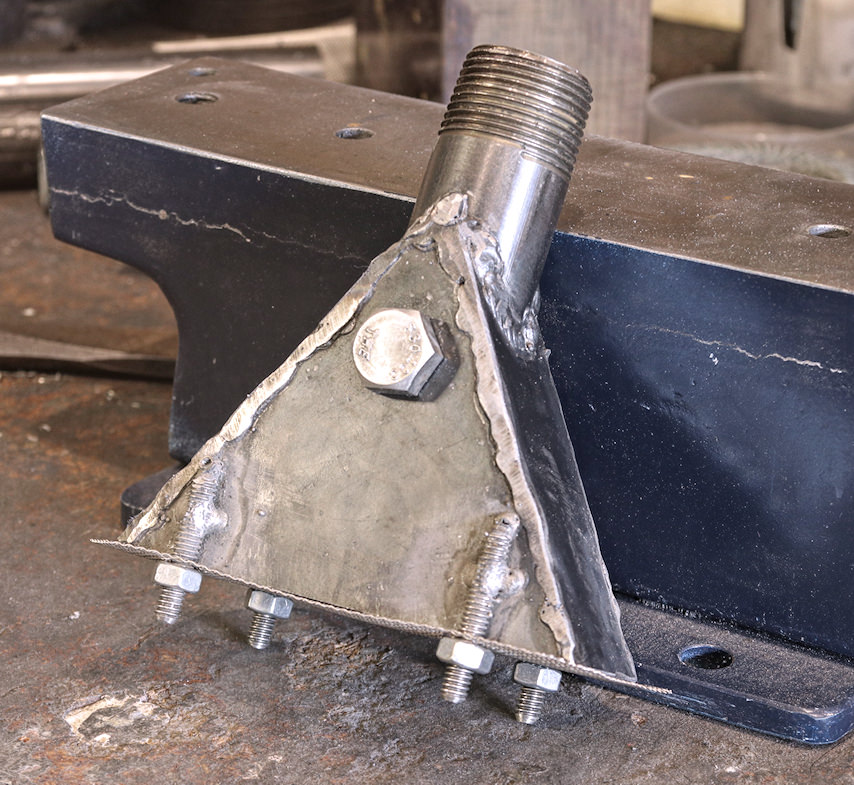
Cutting a strip of metal to fit a tube at an angle is trickier than I thought. You have to cut an ellipse, which took me a while to figure out how. I'm sure there's an easy way. but thankfully welding covers up a multitude of sins. The pipe is still a tad cockeyed.
I stuck the 1/2" bolt in there to deflect the airflow a bit right out of the pipe. Otherwise the flow would go straight down (may still anyway).
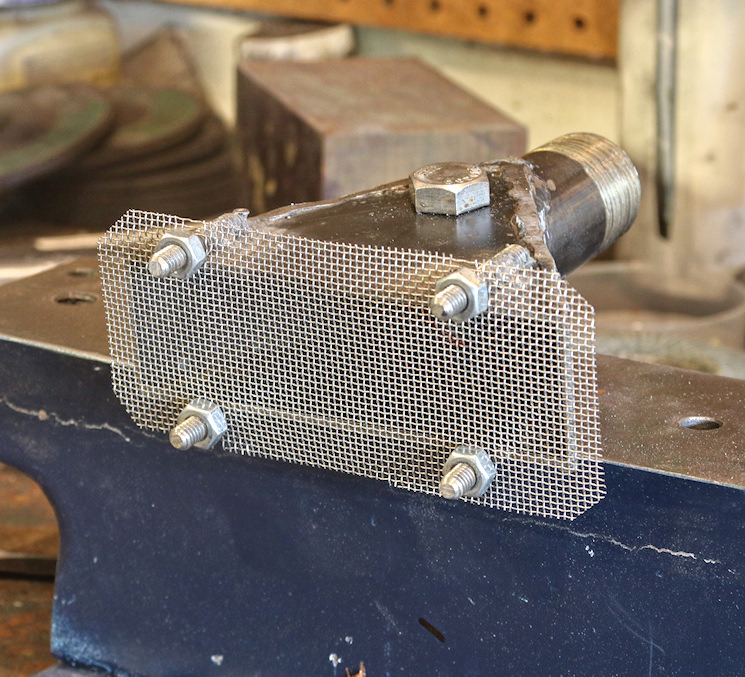
I bolted the screen on the bottom.
I need to install a valve in the gas line. The regulator is too touchy, and I keep having to tweek it for optimal burn. Getting a valve with compatible threads my be tricky. Way too many thread types in plumbing.
I hooked up my thermocouple to see how hot the forge was getting. It got up to just under 1000 degrees F, but this is down in the back corner in a covering pipe, and not in the flame. The forge itself is a heat hog too. Brick and mortar continue to be poor insulators.
I got a weird horn type sound when the oven went into resonance. I had to keep the door open to stop it. I should drill some small holes in the back and through the door for long stock and to break up the resonance. All kinds of surprises today.
Ted
I'm working on a new burner. It's a flare type and I put it together today.
Not my prettiest work, but I just want to see what happens.
Cutting a strip of metal to fit a tube at an angle is trickier than I thought. You have to cut an ellipse, which took me a while to figure out how. I'm sure there's an easy way. but thankfully welding covers up a multitude of sins. The pipe is still a tad cockeyed.
I stuck the 1/2" bolt in there to deflect the airflow a bit right out of the pipe. Otherwise the flow would go straight down (may still anyway).
I bolted the screen on the bottom.
I need to install a valve in the gas line. The regulator is too touchy, and I keep having to tweek it for optimal burn. Getting a valve with compatible threads my be tricky. Way too many thread types in plumbing.
I hooked up my thermocouple to see how hot the forge was getting. It got up to just under 1000 degrees F, but this is down in the back corner in a covering pipe, and not in the flame. The forge itself is a heat hog too. Brick and mortar continue to be poor insulators.
I got a weird horn type sound when the oven went into resonance. I had to keep the door open to stop it. I should drill some small holes in the back and through the door for long stock and to break up the resonance. All kinds of surprises today.
Ted
- Joined
- Apr 4, 2018
- Messages
- 53
The flare burner didn't work very well. Concept and reality were at odds. So, I started screwing around with a simpler design.
I kept thinking I needed more air. Since I have a fairly good flow at full volume, I figured a venturi design might do the trick.
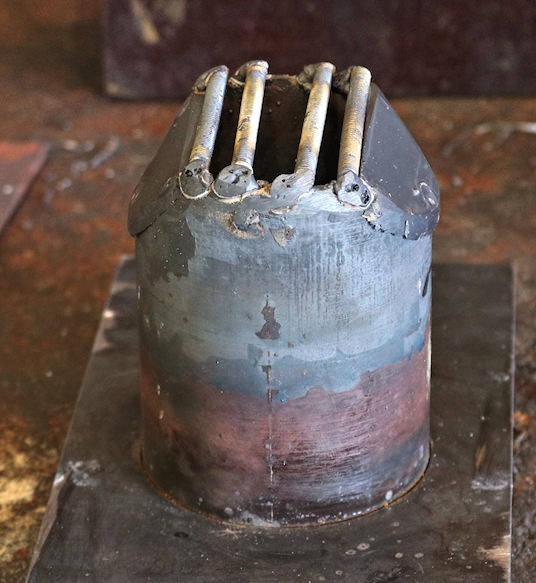
I stuck a piece of 3" electrical conduit around the end of a 1" pipe. I tried it like that, but the flame kept getting blown out when I opened the valve. I stuck some screen over the opening, but that was too restricting and stopped the venturi from working. I then tried a piece of small threaded rod across the opening and the flame stuck to it. I then welded 3 in a row and a forth across them. That allowed plenty of air to pass and kept the flame burning all the way to full open. I was also able to open the gas a lot more and still get a clean burn.
Here's the burner:
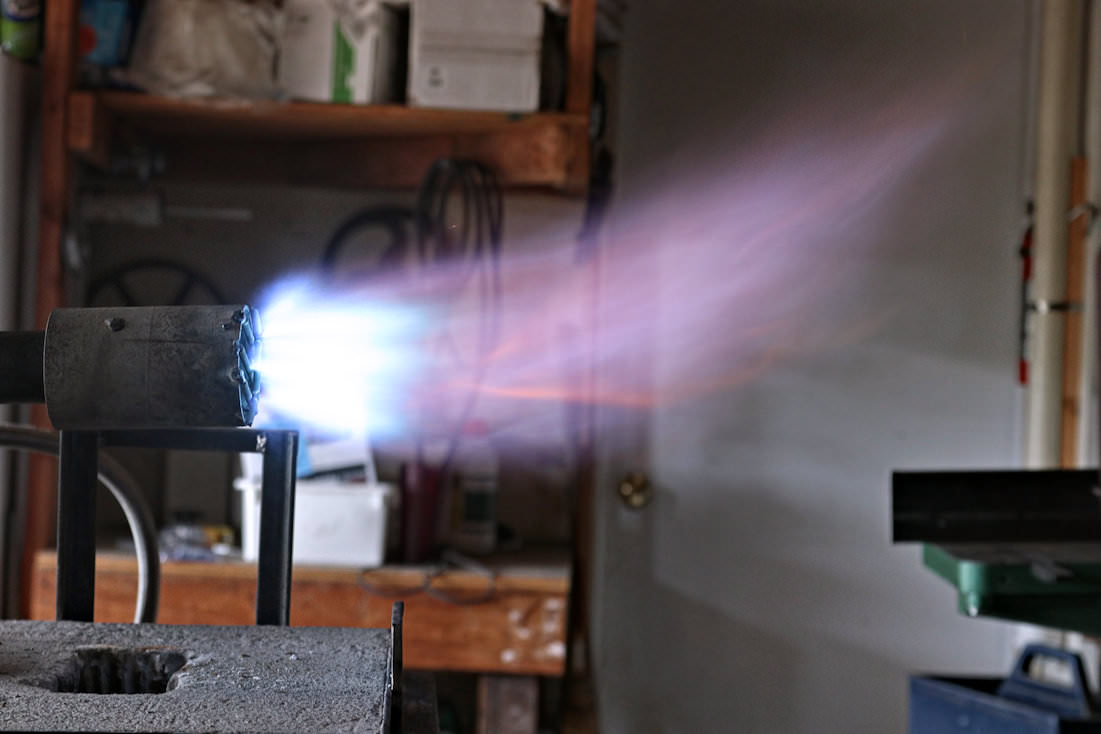
You can see that the venturi effect is working by the flame getting sucked in:
This one is going to be a lot hotter than anything I've built so far
Ted
I kept thinking I needed more air. Since I have a fairly good flow at full volume, I figured a venturi design might do the trick.
I stuck a piece of 3" electrical conduit around the end of a 1" pipe. I tried it like that, but the flame kept getting blown out when I opened the valve. I stuck some screen over the opening, but that was too restricting and stopped the venturi from working. I then tried a piece of small threaded rod across the opening and the flame stuck to it. I then welded 3 in a row and a forth across them. That allowed plenty of air to pass and kept the flame burning all the way to full open. I was also able to open the gas a lot more and still get a clean burn.
Here's the burner:
You can see that the venturi effect is working by the flame getting sucked in:
This one is going to be a lot hotter than anything I've built so far
Ted
- Joined
- Apr 4, 2018
- Messages
- 53
Interesting note, I built another nozzle using small round stock and it didn't work. The threads are needed to cause turbulence in order to slow the gas down enough to remain lit. With the smooth stock, the flame started at the mouth of the inner pipe and the rods turned bright orange. If I increased the flow of air the flame would blow out. With the threads, the flame starts at the threaded stock and they don't change color. They also allow me to run the blower wide open.
- Joined
- Apr 4, 2018
- Messages
- 53
I modified the nozzle to get a more focused flame. I noticed that while heating a long, thin piece of steel that most of the heat was spreading out to the sides. Since I'm going to do mostly thin stock I figured that a narrow flame was more optimal.
I cut the sides of the nozzle at an angle and welded some sheet metal in to shape the flow. I also added some threaded stock to keep the flame lit.
This is the inner nozzle I made. The venturi effect I enjoyed in free air didn't work very well in the forge. Too much back pressure evidently. Anyway, I still added some holes for a future forced air experiment.
Here is the configuration as it stands. Adding the gas valve helped a lot with controlling the flame. It's still a bit touchy but much more stable. The regulator works better with some back pressure, so the valve helped there too.
Here's the new flame. You can see it's a lot narrower than the original.