- Joined
- Nov 5, 2016
- Messages
- 1,419
I picked up a Harding Cataract lathe a few weeks ago. Nice machine at a great price. When I check it out before buying it I saw that the dials on the slides had 200 divisions so I thought "Good... it will be like some of my other machines; 200 thousandths per rev". But, I quickly found out that the cross slide was 1mm per rev and the longitudinal slide was 2mm per rev! This thing was setup for doing really fine work!
So, it didn't take long to know I was going to convert the metric screw/nut combos to inch ones. The two hundred division dials were perfect for 1/2" - 10 thread per inch acme screws/nuts.
Hardinge uses drill/tap fixtures to tap the nuts in place after the slides are fitted so measurements have to be carefully taken when attempting to make these without the use of said fixtures. The cross slide uses double 7/8" round plugs that are pressed in place before drilling/tapping. There is no way to make these two by single pointing in a lathe so the thread helixes will match up without tapping in place, but I figured for my limited use a single 1/2" - 10 acme threaded nut 7/8" long would last me forever. So, I pressed out the originals and used the slide as a fixture that I could line up on and drill/ream the replacement plug for use with a dowel pin to align in my lathe for single pointing.
The oringal:
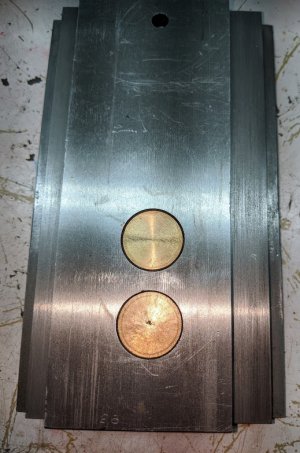
Lining up so I can spot, drill and ream the new plug for aligning using a dowel pin in my lathe.
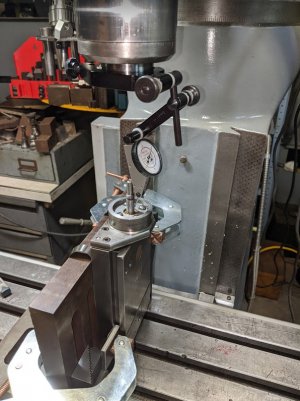
I removed the inner slide, removed the two nuts and clamped the new plug in place after reinserting the inner slide back into the outer slide. Clamped the slide in place by tightening the gib screws tight. Spotted the new plug with an end mill, spot drilled, drilled and reamed for a 3/8" dowel pin.
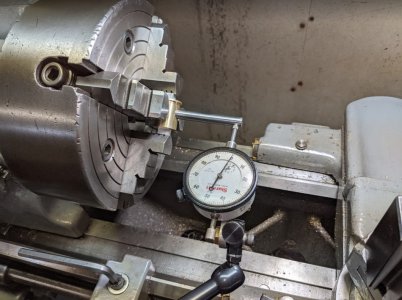
Aligning in the lathe for single pointing. The shoulder on the nut was only used so I could clamp it into the slide when I drilled/reamed it. It was removed prior to assembly in the slide.
After threading the plug and making a new screw I assembled the slide and used some 648 Loctite to hold the new nut in place rather than pressing it in, because I knew I'd never be able to get it properly aligned if I pressed it in. I also made a steel plug with just a clearance hole in it to plug the second hole to keep the crap out of things.
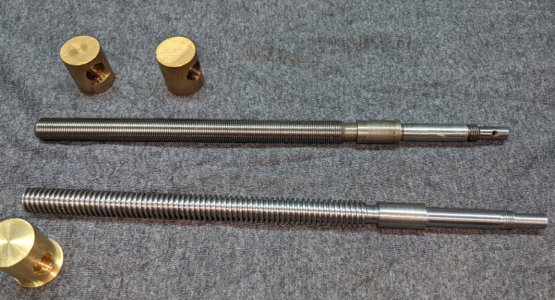
New and original nuts and screws:
Here's the finished slide.
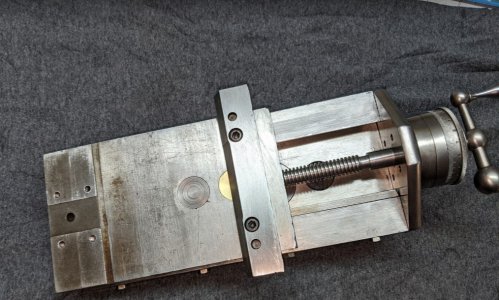
The longitudinal slide used a different method, but was still drill/tapped in place. It was a very long nut at 1-3/4" long. Nothing was symmetrical and/or square or used uniform dimensions. I had to carefully measure everything on my surface plate and using the DRO on my mill to make the drawing for the replacement. I measured everything on both sides of the nut off the center line of the screw. That way I knew everything would line up and come out right. I needed more travel than my test indicators and didn't have an adapter to mount my dial indicator on my surface gage (need to make an adapter!) so I just used my Noga base. It worked fine and allowed me to measure from surface to surface. The mounting holes were measured for location using the DRO on my Bridgeport from the screws and the critical edges.
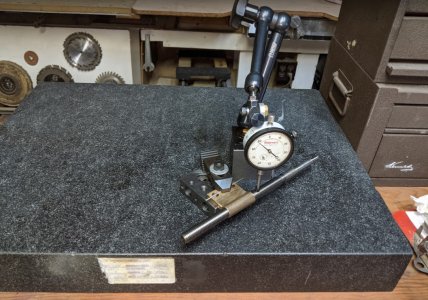
Machining the brass rectangular block (which I threaded first) was done in my Bridgeport with the new screw in place and everything was aligned (using accurate spacer blocks) and measured off from that while machining. Cut the radius by walking the piece around the screw, with the screw resting on top of my vise jaws, milling a series of flats around a layout of the required radius. Then, filed and hit it on the belt sander to finish. Could have used my shaper, in fact made a quick radius tool, but decided that the method I used was a lot quicker and the radius was just clearance anyways...
Finished replacement screw/nut along with the original.
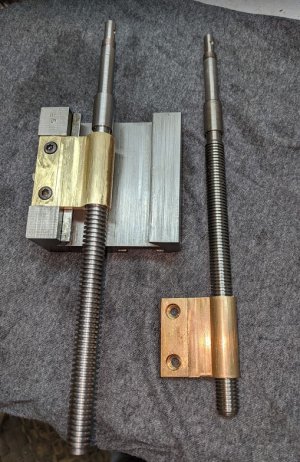
The screws from the two slides were identical to each other with the exception one was right hand and the other was left hand thread. I like to turn things like this between centers when possible. I don't have a follower rest so I just took light cuts and plenty of flex passes.
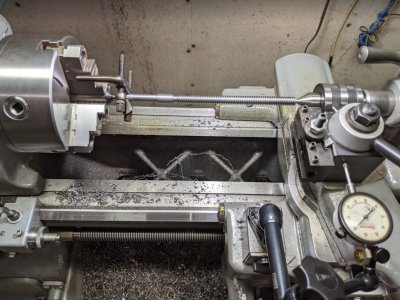
So now I have an imperial set of slides!
Ted
So, it didn't take long to know I was going to convert the metric screw/nut combos to inch ones. The two hundred division dials were perfect for 1/2" - 10 thread per inch acme screws/nuts.
Hardinge uses drill/tap fixtures to tap the nuts in place after the slides are fitted so measurements have to be carefully taken when attempting to make these without the use of said fixtures. The cross slide uses double 7/8" round plugs that are pressed in place before drilling/tapping. There is no way to make these two by single pointing in a lathe so the thread helixes will match up without tapping in place, but I figured for my limited use a single 1/2" - 10 acme threaded nut 7/8" long would last me forever. So, I pressed out the originals and used the slide as a fixture that I could line up on and drill/ream the replacement plug for use with a dowel pin to align in my lathe for single pointing.
The oringal:

Lining up so I can spot, drill and ream the new plug for aligning using a dowel pin in my lathe.

I removed the inner slide, removed the two nuts and clamped the new plug in place after reinserting the inner slide back into the outer slide. Clamped the slide in place by tightening the gib screws tight. Spotted the new plug with an end mill, spot drilled, drilled and reamed for a 3/8" dowel pin.
Aligning in the lathe for single pointing. The shoulder on the nut was only used so I could clamp it into the slide when I drilled/reamed it. It was removed prior to assembly in the slide.

After threading the plug and making a new screw I assembled the slide and used some 648 Loctite to hold the new nut in place rather than pressing it in, because I knew I'd never be able to get it properly aligned if I pressed it in. I also made a steel plug with just a clearance hole in it to plug the second hole to keep the crap out of things.
New and original nuts and screws:

Here's the finished slide.

The longitudinal slide used a different method, but was still drill/tapped in place. It was a very long nut at 1-3/4" long. Nothing was symmetrical and/or square or used uniform dimensions. I had to carefully measure everything on my surface plate and using the DRO on my mill to make the drawing for the replacement. I measured everything on both sides of the nut off the center line of the screw. That way I knew everything would line up and come out right. I needed more travel than my test indicators and didn't have an adapter to mount my dial indicator on my surface gage (need to make an adapter!) so I just used my Noga base. It worked fine and allowed me to measure from surface to surface. The mounting holes were measured for location using the DRO on my Bridgeport from the screws and the critical edges.

Machining the brass rectangular block (which I threaded first) was done in my Bridgeport with the new screw in place and everything was aligned (using accurate spacer blocks) and measured off from that while machining. Cut the radius by walking the piece around the screw, with the screw resting on top of my vise jaws, milling a series of flats around a layout of the required radius. Then, filed and hit it on the belt sander to finish. Could have used my shaper, in fact made a quick radius tool, but decided that the method I used was a lot quicker and the radius was just clearance anyways...
Finished replacement screw/nut along with the original.

The screws from the two slides were identical to each other with the exception one was right hand and the other was left hand thread. I like to turn things like this between centers when possible. I don't have a follower rest so I just took light cuts and plenty of flex passes.

So now I have an imperial set of slides!
Ted

