- Joined
- Dec 22, 2015
- Messages
- 561
I use a Drill Doctor for my smaller drill bits and find it works OK for most bits but not some of my numbered bits and it is limited to 1/2" max. I tried sharpening the larger bits by hand but I cannot get consistent results. So I decided to make HH's sharpening jig.
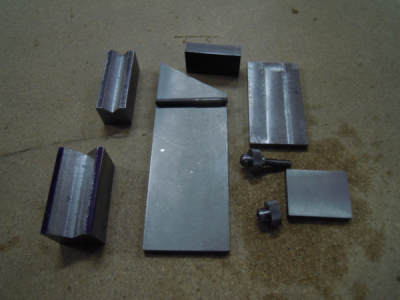
Here are all the pieces cut to size. This takes me a lot of time since I don't have any stock that is the right size to start with and it all has to be cut from larger thicker stock then sized. Note the 2 V blocks. The smaller one is from Harold's drawings and I made the larger one thinking I could use it for the bigger drill bits.
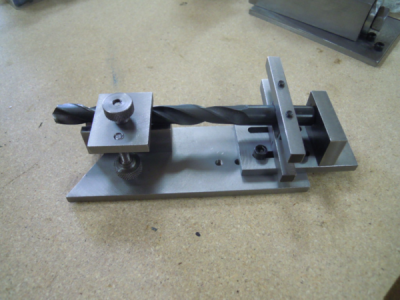
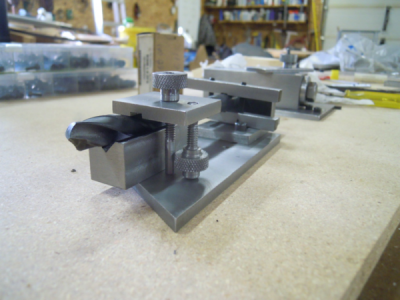
Here it is all finished and set up to sharpen a 1/2" bit for its first trial.
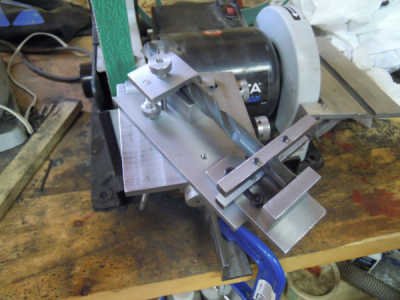
I used my recently completed Harold Hall simple grinding rest to do this work and found the fine adjustment for moving the table closer to the grinding wheel (belt sander in this case) to be absolutely essential. The only downside to the simple rest is that when changing the table angle from the secondary angle to the primary angle it is difficult to keep the table registered in the same orientation to the grinder in the Y direction (both horizontally and vertically). I don't think it really mattered though because adjusting it by eye seemed to work. I love this jig and the rest but I'm sure the advanced rest would make this task a little easier. I'm about 75% through making the advanced rest but got sidetracked with other things.
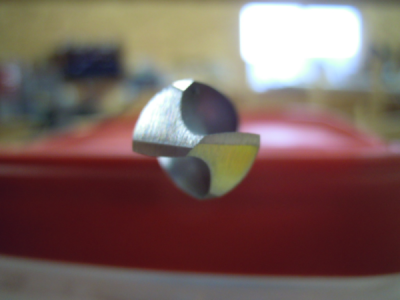
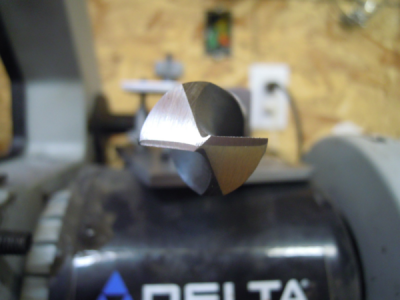
The picture doesn't do it justice but this jig does an awesome job. When grinding the primary facets I kept checking to see if the edges met in the middle and I swear the did but the pic clearly shows they don't. Looks like these old eyes are not what they used to be.
I found the larger V block was not long enough to support the larger drill bits properly.
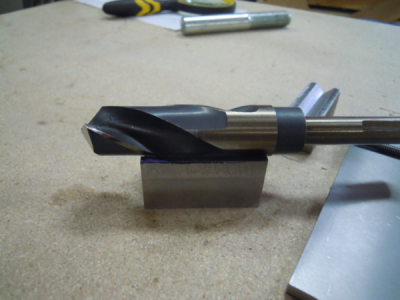
So I came up with plan B. All of my larger bits are Silver and Deming with 1/2" shanks so I decided to use my homemade R8 collet block with a 1/2" collet. I use the same setup for sharpening the ends of my end mills and that works great.
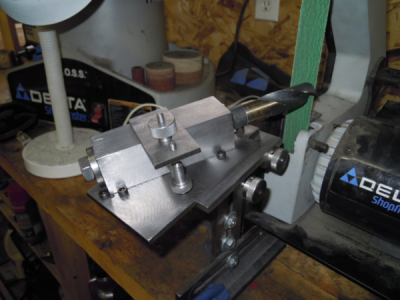
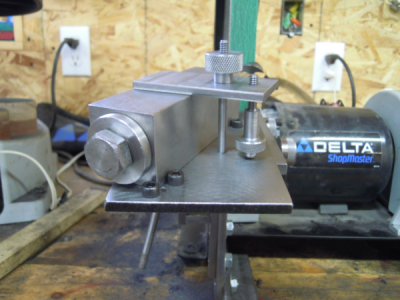
Here's a pic of a 3/4" bit not quite finished. As you can see the left side is not the same width as the right side. This is the drawback to using a 1" belt sander with a platen that is not solid. It takes a lot of passes with the fine belt to take material off. I need to stiffen the platen until I can make a better sander. Maybe a 72" one. Better add that to the list of projects that need to be done, lol. Now I know why Mikey says a solid platen is essential.
It's kind of funny .... when I first made the jig for the larger bits I planned on using it in a downward slope but when I placed it on the grinding rest the end of the bit was too low. But if I simply adjusted the table to an upward slope I would be grinding the facets with a backwards slope. So I had to reverse the approach angle to the belt, from 67.5* right facing, to 67.5* left facing. I thought I was going to have to make a new base plate but as dumb luck would have it ........ I mean great planning, I just had to flip the plate over and put the indexing screws in from the back side.
Here are all the pieces cut to size. This takes me a lot of time since I don't have any stock that is the right size to start with and it all has to be cut from larger thicker stock then sized. Note the 2 V blocks. The smaller one is from Harold's drawings and I made the larger one thinking I could use it for the bigger drill bits.

Here it is all finished and set up to sharpen a 1/2" bit for its first trial.


I used my recently completed Harold Hall simple grinding rest to do this work and found the fine adjustment for moving the table closer to the grinding wheel (belt sander in this case) to be absolutely essential. The only downside to the simple rest is that when changing the table angle from the secondary angle to the primary angle it is difficult to keep the table registered in the same orientation to the grinder in the Y direction (both horizontally and vertically). I don't think it really mattered though because adjusting it by eye seemed to work. I love this jig and the rest but I'm sure the advanced rest would make this task a little easier. I'm about 75% through making the advanced rest but got sidetracked with other things.

The picture doesn't do it justice but this jig does an awesome job. When grinding the primary facets I kept checking to see if the edges met in the middle and I swear the did but the pic clearly shows they don't. Looks like these old eyes are not what they used to be.

I found the larger V block was not long enough to support the larger drill bits properly.

So I came up with plan B. All of my larger bits are Silver and Deming with 1/2" shanks so I decided to use my homemade R8 collet block with a 1/2" collet. I use the same setup for sharpening the ends of my end mills and that works great.


Here's a pic of a 3/4" bit not quite finished. As you can see the left side is not the same width as the right side. This is the drawback to using a 1" belt sander with a platen that is not solid. It takes a lot of passes with the fine belt to take material off. I need to stiffen the platen until I can make a better sander. Maybe a 72" one. Better add that to the list of projects that need to be done, lol. Now I know why Mikey says a solid platen is essential.

It's kind of funny .... when I first made the jig for the larger bits I planned on using it in a downward slope but when I placed it on the grinding rest the end of the bit was too low. But if I simply adjusted the table to an upward slope I would be grinding the facets with a backwards slope. So I had to reverse the approach angle to the belt, from 67.5* right facing, to 67.5* left facing. I thought I was going to have to make a new base plate but as dumb luck would have it ........ I mean great planning,
 I just had to flip the plate over and put the indexing screws in from the back side.
