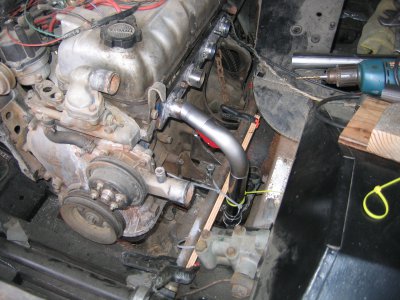
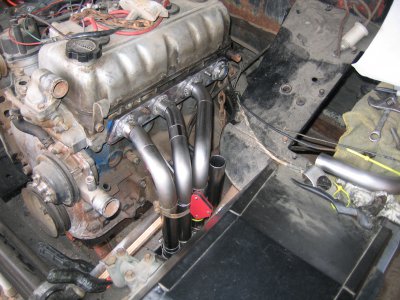
Headers for my MG Midget

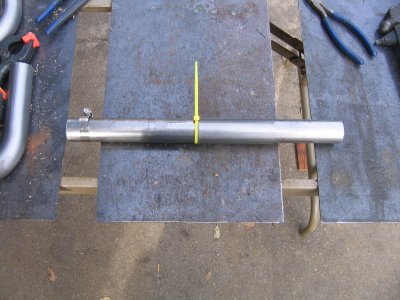
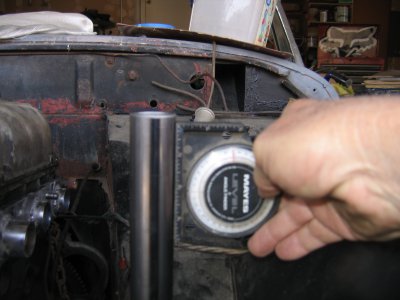
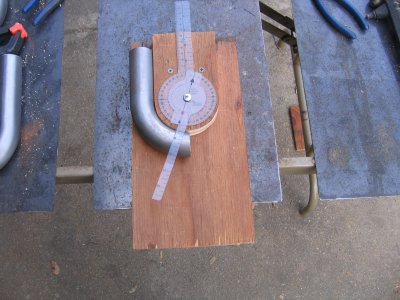
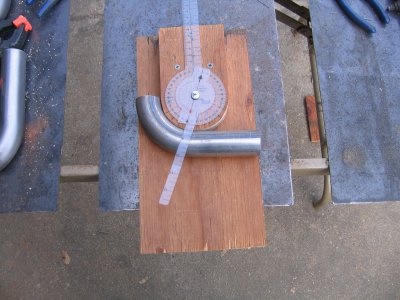
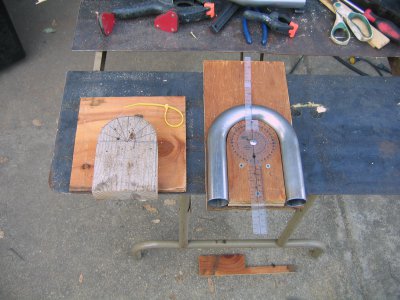
I was back at this morning. Here are the finished fixtures for marking the tubes for cutting. I can use the protractor on either fixture to mark the tube and I use the wire tie to mark all the way around the tube.
IMG_3974.JPG

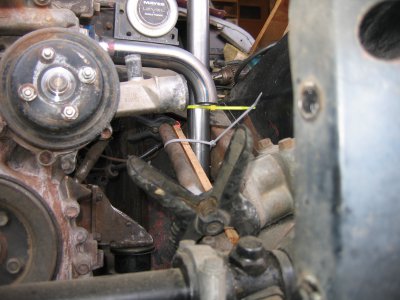
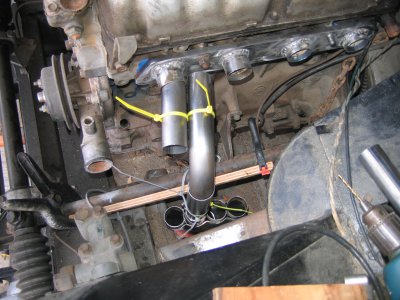
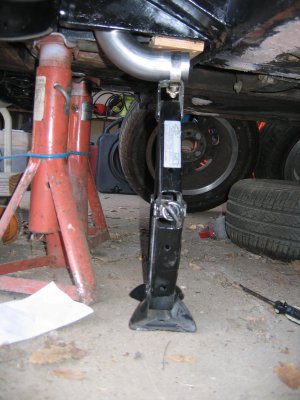
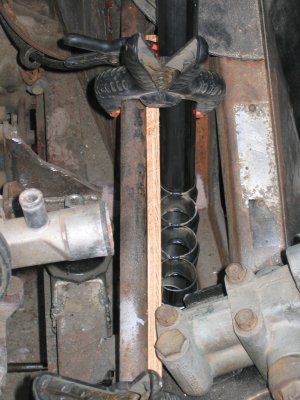
I shortened the 1 7/8 exhaust tube so it will clear the frame rails to remove the header. I have the collector exhaust outlet tube held in place with a jack. This allowed me to get the collector positioned so the tubes will clear the steering shaft.
IMG_3971.JPG IMG_3972.JPG

Next up was to insert the slip joint tubes into the exhaust flange. Videos on you tube said to flatten and pound the slip joint tubes into the flange. No matter what I tried no way that was going to happen. Even the smaller primary tube couldn't be made to fit into the rectangular opening. I'll give it one more try before I mill the rectangular openings into circles that fit the 1 3/8 primary tubes.

The saga continues.
 
Made some progress this afternoon. Got a bigger hammer and went for it. No holds barred. Got a piece of 1 3/8 tube to fit into the exhaust flange. The piece was now a rough rectangle. Tried to use some sockets to form the outer portion back into a circle with limited success. Found a round bar in the scrap bin that happened to be a tight to the ID of the 1 3/8 tube. The big hammer and round bar made short work of it and the slip joint tube fit also. I am back in business making the headers. Will have at least some of it tacked together tomorrow.

Used the band saw to cut some more tubing. I am getting the hang of just how much pressure I need to apply to get a good cut.

Also spent some time figuring out my set to up measure tubing to the right length. Looks like it is going to work.

Sorry no pictures this afternoon. I will take some tomorrow to show how I am doing stuff.
 
When you posted the picture of the header collector yesterday, I gave it a good look. My thoughts were, "He's gonna have a lot of fitting to do..."
It was formed with a press, probably with some sort of brake, and possibly a die made of pipe. Effective, but crude compared to the hydroforming we see today. I'm glad you got the collector all mandreled out. Happy welding!
 
The place I bought the collector from has a video on how to finish it off. I will tack the slip joint piece into the collector tomorrow. I won't final weld anything until I have everything cut and fitted. Then I will do the final welding on each tube and the collector. Then I will weld the tubes to the collector and the exhaust flange. Might have it done by Friday.
 
All I got done today was welding the tubes into the flange. I got one section too hot the the flange warped a little. Everybody has a BFH. Well I also have two BFPB's (Big !!!!!!! Pry Bar) One 4 footer and one 8 footer. Using the 4 footer I was able straighten out the flange.

Nothing I had was the right shape to get the tubes to fit in the round corners of the flange. So I ground the end of a short piece of 3/4" round bar to the right shape. My band saw doesn't have a fence and I needed one to cut some of the tubing. So I cut some angle iron to make a fence that I could clamp to the table. Seems like there is always something that you need to make to do something.
 
I had a Midget in high school, unfortunately it had many electrical gremlins that I wasn't capable of fixing at the time. I know where a couple are around here if you need more parts; also, car-part.com is a parts search for member salvage yards all over North America, since you're putting in some upgraded parts from other makes. They generally don't list everything down to the third wiper, but usually I search for something generic like "wheels" or "door glass" just to find yards that have the model I'm looking for, then call to see if they have the part I want.
 
My girlfriend in high school had a 1950's AH 100-4. I got so tired of chasing electrical gremlins that over spring break one year I rewired the whole car. Took the complete wiring harness out and laid it on the garage floor. Then duplicated it and put the new harness back in. End of wiring problems.

When I bought my midget I also bought a AH sprite parts car that had a rusted out body from the same seller. Striped everything that was usable off of the sprite and hauled the remaining hulk off to a scrap yard. For the Toyota engine and transmission I bought a running car from a scrapper and stripped everything off of it that I thought I might need. The scrapper delivered it to my house and then came back and hauled away the remaining hulk when I was done with it. That was a pretty good deal for me.
 
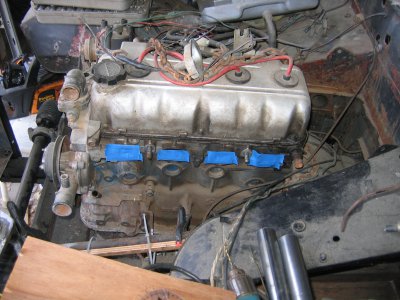
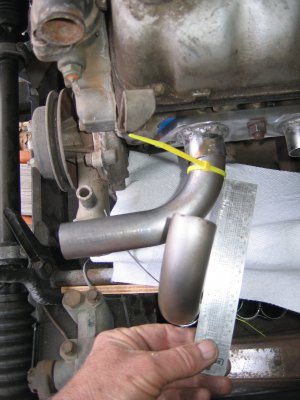
Back at it again this morning. Taped over the exhaust ports to keep anything out and attached the exhaust flange to the head. Doing the #1 cylinder first. Put a hose clamp 3/4" up from the bottom end of the tube. Because the top of the slip joint tubes in the collector are level I put the tube in the adjacent #2 slip joint tube and set the tube straight up side to side and front to back. Doing this allowed me to run the #1 tube straight out from the exhaust flange so I could mark the length of the collector tube. I put a wire tie on the collector tube and set the exhaust flange tube in place using a level to match the tilt of the engine. Slid the wire tie up to the bottom of the exhaust flange tube. The wire tie is a tight fit and doesn't move unless you give it a good shove. Took everything apart, marked the tube and cut it on the band saw. Hose clamp back on the tube and set the tube in the #1 slip joint tube. Used some extra slip joint tube to hold a 90 degree bend to the collector tube. Placed a white paper towel under the tubing. I put another 90 degree bend in the exhaust flange. Then held a ruler up against the elbow in the collector and moved the ruler until the end was tangent to the elbow from the exhaust flange. The white background gives a really good visual to see when the the end of the ruler is tangent to the elbow. Slid a tight fitting wire tie up to the end of the ruler and made a mark on the elbow. Put the elbow in the fixture that I had made and lined up the arm on the protractor with the mark on the elbow. Without moving the protractor arm flipped the elbow 90 degrees and marked the elbow for the cut line. Back to the band saw to cut the elbow. Next up was to mark the two elbows where they would join together. The collector tube went back into the #2 position. This allowed the two elbows to be beside each other. Eye balled the middle and placed wire ties to mark the cut lines. Two more cuts at the band saw. Put everything back into place. To my surprise the tubes all met up with no gaps.

IMG_3976.JPG IMG_3980.JPG IMG_3977.JPG

IMG_3979.JPG IMG_3982.JPG IMG_3983.JPG

IMG_3984.JPG IMG_3985.JPG IMG_3986.JPG
 
This afternoon I got the number 2 cylinder tubes cut and fitted and got part way through with the number 3 & 4 cylinder tubes before I called it a day. Supposed to rain tonight at my house. Needed to get everything off of the driveway and back into the garage.
 
I am so glad that I have everything in my shop on wheels. Moved stuff around this morning and was able to set up my welding table just inside the garage door and out of the rain. Was putting the off cuts on the table and one of the bend pieces looked like it might be close to what I needed to fit the #3 cylinder exhaust flange tube. Turned out to be a perfect fit. No cutting necessary. The #4 cylinder exhaust flange tube is going to require some serious fitting to fit over the footwell. I am going to tack together #1, 2,& 3 before starting on #4.

IMG_3987.JPG
 
Back
Top