- Joined
- May 27, 2016
- Messages
- 3,469
Now that I have the freebie granite block, it is time to get some of the rest of the kit going.
I have no experience of using this stuff properly, although the principle seems obvious.
The two height gauges were acquired off an eBay auction for around £26, used, no claim to being OK, and without any correct carbide scriber parts, although it did come with two long arm carbide scribers, and an assortment of clamps, and bits.
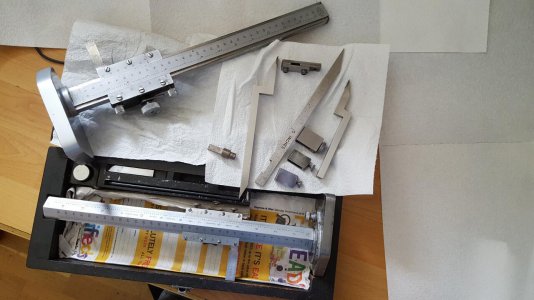
The Chesterman is in it's black box, and the Shardlow, sans a box of it's own, is just placed across the lid. Both have a heavy, solid smooth "feel" of quality, but had been somewhat neglected. The Shardlow has little lever by the fine adjuster knob which engages or not, the worm drive and rack pinion for fine adjustment, and a larger knob at the back to quickly drive it up and down the rack gear.
The Shardlow
It was somehow broken, jammed up solid. The strip-down revealed that someone a bit heavy-handed had forcibly turned the knob, possibly when it was at limit, of maybe against the lock screws, to the extent of shearing off the two 1/16" pins through the shaft that engage the keyway of the large gear.
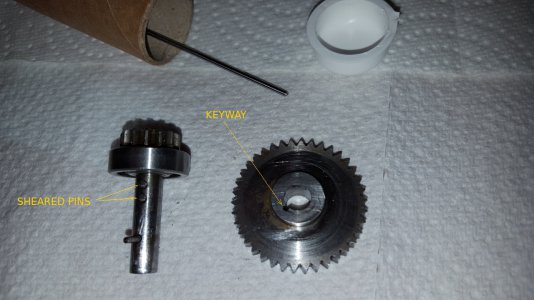
The rod in the picture with it is some replacement 1/16" silver steel rod I used to push out the old pins, and make replacements. They needed some careful final rubbing to make them fit exactly in the 0.05" high keyway, but they slid on with a firm push from the fingers.
Gear function restored!
While it was apart, I cleaned it up, removed the corrosion and flaking paint , and gave it the new cream paint job on the face under the rack gear, and under the base.
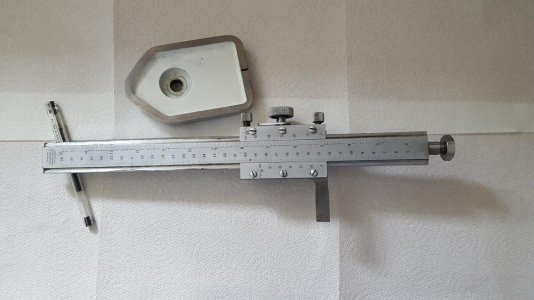
.. and here is the rear side, showing the rack gear.
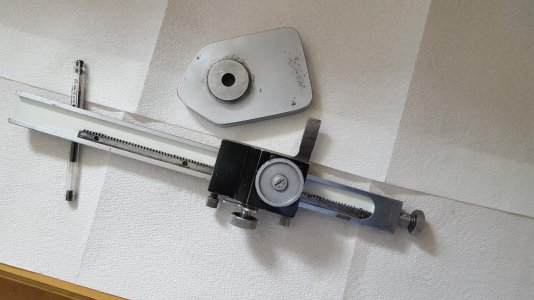
The measure arm of the Shardlow is exactly 0.5" top to bottom, and is 1/4" thick. The top face ends up equal to the scale indications, which start at 50mm, or with a tiny shift, at 2" on the other vernier scale.
The scribers
There is a 0.35" tool steel scriber part (seen in the box to the right of the 1.5" calibration cylinder gauge) which would indicate direct if mounted on the top. I guess to use it for anything smaller than 2", you either put a gauge block on top, use a smaller height gauge, or do arithmetic on the step height of whatever scriber can be persuaded on.
The arm is 1/4" wide, the two carbide scribers are 9mm wide, and the fat clamp is 9.2mm wide, so the clamp fits.
The step heights of the heights of the two carbide scribers don't seem to relate to anything sensible. One is 30.33mm (1.194" casually measured), and the other is 23.55mm (0.927"). I have no idea how to use these.
Other bits in the box.
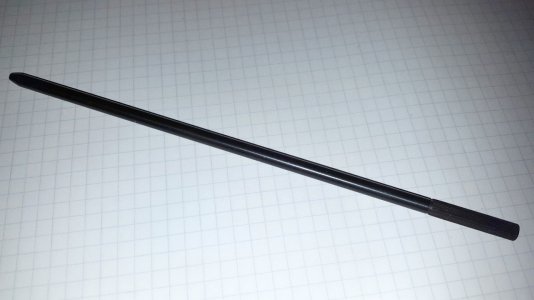
The 1.5" x 7/8" gauge block measures exactly 1.5" to better than the last tenth as checked with electronic micrometer, which itself had been checked with an inspection gauge block. There is a 7" long black rod with a knurled end seen in the box that I have no idea what is it for, nor how it is used.
The last part, round one end 9.46mm on one end, and 8.9 x 4.6mm flat on the other, I don't know what it does, nor if it belongs there at all! Possibly something to do with mounting a dial indicator - I don't know.
The Chesterman
This one was in working order, although it did benefit from a clean-up. The minimum height to the top of the bar is 1.5".
That bar is also 0.5" wide, but thinner, at 3/16" thick.
I reasoned I could use a eBay scriber 25mm step height, mounted against the underside of the bar.
Mixing units madly, 25mm + 0.5" = 25 + 12.7 = 37.7mm
Compared to the height of the start of the numbers (1.5" = 38.1mm), we are only 0.4mm to go. Either I could shift the verniers, or sacrifice some of my feeler gauge shim to pack it the 0.4mm.
So - I purchase this 25mm high scriber..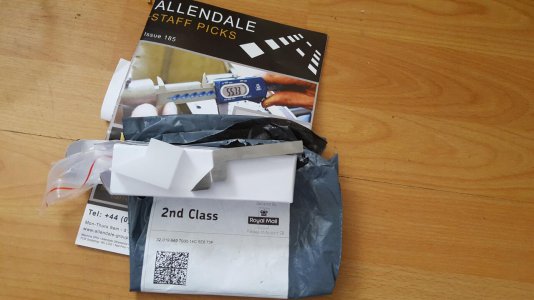
Then I started to try things out, just borrowing a 6" x 1" optical flat (one side scratched up) as a temporary surface plate.
The funny little piece of tool steel sticking out is just used as packing for the oversized clamp, because 6mm wide is more than the clamps for 3/16" would fit.
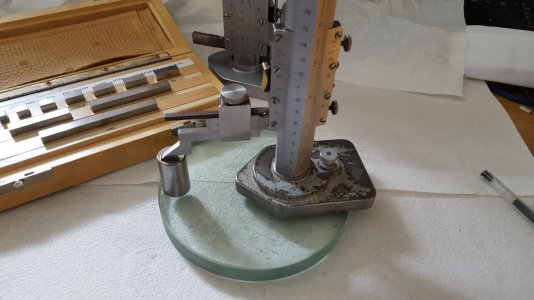
I will get the hang of this in the end, but I found that setting the scriber down onto any surface by simply squeezing in on the brass bits that release from the gear rack does not work. As I let go, it finds a place too low. The only way is to creep up on it using the fine adjust, and that is not easy to tell when one has squeezed too firm. I slide the block out, and "click", I can't slide it in again.
So - I resorted to the resistance continuity bleeper on my multi-meter, with the black clip just slightly touching the gauge block.
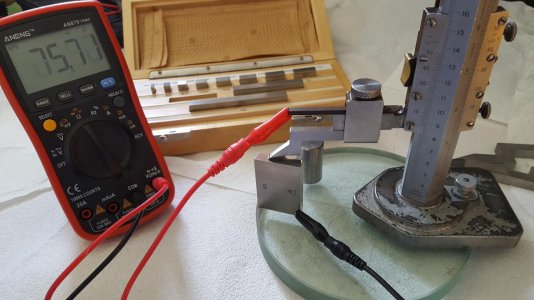
I know I am new at this, so try not to laugh! I don't know what the norms are for these things, but they seem easily able to measure to better than 0.001. I can see the usefulness of electronic types with cal zero buttons, but I have in mind that this lot cost me £26 + £12.50 + £2.50 + the time I spent repairing and fooling with it.
I have no experience of using this stuff properly, although the principle seems obvious.
The two height gauges were acquired off an eBay auction for around £26, used, no claim to being OK, and without any correct carbide scriber parts, although it did come with two long arm carbide scribers, and an assortment of clamps, and bits.

The Chesterman is in it's black box, and the Shardlow, sans a box of it's own, is just placed across the lid. Both have a heavy, solid smooth "feel" of quality, but had been somewhat neglected. The Shardlow has little lever by the fine adjuster knob which engages or not, the worm drive and rack pinion for fine adjustment, and a larger knob at the back to quickly drive it up and down the rack gear.
The Shardlow
It was somehow broken, jammed up solid. The strip-down revealed that someone a bit heavy-handed had forcibly turned the knob, possibly when it was at limit, of maybe against the lock screws, to the extent of shearing off the two 1/16" pins through the shaft that engage the keyway of the large gear.

The rod in the picture with it is some replacement 1/16" silver steel rod I used to push out the old pins, and make replacements. They needed some careful final rubbing to make them fit exactly in the 0.05" high keyway, but they slid on with a firm push from the fingers.
Gear function restored!
While it was apart, I cleaned it up, removed the corrosion and flaking paint , and gave it the new cream paint job on the face under the rack gear, and under the base.

.. and here is the rear side, showing the rack gear.

The measure arm of the Shardlow is exactly 0.5" top to bottom, and is 1/4" thick. The top face ends up equal to the scale indications, which start at 50mm, or with a tiny shift, at 2" on the other vernier scale.
The scribers
There is a 0.35" tool steel scriber part (seen in the box to the right of the 1.5" calibration cylinder gauge) which would indicate direct if mounted on the top. I guess to use it for anything smaller than 2", you either put a gauge block on top, use a smaller height gauge, or do arithmetic on the step height of whatever scriber can be persuaded on.
The arm is 1/4" wide, the two carbide scribers are 9mm wide, and the fat clamp is 9.2mm wide, so the clamp fits.
The step heights of the heights of the two carbide scribers don't seem to relate to anything sensible. One is 30.33mm (1.194" casually measured), and the other is 23.55mm (0.927"). I have no idea how to use these.
Other bits in the box.
The 1.5" x 7/8" gauge block measures exactly 1.5" to better than the last tenth as checked with electronic micrometer, which itself had been checked with an inspection gauge block. There is a 7" long black rod with a knurled end seen in the box that I have no idea what is it for, nor how it is used.
The last part, round one end 9.46mm on one end, and 8.9 x 4.6mm flat on the other, I don't know what it does, nor if it belongs there at all! Possibly something to do with mounting a dial indicator - I don't know.
The Chesterman
This one was in working order, although it did benefit from a clean-up. The minimum height to the top of the bar is 1.5".
That bar is also 0.5" wide, but thinner, at 3/16" thick.
I reasoned I could use a eBay scriber 25mm step height, mounted against the underside of the bar.
Mixing units madly, 25mm + 0.5" = 25 + 12.7 = 37.7mm
Compared to the height of the start of the numbers (1.5" = 38.1mm), we are only 0.4mm to go. Either I could shift the verniers, or sacrifice some of my feeler gauge shim to pack it the 0.4mm.
So - I purchase this 25mm high scriber..

Then I started to try things out, just borrowing a 6" x 1" optical flat (one side scratched up) as a temporary surface plate.
The funny little piece of tool steel sticking out is just used as packing for the oversized clamp, because 6mm wide is more than the clamps for 3/16" would fit.

I will get the hang of this in the end, but I found that setting the scriber down onto any surface by simply squeezing in on the brass bits that release from the gear rack does not work. As I let go, it finds a place too low. The only way is to creep up on it using the fine adjust, and that is not easy to tell when one has squeezed too firm. I slide the block out, and "click", I can't slide it in again.
So - I resorted to the resistance continuity bleeper on my multi-meter, with the black clip just slightly touching the gauge block.

I know I am new at this, so try not to laugh! I don't know what the norms are for these things, but they seem easily able to measure to better than 0.001. I can see the usefulness of electronic types with cal zero buttons, but I have in mind that this lot cost me £26 + £12.50 + £2.50 + the time I spent repairing and fooling with it.
Last edited:


